If you’ve ever admired the elegant strokes of calligraphy, you know that the right tools can transform your writing experience. Using a calligraphy pen with ink cartridges is one of the easiest ways to achieve stunning results without the mess of traditional ink bottles. This guide will take you through a foolproof method for using these pens, making the art of beautiful writing accessible, even for beginners.
Whether you’re looking to enhance your invitations, create personalized gifts, or just enjoy a new hobby, mastering calligraphy adds a personal touch to everything. As you learn to use these pens, you’ll discover the joy of crafting your own unique lettering styles. So, get ready to unleash your creativity and impress your friends with your newfound skills-let’s dive into the world of calligraphy and get started!
Choosing the Right Calligraphy Pen and Ink Cartridges
can significantly enhance your lettering experience. The market is filled with various options, each catering to different styles and preferences, which can make the selection overwhelming. One essential thing to keep in mind is that not all pens are created equal. For instance, if you’re leaning toward traditional calligraphy techniques, consider a dip pen or fountain pen. Dip pens allow for flexibility and a personal touch, while fountain pens provide the convenience of ink cartridges and consistent flow.
When it comes to ink cartridges, opt for brands known for quality. For example, Speedball ink cartridges offer a range of colors specifically designed for calligraphy pens, ensuring smooth and vibrant writing. Similarly, Pilot Parallel ink cartridges allow for blending, giving you more creative freedom. Always check compatibility before purchasing; cartridges might differ between brands and models, so knowing your pen’s specifications is key.
Before you make your final choice, think about the types of projects you’ll be undertaking. If you’re aiming for bright, colorful designs, look for cartridges that offer assorted colors. On the other hand, if you prefer a classic look, rich black or sepia tones might be more suitable. Ultimately, experimenting with different pens and inks can be part of the fun, helping you develop your own unique style and approach to calligraphy.
Essential Tools for Calligraphy Success

The right tools can make or break your calligraphy experience. Investing in quality materials isn’t just about aesthetics; it directly impacts your learning curve and the quality of your work. Start with the basics: a reliable pen, good ink, and the right type of paper. Emphasizing these essentials lays the foundation for a successful calligraphy practice.
When choosing a pen, consider whether you prefer a dip pen or a fountain pen. Dip pens offer versatility and control that allow for varied line thickness, while fountain pens with ink cartridges are convenient and consistent for daily use. For beginners, a flexible brush pen like the Tombow Fudenosuke is a solid choice, offering a balance of flexibility for expressiveness and control for precision[2].
Ink selection also plays a crucial role. Opt for high-quality brands; Speedball and Pilot Parallel offer rich colors and smooth flow, which are essential for achieving beautiful results. Remember, not all ink is compatible with every pen, so verify what works with your chosen tools to avoid frustration[1]. Pay attention to paper as well-it should be smooth to facilitate a clean glide of your pen, preventing ink bleed and ensuring crisp lines.
Lastly, don’t overlook your workspace. A properly lit area with a comfortable setup allows you to focus on your practice without distractions. Setting yourself up for success goes beyond your materials; it’s about creating an environment that fosters creativity and enjoyment in your calligraphy journey. As you experiment with different tools, your personal style will emerge, making the process even more rewarding.
How to Properly Load Ink Cartridges

Loading ink cartridges into your calligraphy pen is a straightforward process, but getting it right is essential for a smooth writing experience. Think of it this way: a well-loaded cartridge is like the engine of your creativity-without it, you’re just stalled. Here’s how to do it seamlessly so you can focus on your artistry.
First, ensure you have the correct cartridge that fits your pen model. Most fountain pens use standard cartridges, so check the specifications for compatibility. Once you have your cartridge, remove the pen cap and unscrew the barrel if necessary. You’ll often find a section where the nib is housed-this is where the cartridge will go.
Next, gently insert the cartridge into the pen’s nib section. It should fit snugly; if you feel resistance, don’t force it-just reposition until it clicks in. Many cartridges come with a protective seal that you’ll need to remove. This is usually a small plastic or foil covering at the top. Make sure you take it off, or else the ink won’t flow correctly.
After loading the cartridge, let the pen sit for a minute. This allows the ink to travel down to the nib fully. When you’re ready to write, give the pen a gentle shake with the nib facing downwards. This helps to ensure a steady flow of ink at the start. And just like that, you’re ready to create beautiful letters! Remember, a little patience goes a long way-proper loading can mean the difference between a pleasurable writing session and a frustrating one.
Staying organized and having backup cartridges handy can also elevate your calligraphy experience. Consider brands like Speedball or Pilot Parallels, known for their vibrant colors and smooth flow. Each cartridge is an opportunity to express your creativity without interruption, so make loading them a part of your joyful process!
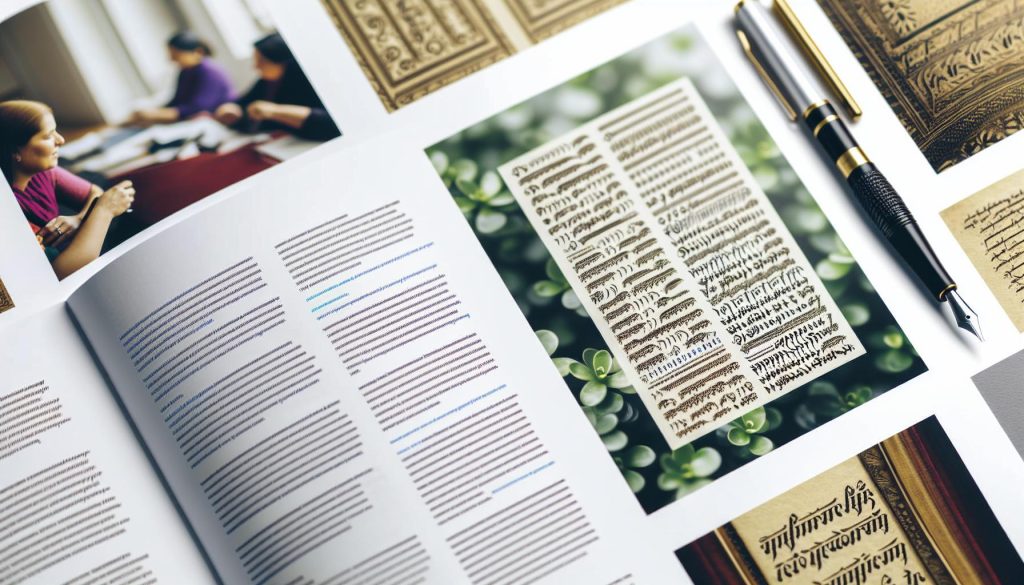
Mastering Basic Calligraphy Strokes
To really shine in calligraphy, mastering the basic strokes is your first step. These strokes are the building blocks of beautiful lettering, and the better you understand them, the more confidence you’ll gain in your writing. Think of it as learning to walk before you run-get these strokes down, and you’ll find that your calligraphy flows more naturally.
Start with the fundamental strokes, which include the entry and exit strokes, upstrokes, downstrokes, and curves. Each stroke serves a specific purpose in creating different letters. For instance, an upstroke is usually light and thin, achieved by applying less pressure as you raise your pen, while a downstroke is bold and thick due to increased pressure. Practice these motions repeatedly; it’s all about muscle memory. You might even find it beneficial to use grid paper or practice sheets specifically designed for this-these resources can guide your hand and keep your letters uniform.
Another great way to immerse yourself in calligraphy is through pattern drills. Draw horizontal and vertical lines, loops, and swirls. Not only does this improve your control over the pen, but it also allows you to experiment with varying pressure and speed. Don’t be afraid to try different pen angles and speeds. A slight adjustment can significantly change the stroke’s appearance and help develop your unique style.
Finally, keep in mind that patience is key. The precision of your strokes improves with persistent practice. Share your journey with fellow calligraphy enthusiasts, or even consider posting your work on social media for feedback. This community can be incredibly encouraging and inspiring. So grab your favorite pen with those ink cartridges loaded and start practicing; soon, you’ll be amazed at how far your skills have come.
Creating Beautiful Lettering with Calligraphy
To craft beautiful lettering with a calligraphy pen and ink cartridges, you need to master more than just penmanship-you must embrace the art itself. Imagine your pen as an extension of your creativity, transforming simple letters into works of art. Understanding the interplay of pressure, speed, and angle is crucial. For example, a gentle upstroke requires light pressure, creating fine lines, while a downstroke with more pressure yields bold, sweeping curves.
The key to stunning calligraphy lies in consistent practice. Use practice sheets where you can repeat different letters and strokes. Add variety by trying out different speeds and pen angles; these small adjustments can dramatically alter the character of your strokes. Grid paper is a fantastic resource for keeping your letters uniform and ensuring you stay within the guidelines.
Don’t shy away from experimenting with styles. Each calligraphy type, whether modern or classic, has its beauty. Consider combining scripts or adding flourishes to your lettering-this personal touch can elevate your creations. Encourage yourself to explore and make mistakes; every error is a learning opportunity that will refine your technique.
Finally, don’t forget the role of inspiration. Surround yourself with calligraphy projects, join online communities, and share your work for feedback. Seeing how others approach the same craft can spark fresh ideas and motivate you to push your boundaries. Dive in, enjoy the process, and soon enough, your lettering will exude both confidence and creativity.
Handling Common Calligraphy Pen Issues
Struggling with a calligraphy pen can be frustrating, but most issues are fixable with a little know-how and patience. The first thing to keep in mind is that ink flow problems are the most common issue. If your pen refuses to write, it’s often due to dried ink or residue clogging the nib. Simply soaking the nib in warm water for a few hours can help dissolve any buildup. If that doesn’t work, you might try adding a drop of dish soap to a small amount of water and using a syringe to flush out the nib. This method can significantly improve flow, especially in older pens or cartridges that have been sitting unused for a while [[1]].
Another frequent issue is skipping or uneven lines, which can be caused by not holding the pen at the right angle or applying inconsistent pressure. Spend some time experimenting with grip and pressure; the goal is to find that sweet spot where the nib glides smoothly across the paper. A light dusting of baby powder on textured or rough paper can also help reduce skipping, allowing for cleaner lines.
If you’re dealing with a cartridge that won’t fit or load properly, it might be worthwhile to check if it’s compatible with your nib. Some nibs require specific cartridges or converters. Always refer to the manufacturer’s guidelines to ensure a seamless fit. When loading a cartridge, align it correctly and press gently until you hear a click-this ensures it’s seated properly and ready to go.
Remember, every calligraphy pen has its quirks. Keep a checklist of common issues you encounter and how you’ve resolved them. This not only helps you troubleshoot faster but also builds your confidence in handling your tools. With practice and a little patience, you’ll turn those frustrating moments into opportunities for mastering your craft.
Advanced Techniques for Calligraphy Enthusiasts
There’s a world of creativity waiting for you in calligraphy, especially once you’ve mastered the basics. But to truly elevate your work, it’s time to dive into some advanced techniques that can refine your craft. If you’ve been using a calligraphy pen with ink cartridges and want to push the boundaries of your lettering art, these methods will make your writing not just beautiful but also distinctively yours.
One powerful technique is layering colors. Instead of sticking to a single ink color, try blending different shades to create depth in your letters. When using multiple cartridges, start with lighter inks and gradually add darker colors. This can result in a stunning gradient effect or even give dimension to your lettering, making it pop off the page. For example, using a light blue ink followed by a deeper navy can bring a wave effect to letterforms, enhancing visual interest.
Varying your pen pressure is another key skill to develop. While traditional calligraphy often emphasizes consistent strokes, experimenting with pressure can introduce a more dynamic feel to your writing. Apply varying degrees of pressure as you create downstrokes and upstrokes-heavy pressure for bold downstrokes and lighter for delicate upstrokes. This nuanced control can give your letterforms an expressive flair that adds personality to your work.
Don’t underestimate the potential of creating texture in your lettering. You can use techniques like stippling, cross-hatching, or even adding flourishes around your letters to create intricate patterns. Incorporate different styles of strokes within the same word or letter to enhance visual complexity. This not only adds sophistication but also invites viewers to linger on your work as they discover new details.
Lastly, for those looking for a challenge, consider calligraphy on unconventional surfaces. While paper is the standard medium, practice lettering on materials like wood, canvas, or even fabric using appropriate inks that adhere well. This opens up a whole new range of projects, from creating personalized gifts to unique home decor. Each surface has its unique challenges, but overcoming them can significantly boost your skills and confidence.
Incorporating these advanced techniques into your calligraphy practice will not only refine your technical skills but also help you develop a unique style that reflects your artistic voice. Keep experimenting, stay curious, and enjoy the journey of transformation as you turn simple letters into works of art.
Troubleshooting Calligraphy Problems
Troubleshooting calligraphy issues can feel overwhelming, but many problems have straightforward solutions if you know where to look. Often, you might experience inconsistent ink flow, skipping, or smudging. These can stem from a variety of causes, including the nib, ink, and paper you’re using. Understanding each component’s role in the process can help you troubleshoot effectively.
One common issue is a new nib that hasn’t been properly prepared. New nibs often come with a protective coating that can inhibit ink flow. To remedy this, gently wash the nib with mild soap and warm water. Alternatively, using a bit of saliva on the nib can break down the coating, allowing for smoother ink flow. Regular maintenance is critical; always clean your pen and nib after use to prevent clogged ink and keep the nib performing well.
If you’re using cartridges, ensure they’re seated correctly in the pen. A cartridge that isn’t fully inserted might cause air bubbles, which disrupt the ink flow. Additionally, check the compatibility of your ink and nib. Some inks are too thick for certain nibs, leading to skipping and other flow issues. Always use high-quality ink specifically designed for calligraphy.
Lastly, consider the paper you’re using. Basic copy paper isn’t ideal for calligraphy; it can cause uneven ink absorption, leading to smudges and feathering. Invest in smooth, bleed-proof paper designed for calligraphy to see the best results. When you pair the right tools and techniques, you’ll find that what starts as frustrating can quickly become a rewarding part of your calligraphy journey.
Tips for Maintaining Your Calligraphy Pen
To keep your calligraphy pen in top shape, embracing regular maintenance isn’t just a good idea-it’s essential. You can have the best nib and ink, but without proper care, your writing experience could quickly turn frustrating. One of the easiest yet most overlooked tips is to clean your nib after every use. Ink residue can dry out and clog the delicate tips, leading to inconsistent flow and poor performance. Simply rinse your nib under warm water and, if necessary, use a soft cloth to wipe away any persistent remnants.
Another crucial aspect is checking the ink cartridges. Make sure they’re inserted correctly. A loose cartridge can lead to air bubbles, which disrupt the ink flow and make writing a hassle. If you notice your ink isn’t flowing smoothly, try reseating the cartridge or replacing it entirely. Investing in high-quality ink is also a game changer; inexpensive inks can dry out quickly or cause excessive clogging. Opt for brands known for their suitability for calligraphy-it pays off in the long run.
Don’t forget about your workspace, too. Working on a clean, smooth surface while using appropriate paper can significantly enhance your calligraphy process. Cheap paper can bleed or feather, making your beautifully crafted letters look messy. Instead, select paper designed specifically for calligraphy. It prevents smudging and allows the ink to absorb evenly, enhancing the overall quality of your work.
Finally, store your pen correctly. When you’re not using it, cap or retract the nib to keep it from drying out or getting damaged. Avoid exposing it to extreme temperatures or direct sunlight. Each of these practices contributes to a smoother, more enjoyable writing experience-so make them part of your calligraphy routine! Your pen will thank you, and your artistry will flourish.
Exploring Different Calligraphy Styles
Different calligraphy styles can significantly enhance your writing and bring a unique character to your projects. Each style has its personality, effectively communicating emotions and themes. Whether you’re looking for elegance, playfulness, or historical authenticity, the diverse world of calligraphy offers something for everyone.
You might start with Copperplate, known for its flowing, cursive letters and delicate, thin strokes. This style is often used for formal invitations and elegant cards due to its graceful appearance. To achieve this look, it’s vital to master the pressure control of your nib-thin on the upstrokes and thicker on the downstrokes. Practice by writing individual letters, focusing on fluidity and maintaining consistent angles to get that signature swirl.
Another popular style is Gothic, characterized by its bold, angular shapes and dramatic flourishes. This style is excellent for creating impactful headings and decorative pieces. As you explore Gothic calligraphy, you’ll notice that it utilizes thicker lines which can be effectively achieved using a broad nib. Start by sketching out the basic forms before you ink them-this can often result in cleaner, more impressive final scripts.
For those interested in a more contemporary look, Modern Calligraphy might be your go-to. This style embraces freedom, allowing for a playful mix of lettering styles-sometimes combining print and cursive. The best part? It doesn’t have strict rules, so you can let your creativity flow! To dive into modern calligraphy, experiment with varying line thicknesses and connect letters in unexpected ways. Use your pen and ink to play around with different textures and blends, creating a unique visual style that reflects your personality.
In choosing a style, think about the message you wish to convey. Each calligraphy style has a specific aesthetic that can greatly influence how your audience perceives your work. So grab your pen, experiment with different techniques, and let the artistry of each style inspire your creativity!
Inspiring Calligraphy Project Ideas
Unleashing your creativity with a calligraphy pen can transform simple projects into stunning pieces of art. The beauty of calligraphy lies in its flexibility. Whether you’re personalizing gifts, creating wall art, or enhancing your journal, the possibilities are endless. Dive into these inspiring project ideas that not only allow you to practice your skills but also result in meaningful creations.
One popular project is designing personalized greeting cards. Special occasions call for special touches, and a hand-lettered card makes a heartfelt statement. Experiment with different calligraphy styles to match the theme of the event-use elegant Copperplate for weddings or playful modern styles for birthdays. You can even add embellishments like florals or geometric designs to elevate your card even further.
Consider creating a custom piece of wall art. Choose a quote that resonates with you-something that inspires or motivates. Using your calligraphy pen, you can transform this quote into a beautiful piece of art, framing it to display in your home. This not only serves as a great practice opportunity but also allows you to showcase your personal taste and creativity.
Another engaging project is developing a calligraphy journal. Each page could feature a different stroke or letter style, allowing you to track your progress while creating a workbook for future reference. You can include motivational quotes, doodles, and color experiments, making this journal uniquely yours. Plus, it’s a fantastic way to reflect on your calligraphy journey.
Lastly, party decorations like banners or signs offer a fun opportunity to use your calligraphy skills. For a birthday or celebration, create striking signage that welcomes guests or identifies different areas (like a dessert bar). Using vibrant inks and decorative paper can really make your lettering pop, captivating the attention of everyone at the party.
With these project ideas, your calligraphy practices become more than just exercises-they evolve into unique expressions of creativity. So get your pen ready, explore these ideas, and watch as your calligraphy skills flourish!
Q&A
Q: How do I choose the right ink cartridges for my calligraphy pen?
A: To choose the right ink cartridges for your calligraphy pen, ensure compatibility by checking your pen’s brand and model. Opt for high-quality, water-based inks for smooth flow and easy blending. For a variety of color options, consider brands that offer an extensive range of cartridges.
Q: Can I use any ink cartridge with my calligraphy pen?
A: No, not all ink cartridges are compatible with every calligraphy pen. Always check your pen’s specifications to find the right size and type of cartridge. Using the wrong cartridge can lead to poor ink flow or damage to your pen.
Q: What mistakes should I avoid when using a calligraphy pen with ink cartridges?
A: Avoid overfilling your pen’s cartridge as this can cause ink leakage. Don’t use cheap or incompatible inks, as they might clog the nib. Also, refrain from pressing too hard while writing, which can affect the quality of your strokes.
Q: How can I improve my calligraphy using ink cartridges?
A: To improve your calligraphy with ink cartridges, practice various strokes consistently and experiment with different nib sizes to find what works best for your style. Utilize quality cartridges to ensure smooth ink flow, which enhances your lettering results.
Q: Is it necessary to clean my calligraphy pen when changing ink cartridges?
A: Yes, it’s advisable to clean your calligraphy pen when changing cartridges. This prevents ink mixing that can alter colors and performance. Use cold water or a cleaning solution suited for your pen type to flush out residual ink.
Q: What should I do if my ink cartridge is not flowing properly?
A: If your ink cartridge isn’t flowing, first check if it’s correctly installed. If it is, try gently tapping it or holding the nib down onto the paper to get the ink flowing. If the problem persists, consider replacing the cartridge as it may be defective.
Q: How often should I replace ink cartridges in my calligraphy pen?
A: Replace ink cartridges in your calligraphy pen when you notice decreased ink flow, discoloration in your writing, or after extensive use, which can vary based on your writing frequency. Regularly check your cartridges to ensure optimal performance.
Q: Can left-handed users effectively use calligraphy pens with ink cartridges?
A: Yes, left-handed users can successfully use calligraphy pens. It might require adjusting pen angles and grip techniques to prevent smudging. There are also specific nibs designed for left-handed writing to enhance comfort and flow.
Closing Remarks
Now that you’ve mastered the art of using a calligraphy pen with ink cartridges, it’s time to put your skills to work! Explore our range of calligraphy tools and supplies to find the perfect pen that suits your style. Whether you’re creating elegant invitations or just practicing your handwriting, the right materials can elevate your craft.
Want to dive deeper? Check out our detailed guides on selecting the best calligraphy inks and nibs-your letters deserve the finest treatment! If you have questions about techniques or specific pens, drop a comment below-we’re here to help! Remember, practice makes perfect, so don’t hesitate-pick up that pen and start writing today!
For a seamless experience, consider subscribing to our newsletter for tips, tricks, and exclusive offers sent straight to your inbox. Your calligraphy journey is just beginning; let’s make it beautiful together!