If you’re looking to elevate your handwriting or add a personal touch to your art, mastering the Royal Langnickel calligraphy pen is essential. This pen can transform even basic scripts into elegant, flowing letters that convey emotion and craft. But before you start creating stunning calligraphy, proper setup is crucial. Many beginners struggle with assembling their pens, which can lead to frustration and wasted materials. Ensuring everything is in place not only improves your writing experience but also enhances the quality of your work. In this guide, we’ll walk you through the assembly basics step-by-step, so you can confidently dive into the world of calligraphy. Ready to unlock your creative potential? Let’s get started!
Choosing the Right Royal Langnickel Pen for You
Choosing the right Royal Langnickel pen is essential for unlocking your calligraphy potential. With a variety of options available, it’s crucial to know what each pen offers to find the perfect match for your style and skill level. For beginners, a fountain pen with a flexible nib is often a great starting point. It provides the fluidity needed for developing consistent strokes while being forgiving for those just starting out. On the other hand, more experienced users might prefer a brush pen, which allows for greater expressive control and variation in line width, ideal for intricate designs or artistic lettering.
When selecting your pen, consider the type of calligraphy you’re interested in. If you’re drawn to traditional styles like Copperplate or Spencerian, pens that accommodate pointed nibs are ideal. These pens create delicate, fine lines, showcasing beautiful scripts. For modern calligraphy, explore felt-tip or brush pens that offer more versatility and ease of use. Don’t overlook the ink as well! Some pens come pre-filled, while others require bottled ink, which can influence your choice based on convenience and your desired color palette.
Additionally, always take into account the comfort and grip of the pen. If you plan to work on your projects for extended periods, find a pen that feels good in your hand. It should balance well and allow for a natural grip. Ultimately, testing a few options can be the best way to find your ideal Royal Langnickel calligraphy pen, ensuring you enjoy the process as much as the results. Remember, the right pen can make all the difference in your calligraphy journey!
Necessary Tools for Assembly Success

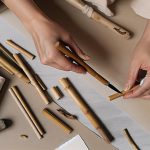
When setting up your Royal Langnickel calligraphy pen, having the right tools at hand can make all the difference between a frustrating experience and an enjoyable one. To ensure a successful assembly, gather a few essential items before diving in. Your toolkit should include not only the pen itself and its nibs but also a few extras that will simplify the process and enhance your comfort.
Start with the basics: you’ll need your Royal Langnickel pen, the appropriate nib, and some quality ink. It’s also wise to have a small container of water and a cloth handy for cleaning any stray ink during assembly. Remember, a clutter-free workspace can help you focus better on the task at hand. Having these tools, you’ll feel more prepared and less rushed.
Here’s a simple checklist of what to have ready:
- Royal Langnickel Pen: Ensure it’s the right type for your calligraphy style.
- Nibs: Choose the appropriate nib sizes depending on your planned design.
- Ink: Opt for high-quality ink to avoid clogs and smudging.
- Container of Water: For cleaning your nibs as you work.
- Cloth or Paper Towels: To wipe away any excess ink or spills.
- Instruction Manual: Keep it on hand for guidance, especially if you’re new to assembly.
In addition, consider the ergonomics of your workspace. A comfortable chair and desk can prevent fatigue during longer sessions. If you’re planning to create intricate designs, practicing good posture and having sufficient light can also help maintain control over your pen strokes.
Lastly, patience is key. Take your time, and if things get tricky, don’t hesitate to refer back to the instruction manual. Proper setup is the foundation for your artistic expression, leading to stunning results in your calligraphy projects.
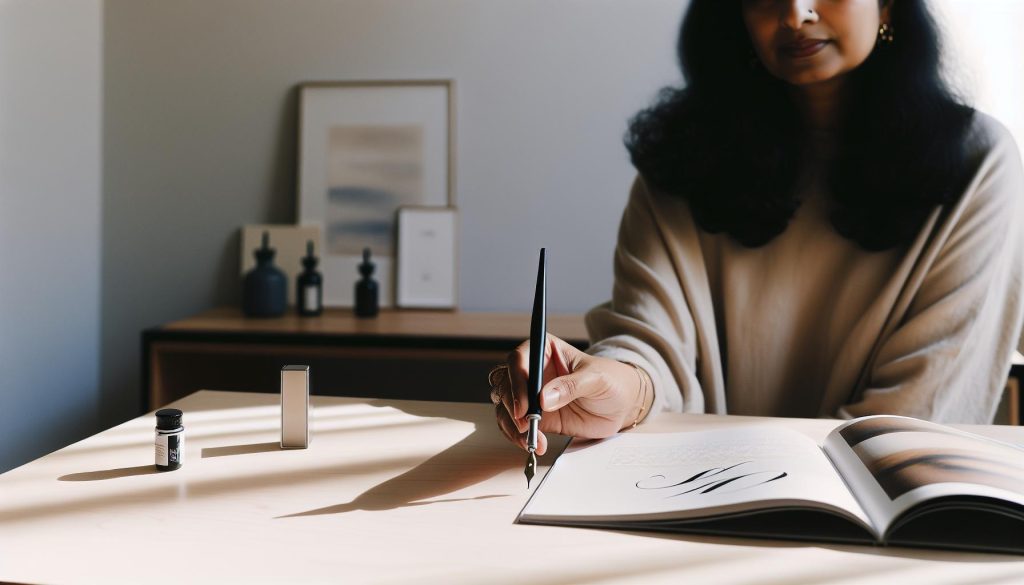
Step-by-Step Guide to Assembling Your Pen
Assembling your Royal Langnickel calligraphy pen could be the start of your journey into the world of elegant lettering. It’s more than just sticking parts together; it’s about setting the stage for creativity. Let’s break it down step-by-step to ensure you’re fully equipped to handle this simple but crucial process.
First, take a close look at the parts of your pen. Most models will consist of the barrel, nib holder, and interchangeable nibs. Begin by inserting the nib into the nib holder. Ensure you push it in firmly but gently. You don’t want to bend or damage the nib. If your pen uses a screw mechanism, tighten it to secure the nib without overdoing it-just a snug fit will do.
Next, attach the nib holder to the barrel of the pen. This is often a matter of twisting or sliding it into place, depending on your specific model. Make sure it feels secure, as a loose connection can lead to unwelcome wobbles while you write. If your pen includes an ink reservoir, this step is crucial, as a stable setup directly influences the flow of ink during writing.
Once your pen is assembled, it’s time to load the ink. Depending on your ink source-whether it’s bottled ink or cartridges-follow the specific instructions for your model. For bottled ink, dip the nib and gently draw ink into the nib’s reservoir by either pulling the nib up while holding it underwater and releasing pressure or using a syringe, if applicable. With cartridges, simply insert the cartridge into the holder until you hear a click. Allow the ink to flow down into the nib for a moment before starting your first stroke.
Before you dive into writing, take a moment to test your pen. On a scrap piece of paper, make a few strokes to check the flow of ink. If the ink flows smoothly, you’re ready to start your calligraphy adventure. But if you notice skipping or blotchy ink, make slight adjustments to the nib’s position and test again.
With your calligraphy pen assembled and tested, you’re now set to explore the beautiful art of handwriting. These initial steps may seem small, but getting your pen right transforms your calligraphy experience, from frustrating to enjoyable. Remember to stay relaxed and have fun-the true joy lies in every stroke you make.
Understanding Ink Types and Their Uses

To truly master calligraphy, understanding the different types of ink available is paramount. The right ink can elevate your writing, while the wrong one can cause frustration. Broadly speaking, there are two main categories of ink you’ll encounter: bottled inks and cartridge inks. Each has its unique qualities and suitability for specific projects.
Bottled inks are a popular choice among calligraphy enthusiasts. They offer a wide range of colors and finishes, including metallics and fluorescent shades. With bottled ink, you typically have more flexibility regarding the ink’s flow characteristics. Brands often design bottled inks explicitly for calligraphy, providing a balance that prevents feathering and ensures smooth application. Plus, they can be easily customized by mixing colors! However, using bottled ink requires an understanding of how to fill your pen properly-a little practice goes a long way here.
On the other hand, cartridge ink is designed for convenience. It’s quick and clean to use; simply insert a cartridge into your pen, and you’re ready to go. While range might be limited compared to bottled inks, many brands offer high-quality shades that perform well for beginners and seasoned calligraphers alike. Cartridges eliminate the need for messy filling processes, making them an excellent choice for on-the-go writing and projects where you need to switch colors frequently.
Regardless of the ink type you choose, the key is to match the ink’s properties with your writing style and the projects at hand. For instance, if you’re tackling a detailed wedding invitation, opt for a slow-drying ink to ensure beautiful, crisp lines without smudging. Alternatively, for everyday practice or less formal pieces, fast-drying inks can save you time.
In summary, experimenting with different inks can lead to delightful discoveries. As you delve deeper into calligraphy, keep notes on what works best for your style and projects. Your pen’s potential will truly shine when paired with the right ink!
Tips for Maintaining Your Calligraphy Pen

To keep your calligraphy pen in top shape, a little maintenance goes a long way. Many enthusiasts overlook this crucial step, but proper care can extend the life of your pen and ensure your calligraphy remains sharp and vibrant. Think of your pen as a musical instrument; it needs tuning and care to produce beautiful results.
Start with cleaning your pen regularly. After each use, especially with bottled inks, rinse the nib and feed with cool water to prevent ink residue build-up. If you’ve used a particularly viscous ink, it may be worth soaking the nib in a glass of water for a few hours before rinsing to dissolve any stubborn remnants. Use a soft cloth to gently wipe down the nib and remove excess moisture, ensuring no water stays trapped in the nib housing, as this can affect your next writing session.
Storage is equally important. Always store your pen nib-down in a pen holder or standing upright in a case to avoid ink pooling. If you’re not using your pen for an extended period, consider removing the nib and cleaning it thoroughly. If you have a specific ink color you love, store a small amount in a sealed container to prevent it from drying out in the cartridge.
Lastly, don’t underestimate the importance of regularly checking for wear and tear. If your nib starts to feel scratchy or produces uneven lines, it’s time to get a replacement. Maintaining awareness of your pen’s condition ensures you won’t face unexpected interruptions during a creative project.
By embracing these maintenance tips, you’ll cultivate not just a tool, but a dependable companion in your calligraphy journey-one that enhances your creativity with every stroke.
Common Mistakes to Avoid When Setting Up
When setting up your Royal Langnickel calligraphy pen, there are a few common pitfalls that can turn an exciting creative endeavor into a frustrating experience. Knowing these mistakes ahead of time can save you time, effort, and disappointment later. One major error is neglecting the importance of assembling the pen in the correct order. Many beginners mistakenly insert the nib before securing the ink cartridge, which can lead to ink leaks and a messy workspace. Always ensure that the cartridge is properly snapped into place before attaching the nib to avoid these issues.
Another frequent oversight is failing to familiarize yourself with the nib choices available. Each nib produces different line thicknesses and styles; using the wrong one can dramatically affect your writing quality. Spend a bit of time experimenting with different nibs to see how they feel and what kind of effects they produce. This experimentation can enhance your calligraphy significantly, allowing you to express your style more effectively.
Improperly storing your inks can also lead to avoidable complications. If you don’t close the caps tightly or if you store them horizontally, they might leak or dry out. Make a habit of upright storage and ensure caps are secure after each use. Lastly, don’t overlook cleaning your nibs before you begin. A quick rinse not only helps remove any manufacturing oils but also primes the nib for ink flow, leading to smoother strokes right from the start.
By keeping these essential tips in mind and avoiding these common mistakes, you’ll set yourself up for a more enjoyable and productive calligraphy experience. Remember, preparation is key to unleashing your creativity!
Exploring Advanced Techniques for Calligraphy
Using a calligraphy pen like the Royal Langnickel opens up a world of creative expression, and exploring advanced techniques can elevate your skills dramatically. One particularly exciting approach is experimenting with varying the pressure you apply to the nib. By adjusting your grip and how firmly you press down, you can create beautiful contrast in your lettering. This not only improves the aesthetics of your work but also adds a unique personal touch that can transform simple letters into art.
Another advanced technique is incorporating flourishes into your script. Flourishing involves adding decorative strokes to your letters. Start with basic curls and loops-you can enhance your letters by adding swirls at the beginning or end of strokes. Practice these separately before integrating them into your writing. As you get comfortable, try mixing different styles; for example, pairing a bold script with delicate flourishes can create stunning visual effects.
Utilizing Different Inks and Surfaces
To truly expand your calligraphy repertoire, consider experimenting with various inks and writing surfaces. Specialty inks, like metallic or shimmer inks, can add depth and sparkle to your projects. Likewise, different paper types can influence how your ink flows; try using textured papers or specialty cardstocks for unique results. Remember, not all nibs can handle every type of ink, so do a little test first.
Lastly, don’t shy away from combining calligraphy with other art forms. You can integrate watercolor backgrounds, hand-drawn illustrations, or even digital elements into your calligraphy pieces. This blend allows you to create stunning, mixed-media artwork that showcases your lettering alongside illustrations or designs.
As you dive into advanced techniques, remember that practice is key. Don’t rush; take your time to refine each method. The beauty of calligraphy is in the journey of learning and finding your style. Enjoy experimenting, and soon, you’ll find your unique voice in the world of calligraphy!
Perfecting Your Calligraphy Skills After Setup
Getting the hang of your new Royal Langnickel calligraphy pen is just the beginning. The real artistry comes after the setup; it’s where your passion for lettering starts to blossom. One of the most effective ways to refine your skills is through consistent practice. Set aside dedicated time each week to work solely on your calligraphy. Even just 15 to 30 minutes can make a world of difference. Use this time to focus on basic strokes, connecting letters, and even whole alphabets. You’ll be amazed at how quickly muscle memory kicks in.
In addition to regular practice, experimenting with different styles and techniques can elevate your work. Start by trying out various scripts-like Copperplate or Spencerian-to broaden your skill set. Each style has unique characteristics that will challenge and improve your control and versatility with the pen. Don’t forget to incorporate flourishes! Adding these embellishments not only beautifies your work but also gives your letters a personal touch.
Engaging with the Community
Another vital aspect of perfecting your calligraphy is connecting with others who share your passion. Join online forums, social media groups, or local workshops. Sharing your work can provide invaluable feedback and inspire you with new ideas. Seeing the diverse styles and approaches from fellow calligraphers can spur creativity and motivate you to try techniques you may not have considered before.
Utilizing Resources
Lastly, make use of instructional resources. There are countless tutorials, both written and video, that provide step-by-step instructions on advanced techniques. Whether it’s learning to balance pressure for thicker strokes or mastering the elegant transitions between letters, having access to expert guidance can fast-track your learning. Experiment with different inks and materials, too-specialty papers and various types of ink can yield fascinating results and help you discover your unique calligraphy voice.
The journey to mastering calligraphy requires patience and dedication, but every line you create brings you closer to your personal style. Embrace the learning process, and don’t be afraid to push your boundaries. Every stroke, every flourish, contributes to your growth as an artist.
Creative Projects to Try with Your Pen
Get ready to take your calligraphy to new heights! Once you’ve mastered setting up your Royal Langnickel pen, dive into a world of creative projects that will not only challenge your skills but also let your artistic flair shine. Whether you’re preparing for a special occasion or simply want to enhance your practice, there are plenty of projects to choose from.
Start with greeting cards. Handwritten notes carry a personal touch that’s hard to replicate with digital messages. Craft custom cards for birthdays, holidays, or thank-you notes. Use your pen to create elegant lettering on cardstock, and experiment with styles that match the occasion, like whimsical flourishes for a birthday or refined scripts for formal invitations.
Next, consider creating personalized artwork. Design quotes or poems that resonate with you. Choose a meaningful phrase and write it out using your favorite calligraphy style, experimenting with different layouts. Frame your work for home decor or even as a thoughtful gift. This not only provides a creative outlet but also gives you a chance to showcase the effort you put into refining your technique.
Don’t overlook the allure of wedding invitations or place cards. Crafting beautiful, hand-lettered invitations can add a special touch to any event. You can practice various scripts, and once you feel comfortable, try your hand at creating a full suite of wedding stationery-from save-the-dates to menus. The delicate art of calligraphy can turn ordinary items into cherished keepsakes.
Lastly, keep a calligraphy journal where you document your progress and experiment with different styles. Dedicate pages to various scripts, ink types, and nibs. Reflect on your techniques and note what works best for you. This will be invaluable not just for tracking your growth but also for sparking inspiration as you review your journey.
By trying out these projects, you’ll not only refine your skills but also discover joy in the process. Have fun with it, and remember, every piece you create is a representation of your unique artistic voice!
Q&A
Q: How do I clean my Royal Langnickel calligraphy pen before using it?
A: To clean your Royal Langnickel calligraphy pen, gently disassemble it and rinse the nib under warm water. Use a soft cloth to wipe away any ink residue from the body and nib. This ensures smooth ink flow and prevents clogging.
Q: What type of ink should I use with my Royal Langnickel calligraphy pen?
A: It’s best to use watercolor or non-permanent ink specifically designed for calligraphy. These inks are less likely to clog your pen and provide a smooth writing experience. Check the “Understanding Ink Types and Their Uses” section for more details.
Q: Can I use my Royal Langnickel calligraphy pen on different types of paper?
A: Yes! However, using high-quality, smooth paper will yield the best results. Avoid textured or coarse papers, as they can cause the nib to snag. For practice, try using a variety of papers to find what works best for you.
Q: How can I avoid common mistakes when setting up my calligraphy pen?
A: To avoid mistakes, ensure you follow the assembly instructions closely and check for any burrs on the nib that could affect ink flow. Always test your pen on scrap paper before starting your actual project to ensure everything is calibrated correctly.
Q: Why is my Royal Langnickel calligraphy pen skipping while writing?
A: Skipping can be caused by a few factors: dried ink in the nib, incorrect angle, or lack of ink. Try cleaning the nib thoroughly and ensure you hold the pen at the right angle, typically around 45 degrees to the paper.
Q: When should I replace the nib on my calligraphy pen?
A: Replace the nib if you notice excessive wear or if it’s damaged. If your pen is producing inconsistent lines or is no longer producing ink smoothly, it’s a good indicator that a replacement is needed.
Q: Where can I find more creative project ideas for using my calligraphy pen?
A: You can explore a variety of creative project ideas in the “Creative Projects to Try with Your Pen” section of the article. This includes invitations, greeting cards, and personalized gifts that can showcase your calligraphy skills.
Q: How long can I store ink in my Royal Langnickel calligraphy pen?
A: It’s recommended to use the ink within 6 months for optimal performance. If you’re not using it regularly, clean the pen after each session and store it with the nib facing up to prolong its lifespan.
The Way Forward
Now that you’ve set up your Royal Langnickel calligraphy pen, it’s time to unleash your creativity! Remember, proper assembly is just the first step. Experiment with different techniques to make your lettering truly shine and consider sharing your results in the comments-we’d love to see your progress!
Feeling inspired? Check out our guide on the Best Calligraphy Practices to elevate your skills even further, or explore our Top Calligraphy Tools for beginners. If you’re ready to dive deeper into the art of calligraphy, don’t forget to sign up for our newsletter for tips, tricks, and exclusive content straight to your inbox.
You’ve got this! With the right setup and a bit of practice, you’ll master the beautiful art of calligraphy. Don’t hesitate to reach out with questions or insights. Your journey in calligraphy has just begun, and we’re here to support you every step of the way. Happy writing!