Have you ever been deep into a creative flow, only to find your calligraphy pen running dry? It’s frustrating, isn’t it? Keeping your ink fresh is crucial for maintaining that smooth, beautiful line work you strive for. In this guide, we’ll explore the essential steps to refill your calligraphy pen efficiently and effectively. Whether you’re a seasoned scribe or just starting your journey in the art of calligraphy, knowing how to properly refill your pen not only saves time but enhances your writing experience. By the end, you’ll be equipped with the tips you need to keep your favorite pen performing at its best, allowing your creativity to flow uninterrupted. Let’s dive in and ensure your calligraphy never misses a beat!
Choosing the Right Calligraphy Ink for Your Pen
Choosing the right ink for your calligraphy pen can transform your writing experience, ensuring smooth strokes and vibrant colors. The world of calligraphy ink is vast, and with so many options available, it’s crucial to understand what works best for your specific pen type and your artistic intentions. Different inks offer varied flow characteristics, drying times, and finish, impacting everything from how your nib glides across the paper to the overall aesthetic of your work.
First, consider the type of pen you’re using-fountain pen, dip pen, or brush pen-as this influences your ink choice. Fountain pens work well with water-based inks, which allow for consistent flow and clarity. Look for inks labeled specifically for fountain pens to avoid clogging your nib. On the other hand, dip pens pair well with thicker, more viscous inks designed for slower application and richer saturation. This kind of ink can produce dramatic textures and effects, perfect for intricate designs.
Another factor to keep in mind is the purpose of your calligraphy. If you’re aiming for a vibrant, glossy finish for special projects, opt for pigmented or india inks, which stand out beautifully on various paper types. However, if quick drying times are essential-say, for cards or invitations-consider using a fast-drying formula. Also, remember to check if the ink is archival quality if you’re creating pieces intended for long-lasting display.
To help you make an informed decision, here are some ink properties you should evaluate:
- Viscosity: Ideal for your pen type
- Drying Time: Quick-drying for practical use; slower for artistic effects
- Color Fastness: Pigmented inks for rich hues
- Compatibility: Ensure it works with your pen to prevent damage
Investing time in selecting the right ink will save you from headaches later on, keeping your creative flow uninterrupted. With the right ink, you’ll not only enjoy a better writing experience, but you’ll also achieve the stunning results that your calligraphy deserves.
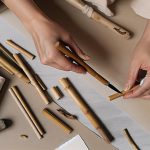
Understanding Different Types of Calligraphy Pens
Different types of calligraphy pens can dramatically influence your writing experience, so it’s vital to choose one that fits your style and needs. Whether you’re crafting beautiful invitations or intricate artworks, the right pen will help keep your ink flowing smoothly and your creative juices alive. Here’s a breakdown of the main types you’ll encounter.
Fountain Pens are a popular choice due to their convenience and ease of use. These pens utilize a built-in ink reservoir and a nib, providing a consistent ink flow. They work beautifully with water-based inks, which offer clarity and vibrancy without risking the clogging issues thicker inks can cause. When choosing a fountain pen, look for options with interchangeable nibs, as this allows you to adapt to different styles of writing or lettering.
Dip Pens, on the other hand, provide a more traditional calligraphy experience. They have no ink reservoir, meaning you dip them into ink before each stroke. This setup lets you choose from a broader range of inks-like thicker, pigment-based options-that can produce stunning textures and vibrant effects. Dip pens excel in creating intricate designs, making them perfect for detailed work, but they do require a bit more patience and practice to master.
Brush Pens combine the flexibility of a brush with the convenience of a pen. They’re excellent for brush lettering and can create a variety of line thicknesses depending on the pressure applied. Brush pens are typically filled with water-based or pigment inks and are great for both beginners and seasoned calligraphers alike. If you’re aiming to achieve a watercolor effect or soft calligraphy, a brush pen might be your best bet.
When considering how to keep your ink flowing fresh, remember that maintaining your pen’s nib-regardless of type-is essential. Regular cleaning, especially after using pigmented or thicker inks, will prevent clogs and prolong the life of your tools. Ultimately, the right pen for you depends on your personal style, the projects you undertake, and how much time you’re willing to invest in mastering your craft. You’ll find that each pen type offers unique benefits that can elevate your calligraphy, making it a journey worth exploring.
Step-by-Step Guide to Refilling Your Pen
Refilling a calligraphy pen can feel daunting at first, but once you know the steps, it’s straightforward and a vital skill for any calligrapher. Keeping your ink flowing fresh ensures your writing remains smooth and vibrant, allowing your creativity to shine. Here’s how to do it efficiently.
Gather Your Materials
Before you start, make sure you have everything you need within reach. You’ll typically require:
- Your calligraphy pen
- The ink of your choice (cartridge or bottled)
- A clean paper towel or cloth
- Dropper (if using bottled ink)
- Gloves (optional, for cleanliness)
Refilling Your Pen
- Identify the Type of Pen: The method will vary slightly depending on if your pen uses cartridges or bottled ink.
– Cartridge Pens: Simply remove the old cartridge by gripping the end and pulling it straight out. Insert a new cartridge until you hear a click, indicating it’s secure.
– Bottled Ink Pens: Unscrew the barrel from the nib. Dip the nib into the ink bottle, then either:
– Draw ink into the reservoir by twisting the converter (if equipped), or
– Use a dropper to fill it directly. Lower the nib into the ink and slowly pull it up while keeping it immersed.
- Check for Air Bubbles: After filling, it’s crucial to ensure that no air bubbles are trapped in the nib. Gently tap the pen against your palm or a surface to release air pockets.
- Wipe the Nib: Use a paper towel to clean excess ink from the nib to prevent blobs on the paper. A neat nib makes for cleaner strokes.
- Reassemble and Test: Screw the pen back together and give it a test on scrap paper. If the ink flow is uneven, you might need to reflush it or check if it’s clogged.
Pro Tips for a Smooth Experience
- Be Patient: Some inks take longer to flow into the nib. If necessary, allow a moment post-refill before you write.
- Clean Your Pen Regularly: Keeping your pen clean after every use, especially if you switch inks or types, prevents clogs and preserves the quality of your work.
- Store Properly: Always keep your pens upright when storing them and ensure the cap is secured tightly to avoid drying.
Mastering the refilling process allows you to focus more on your art, ensuring your ink is ready whenever inspiration strikes. With a little practice, you’ll refill your pens like a pro, keeping your calligraphy vibrant and flowing smoothly.
Common Mistakes When Refilling Ink
Refilling your calligraphy pen shouldn’t feel like navigating a minefield, but many common pitfalls can turn the process into a frustrating experience. One of the most frequent mistakes is not checking the nib for air bubbles after refilling. Air trapped in your nib can cause inconsistent ink flow, leading to unsightly gaps and interruptions in your writing. After you’ve filled the pen, always tap it gently on your palm to release any stubborn pockets of air. This small step can save you from a lot of headaches down the line.
Another slip-up is failing to clean the nib adequately before and after each refill. Leftover ink can mix with new ink and alter its color, consistency, or flow. It’s essential to wipe your nib with a clean paper towel to ensure you’ve removed any old residue. This is particularly crucial if you switch between different ink brands or colors, as each ink has its own distinct properties that work best when untainted. Remember, a clean nib leads to clean strokes.
Also, don’t be too hasty with the reassembly of your pen after refilling. It’s tempting to rush back to your artwork, but taking the time to ensure everything fits snugly is vital. If you don’t secure components properly, you risk ink leaks that could ruin both your pen and your workspace. Before you start writing, always give your pen a quick test on scrap paper to ensure smooth flow and functionality.
Finally, a common oversight is neglecting to store your pen upright when not in use. Storing it horizontally can lead to ink settling in unwanted areas, resulting in clogs or dried-out tips. Always remember to store your pen in an upright position to maintain the integrity of the ink flow and keep your writing experience smooth every time you sit down to create. These simple practices can enhance your refilling routine and keep your calligraphy flourishing beautifully.
How to Troubleshoot Ink Flow Issues
Experiencing flow issues with your calligraphy pen can be frustrating, but there are several straightforward troubleshooting steps you can take to get things flowing smoothly again. Firstly, check for any air bubbles in the nib. Air trapped inside can significantly disrupt ink flow. If you’ve just refilled your pen, tap it gently against your palm to help release those pesky bubbles. It’s a simple fix that can save you from uneven lines and interrupted writing.
Another common issue might be the nib itself. Over time, nibs can become clogged with dry ink or debris. If your pen isn’t dispensing ink properly, carefully clean the nib with a soft cloth or tissue. For more stubborn clogs, running the nib under lukewarm water can help dissolve any dried ink. Make sure to dry it thoroughly before attempting to write again, as excess moisture can cause further flow problems.
If you’re using cartridge ink, ensure it’s properly seated in the pen. Misalignment can cause a failure in ink delivery. Simply remove the cartridge and reinsert it, ensuring it clicks into place. For bottled ink, check whether the converter (if your pen uses one) is filled adequately. A dry converter can be the culprit behind poor ink flow.
Lastly, consider the type of ink you’re using. Some inks are thicker or contain particles that might clog finer nibs. If you frequently face flow issues, it might be worth exploring a different ink brand or type that’s better suited for your pen. Ensuring compatibility between your ink and nib can go a long way in maintaining a smooth writing experience.
Best Practices for Maintaining Ink Freshness
Keeping your ink fresh is crucial not just for maintaining vibrant colors but also for ensuring that your calligraphy flows smoothly. Fresh ink contributes to a better writing experience, reducing the risk of clogs and inconsistencies that can disrupt your artistry. Here are some practical ways to maintain the freshness of your calligraphy ink:
Store Properly
Always keep your ink in a cool, dark place. Exposure to heat and light can break down pigments and lead to dried-out or altered ink consistency. If you’re using bottled ink, ensure the cap is always tightly sealed after use. Also, consider storing ink bottles upright to prevent spills and leaks.
Use Regularly
Inks can stay fresher longer when they’re in use. Frequent use helps maintain the optimal viscosity by preventing them from thickening or separating. If you have a favorite pen, make it a habit to use it a couple of times a week. Even a short practice run can keep the ink flowing and fresh.
Maintain Hygiene
Keeping your nibs and pens clean is essential for ink longevity. Residual ink can dry and create blockages, which makes your inks prematurely stale. Clean your pens regularly by flushing them with water, especially if switching between different colors or types of ink. Simple maintenance can prevent your ink from becoming a victim of contamination.
Consider Mixing and Blending
Don’t hesitate to blend inks if you’re dealing with remnants in multiple bottles. Mixing fresh ink with older ink can revitalize the older product and give you unique shades. Just ensure that the inks are compatible and mix small amounts to test the results first.
By implementing these best practices, you’ll not only extend the lifespan of your ink but also enhance your overall calligraphy experience, allowing every stroke to express its full potential. Remember, keeping things fresh isn’t just about the ink; it’s about nurturing your craft and ensuring every writing session is enjoyable and fulfilling.
Exploring Cartridge vs. Bottled Ink Options
When diving into the world of calligraphy, one of the first decisions you’ll face is whether to use cartridges or bottled ink. Both options have their unique advantages and potential downsides, and understanding these can significantly impact your practice. Cartridge inks offer convenience and cleanliness, ideal for beginners or those who value efficiency. With a simple pop-in mechanism, they eliminate messy refills and the hassle of cleaning spills. If you’re on the go or frequently switching between colors, cartridges are a quick solution that keeps your creativity flowing without interruption.
On the other hand, bottled ink opens up a vast world of colors and types. For those passionate about experimenting, bottled ink can provide a richer variety of shades, textures, and even unique mixtures. It’s also typically more cost-effective in the long run, especially if you find yourself regularly refilling your pen. The tactile experience of pouring and mixing ink adds to the artistry of calligraphy, allowing for customization that cartridges just can’t match. It does require some more effort in terms of cleaning and maintenance, but for many artists, this is part of the charm.
Here’s a quick comparison of both options:
| Feature | Cartridge Ink | Bottled Ink |
|---|---|---|
| Convenience | Easy to replace; no mess | Requires filling and cleaning |
| Color Variety | Limited to available cartridges | Wide selection and can be mixed |
| Cost | More expensive per use | More economical for regular use |
| Artistic Control | Less control over mixing | Full control over shades and mixtures |
So, which should you choose? If you’re just starting out or need to keep things streamlined, cartridges are fantastic. But if you’re looking to deepen your practice and explore a broader spectrum of colors and creative options, bottled ink could be the way to go. Ultimately, it’s about what fits your lifestyle and enhances your calligraphy experience. Whether you lean toward the ease of cartridges or the expressive potential of bottled inks, both choices have their place in the art of calligraphy.
Innovative Techniques for Creative Ink Blending
Creative ink blending is an exciting way to elevate your calligraphy work, allowing you to explore unique color combinations and textures. One standout technique is the two-tone ink method, where you blend two different colors directly in your pen. This creates stunning gradient effects that make your lettering pop. To achieve this, fill one section of your pen with one color and the other section with a second color. As you write, the colors will merge, providing a beautiful, seamless transition between shades.
Another method to experiment with is the ink layering technique. Start by writing with a base color, then once it’s dry, use another color to add shadows, highlights, or overlays. This not only enhances depth in your work but also opens the door to unique styles. For instance, if you use a dark green as a base and add a lighter green or gold over it, you can achieve a sophisticated, visually engaging look.
Don’t forget about watercolor ink blending for even more creativity. Use water-soluble inks or inks that you can dilute with water. Apply one color, then add water with a brush to create a soft wash. This technique is perfect for creating atmospheric backgrounds or soft effects in lettering. You can even mix one ink with another on your palette for more complex colors before applying them.
Here are some practical tips for effective blending:
- Experiment on practice paper: Always test your blends on scrap paper first to see how the colors interact.
- Use different nibs: Some nibs can create varying effects; experiment with fine and broad nibs to see how they change the blending outcome.
- Be patient: Blending often takes practice, so don’t rush. Take your time to understand how different inks react.
Blending ink isn’t just about aesthetics; it’s also a fantastic way to express your personal style and creativity. So go ahead, fill your pen with your favorite colors and start experimenting-your calligraphy can only get more vibrant from here!
Cleaning Your Calligraphy Pen After Refilling
isn’t just a chore; it’s an essential part of maintaining the pen’s performance and longevity. If you want your ink flow to remain fresh and consistent, taking the time to clean your pen properly can make all the difference. Residue from old ink can clog your nib and disrupt your writing flow, potentially ruining your masterpiece.
Start by removing the nib and carrying out a thorough rinse. Use lukewarm water to flush out the ink. Always do this over a sink or a bowl to catch any ink that might spill. Avoid hot water, as it can damage certain materials in your pen. For stubborn ink residue, soak the nib in water for a few minutes, which allows it to break down. After soaking, gently wipe the nib with a soft cloth or paper towel to remove any leftover ink.
Once the nib is clean, it’s best practice to get to the barrel of your pen as well. For cartridge pens, make sure to wipe the inside of the barrel with a damp cloth to ensure no residue is left behind. For converters, thoroughly rinse the converter with water, engaging the filling mechanism to flush it out completely. After everything is rinsed clean, let the nib and pen components air dry completely before reassembling. This prevents moisture from affecting the performance of the ink when you refill next.
Here are some quick tips to keep in mind while cleaning your pen:
- Clean immediately: The sooner you clean your pen after refilling, the easier it will be to remove dried ink.
- Avoid using solvents: Stick to water; solvents can damage the pen materials.
- Store properly: When not in use, store your pen in a flat position to avoid ink pooling in unwanted areas.
By following these straightforward cleaning steps, you’ll keep your pen in top-notch shape, ensuring a smooth, enjoyable writing experience every time. Regular maintenance not only enhances your calligraphy but also allows you to experiment more freely with different inks without the fear of contamination or blockages.
Top Calligraphy Pen Brands and Their Features
When you’re choosing a calligraphy pen that will keep your ink flowing smoothly, brand quality really matters. There are several standout brands in the market, each known for their unique features and reliability. Let’s explore a few that every calligraphy enthusiast should consider.
One of the top names in calligraphy is Pilot. Their pens, such as the Pilot Parallel, offer a versatile experience with dual tips and a wide range of nib sizes. The ink flows consistently, making it perfect for both beginners and seasoned artists. Plus, their cartridges are easy to refill, which is a big plus for keeping your creative juices flowing.
Another notable brand is Kuretake, especially famous for their brush pens. The Kuretake Zig Brush Pen offers a soft brush tip that mimics traditional calligraphy with the convenience of modern ink technology. They are filled with high-quality, water-based ink that dries quickly, reducing smudging and allowing for vibrant color combinations. Kuretake’s refillable options also mean you can have a sustainable ink supply, aligning with best practices for maintaining ink freshness.
If you’re looking for something more classic, Lamy pens have a longstanding reputation for quality. Their Lamy Joy, for instance, is designed for calligraphy and features interchangeable nibs, allowing you to adjust line thickness according to your project needs. Lamy’s ink cartridges are reliable, ensuring a steady ink flow that can handle detailed work without skipping.
To sum it up, choosing the right calligraphy pen brand can significantly impact your writing experience. Consider the flow, refilling ease, and the quality of the ink. Investing in reputable brands like Pilot, Kuretake, and Lamy not only enhances your calligraphy practice but also ensures that your ink flow stays fresh and consistent with every stroke.
The Art of Storing Ink Properly
Properly storing your ink is crucial for preserving its quality and ensuring a smooth writing experience every time you refill your pen. Did you know that the way you store your ink can influence its lifespan and performance? Here’s how to get the most out of your calligraphy supplies.
First, always keep your ink in a cool, dry place. Extreme temperatures can alter the consistency and color of the ink, leading to clogs or poor flow. Ideally, store it in an upright position to prevent leakage and ensure the nibs remain submerged in ink when refilling. This practice protects against drying out and keeps the quality intact for longer.
Next, consider using airtight containers. If you’re working with bottled ink, transferring it to a sealed glass jar can block out light and air, both of which can degrade the ink over time. Label your containers with the ink’s name and date of purchase to keep track of freshness. A simple system, like storing older inks at the back of your shelf, helps ensure you use them before they expire.
Lastly, note that different inks require different handling. For instance, India ink, often used for its rich black color, can dry out quickly without proper sealing. Water-based inks, while easier to clean, can separate if not shaken well before use. Always check the manufacturer’s guidelines for specific storage recommendations.
By implementing these storage techniques, you can help ensure your ink flows smoothly, remains vibrant, and is ready whenever inspiration strikes.
Maximizing Your Calligraphy Experience with DIY Tricks
Enhancing your calligraphy experience goes beyond just picking the right ink-it involves a collection of clever DIY tricks that can elevate both your writing and your creativity. One of the simplest yet most effective techniques is to create a custom mixing palette for your inks. By using small jars or even plastic lids, you can blend colors and test their flow before committing to a piece. This method not only helps you achieve unique shades but also prevents waste by allowing you to experiment without fear.
Another powerful DIY hack is to use a syringe or dropper for refills. These tools provide precision that makes refilling any pen a breeze. By controlling the amount of ink you introduce to the pen, you reduce the risk of overfilling, which can lead to spillage and a mess. Additionally, always keep a microfiber cloth handy. This simple accessory is perfect for wiping excess ink from your nib or pen body, ensuring that ink isn’t smudged on your final work.
Maintaining a consistent ink flow is crucial for smooth writing. If you find that your ink is drying out too quickly, try adding a drop of glycerin to your bottled ink. This additive maintains the ink’s viscosity, resulting in a more fluid writing experience. Alternatively, if your ink tends to clog, consider thinning it with a few drops of water-just remember to test this on scrap paper first to make sure you’re happy with the results.
Lastly, don’t underestimate the power of a comfortable workspace. Create a dedicated calligraphy station with good lighting and an ergonomic setup. Having everything you need at arm’s reach reduces distractions and enhances your focus, allowing your creativity to flow freely. These DIY tricks not only optimize your ink usage but also ensure you enjoy every moment spent with your pen.
Frequently Asked Questions
Q: How do I know when my calligraphy pen needs refilling?
A: You’ll know it’s time to refill your calligraphy pen when the ink flow becomes inconsistent, the pen skips while writing, or the ink runs out completely. Monitoring your ink level regularly, especially during extended use, will help ensure a smooth writing experience.
Q: Can I use any type of ink to refill my calligraphy pen?
A: Not all inks are suitable for calligraphy pens. It’s crucial to use inks specifically formulated for your pen type, whether it’s fountain pen ink for piston fillers or compatible bottled ink for dip pens. This preserves your pen’s performance and longevity.
Q: What should I do if my calligraphy pen leaks after refilling?
A: If your calligraphy pen leaks, check that the ink cartridge is securely attached and that you’ve filled it correctly without overfilling. Additionally, inspect the nib for damage, and ensure it’s properly aligned. If problems persist, consider cleaning the pen thoroughly or replacing the ink cartridge.
Q: How can I avoid ink drying out in my calligraphy pen?
A: To prevent ink from drying out, always cap the pen tightly when not in use. Store your pen horizontally or nib-up, and avoid leaving it exposed to direct sunlight. Additionally, using a high-quality ink with anti-clogging properties can help maintain freshness.
Q: What’s the best way to clean my calligraphy pen after refilling?
A: The best way to clean your calligraphy pen is to flush it with clean water immediately after use. For fountain pens, use a converter to draw water through the nib. For dip pens, wipe the nib gently and submerge it in water. Always ensure it’s completely dry before the next use to avoid ink contamination.
Q: Can I mix different ink colors in my calligraphy pen?
A: Mixing different ink colors directly in your pen can lead to clogs or unexpected results. If you want to create unique colors, try blending inks in a separate container first. Once you’ve achieved your desired shade, refill your pen carefully with the mixed ink.
Q: Why is my calligraphy pen not writing smoothly after refilling?
A: If your calligraphy pen isn’t writing smoothly, it could be due to a blocked nib, air bubbles in the ink feed, or incompatible ink. Check the nib for debris, ensure the ink is properly primed, and use quality ink for optimal results.
Q: Where can I find high-quality ink for my calligraphy pen?
A: You can find high-quality ink for your calligraphy pen at art supply stores, specialty stationery shops, or online retailers. Look for brands known for their performance and color vibrancy. Consider checking our article on “Choosing the Right Calligraphy Ink for Your Pen” for recommendations.
In Summary
Now that you know how to refill your calligraphy pen and keep that ink flowing fresh, don’t let your creativity stop here! Dive deeper into the art of calligraphy with our guides on choosing the right pen and mastering different lettering styles. Whether you’re a beginner or looking to refine your skills, there’s always something new to explore.
Ready to take your calligraphy journey further? Subscribe to our newsletter for tips, exclusive tutorials, and special offers delivered straight to your inbox. You won’t want to miss out on our insights and resources designed to enhance your craft. Remember, the pen is mightier when it’s full of ink-keep practicing, and don’t hesitate to drop us a comment below sharing your experiences or questions.
Let’s keep that ink flowing and those letters beautiful! Check out our related articles for more inspiration and techniques to elevate your writing. Happy calligraphing!