As you dive into the art of calligraphy, having the right tools is essential-and assembling your Sheaffer Calligraphy Pen is the first step to unlocking your creativity. Did you know that a well-assembled pen can drastically enhance your writing experience? Whether you’re a seasoned calligrapher or just starting out, knowing how to put together your pen not only ensures optimal performance but also adds a personal touch to your writing routine. In this guide, we’ll walk you through the assembly steps, making it easy and enjoyable. Let’s get you set up to create stunning letters and beautifully crafted words that truly reflect your style!
Choosing the Right Sheaffer Calligraphy Pen for You

Choosing the right Sheaffer calligraphy pen is crucial for unlocking your creativity and achieving the artistic expression you desire. With a rich legacy in fine writing instruments, Sheaffer offers a range of options that cater to different styles and preferences. Whether you’re a beginner or an experienced calligrapher, the right pen can elevate your work.
To narrow down your choices, consider the following key points:
- Nib Size: Sheaffer pens come with various nib sizes, from broad to fine. A broader nib creates bolder strokes and can be great for flourishing, while finer nibs offer precision for smaller lettering.
- Grip Comfort: Look for pens that feel comfortable in your hand during extended use. Ergonomic designs can significantly reduce fatigue, allowing you to practice longer.
- Ink Types: Some Sheaffer pens are designed for specific ink types. Choosing between bottled inks and cartridges can affect your overall experience and results. Experiment with different inks to see which one suits your style best.
- Budget: Sheaffer offers options across various price points. Determine your budget while still prioritizing quality, as this investment can significantly impact your calligraphy journey.
Moreover, thinking about the aesthetic aspect is equally important. Sheaffer pens often feature elegant designs that complement your personal taste. Whether you prefer classic elegance or modern sleekness, the right choice can enhance not just your writing experience, but also your overall artistic presentation. Exploring different models and possibly testing them in-store can ensure you make the most informed decision. Remember, selecting the right calligraphy pen is a personal journey-take the time to discover what truly works for you!
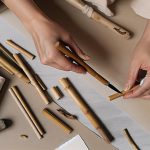
Essential Tools for Assembly You’ll Need
To assemble your Sheaffer calligraphy pen seamlessly, having the right tools on hand can make all the difference. This isn’t about just having a pen-they’re delicate instruments, and a little preparation can simplify the process and enhance your writing experience. Here’s what you’ll need to get started.
First and foremost, you’ll need a clean, flat workspace. A clutter-free environment allows you to focus and prevents any misplaced parts. Next, gather some essential tools:
- Soft Cloth: Keep a soft, lint-free cloth handy to wipe down the pen parts and prevent scratches.
- Pencil or Fine-Point Marker: Use this for marking any assembly steps if needed, especially if you’re customizing your setup.
- Small Tweezers: These can be invaluable for handling tiny components, particularly if you have to make adjustments to nibs or feeds.
- A Small Container: Use this to hold any small parts or extras, like replacement nibs, to keep them organized and prevent loss.
Before beginning the assembly, ensure you have your selected ink ready-whether it’s bottled ink or cartridges, it’s important to choose one that’s compatible with your pen model. Should you prefer bottled ink, have a small dropper or pipette for easy application when filling your pen.
These simple tools not only expedite the assembly process but also enhance your comfort and confidence while creating. With everything laid out before you, you’ll be ready to put together your Sheaffer calligraphy pen without a hitch, setting the stage for your artistic expression to flourish.
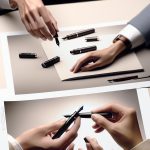
Step-by-Step Guide to Assembling Your Pen

Getting your Sheaffer calligraphy pen ready for action can feel daunting, but it doesn’t have to be. With the right steps, you’ll be able to assemble your pen quickly and confidently, turning it into a beautiful extension of your creativity. Here’s how to do it smoothly.
Begin by ensuring you have your selected nib attachment ready. Depending on your pen model, you might have several nibs to choose from. Each nib size offers a unique line thickness, so pick one that fits your style. Next, insert the nib into the nib holder. Gently slide it in until it feels secure but avoid forcing it to prevent damaging the delicate components.
Once the nib is in place, it’s time to attach the ink cartridge or fill the converter if you’re using bottled ink. If you’re using a cartridge, simply push it into the section until you feel a click; this means the ink reservoir has engaged. When using a converter, dip the nib in the ink and twist the converter plunger to draw ink into the chamber. A good rule of thumb is to fill it about two-thirds full to avoid leaks. Wipe any excess ink from the nib with your soft cloth to keep your workspace clean.
Lastly, screw the barrel onto the section snugly, ensuring the nib remains aligned with the feed. Having a stable setup is crucial for a consistent ink flow. After assembling, give the pen a gentle shake-this can help expedite ink flow right away. Congratulations, you’re now ready to explore the art of calligraphy with your freshly assembled Sheaffer pen!
Common Mistakes to Avoid During Assembly

Assembling your Sheaffer calligraphy pen should feel satisfying, not frustrating. Yet, many people trip up on common pitfalls that can derail their experience. Avoiding these mistakes can save you time and turn your pen assembly into a smooth and enjoyable process.
One major error is rushing the nib installation. Remember, the nib is delicate and precise. Always inspect the nib and the holder for any debris or misalignment before you insert the nib. Push it in gently until you feel resistance-forcing it can bend or break the nib. Make sure it’s snug but never jammed.
Another typical misstep occurs with ink filling. If you’re using a cartridge and don’t push it in until you hear a click, you won’t engage the ink reservoir properly. That means no ink flow when you’re ready to write! If you opt for a converter, filling it too much can lead to spills. Aim for two-thirds full, and always wipe away excess ink. A clean nib keeps everything neat and minimizes the dreaded ink smudges on your hands or paper.
Finally, failing to check the alignment of the nib with the feed can lead to inconsistent writing. A misaligned nib can cause hard starts or ink flow issues. Before securing the barrel, do a quick visual check: the nib should sit straight without any visible gaps. Once everything feels right, screw it together but avoid overtightening-you want the components secure, not strained.
By keeping these common mistakes in mind, you’ll set yourself up for success and unlock the full potential of your Sheaffer calligraphy pen. Happy writing!
Troubleshooting Assembly Issues Quickly
Assembling your Sheaffer calligraphy pen is supposed to be a seamless experience, but sometimes unexpected issues can arise. Quick troubleshooting can save your writing session from turning into a frustrating ordeal. Here’s how to swiftly address common assembly problems.
If you notice that your nib isn’t fitting correctly, double-check for debris or misalignment. Gently clean the nib and holder with a soft cloth to eliminate any obstacles. If the nib still won’t slot past the initial resistance, it might be sitting at an angle. Remove it and reinsert with a soft, steady pressure to ensure it’s seated properly. Remember, it should not require excessive force; a snug fit is what you’re after.
Ink flow issues are another common concern. If your pen isn’t writing smoothly, it might be due to improper ink filling or air bubbles disrupting flow. Try these tips: If you’re using a cartridge, ensure it’s fully inserted until you hear a click. For converters, try priming the nib by dipping it in ink and gently squeezing the converter to create a vacuum before loading it again. Also, if you’ve recently filled your pen, give it a good shake upside down-this can help draw ink down to the nib.
Lastly, if your pen is writing inconsistently, recheck the alignment of the nib with the feed. A misalignment can lead to blotchy ink flow or hard starts. Loosen the barrel slightly, adjust the nib carefully, and retighten it. If it feels right and looks straight, you’re good to go. Keeping these troubleshooting steps in mind will help ensure your Sheaffer calligraphy pen is always ready when creativity strikes. Happy writing!
Maintenance Tips for Your Sheaffer Calligraphy Pen
Maintaining your Sheaffer calligraphy pen isn’t just about keeping it clean; it’s about ensuring it remains a smooth, reliable tool for your artistic expression. The elegance of calligraphy requires not only skill but also a well-cared-for instrument. Regular maintenance can extend the life of your pen and enhance your writing experience, making every stroke a pleasure.
Start by cleaning your nib regularly. Over time, dried ink can accumulate, affecting performance. Just dip the nib in lukewarm water, letting it soak for a few minutes, and gently wipe it with a soft cloth. Remember, you should never scrub the nib as this can damage the delicate surface. If you use different inks, a thorough cleaning between color changes is a must to avoid mixing and clogging.
Next, consider storing your pen properly. Always keep it capped when not in use, and store it horizontally or with the nib pointing up to prevent ink from settling or leaking. Also, be mindful of temperature; extreme heat or cold can warp or damage the materials. If you haven’t used your pen for a while, give it a gentle shake to ensure the ink reaches the nib before you start writing again.
Lastly, pay attention to your ink. Choosing high-quality ink will not only improve the flow but also reduce the frequency of clogs and other issues. Test different brands to find the one that works best for your style. Keeping a small maintenance kit with a soft cloth, water, and a few different inks can make it easier to care for your Sheaffer pen regularly.
By integrating these simple practices into your writing routine, you’ll keep your Sheaffer calligraphy pen in optimal condition, ready for everything from casual notes to elegant invitations. Your pen is not just a writing tool; it’s an extension of your creativity. Treat it well, and it will reward you with smooth, effortless writing for years to come.
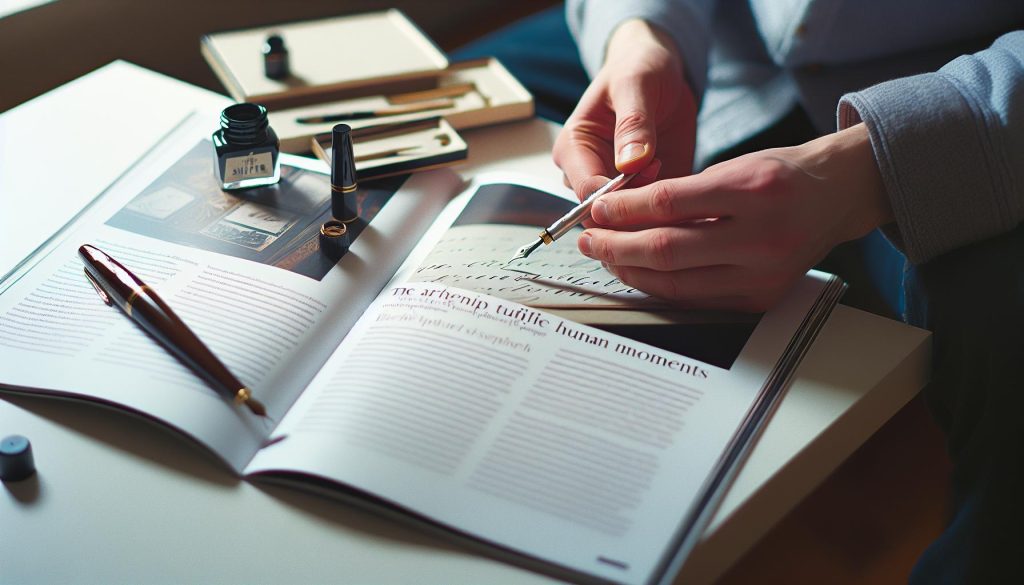
Expert Tips for Mastering Calligraphy Techniques
The art of calligraphy isn’t just about the ink flowing beautifully from your Sheaffer pen; it’s about mastering the techniques that make each stroke tell a story. Here are some expert tips that can elevate your calligraphy game and help you achieve those stunning, fluid lines with confidence.
Start by familiarizing yourself with your Sheaffer pen’s nib. Whether you’re using a broad or fine nib, understanding its strengths will guide your technique. For instance, a broader nib allows for more dramatic strokes, while a finer nib is great for intricate details. Practice varying your pressure on the nib as you write. Increased pressure results in thicker lines, while lighter pressure creates thin lines. This dynamic range is what gives calligraphy its character.
Next, consider your grip. Hold the pen lightly, somewhere between a relaxed grip and a firmer hold to allow fluidity in your movements. If you’re tense, your writing will look stiff and mechanical. Make sure your hands and arms are in a comfortable position-ideal posture can dramatically affect your flow. Using movements from your shoulder rather than just your wrist can create smoother, more controlled lines.
Creating a consistent style is crucial. Develop a personal alphabet by practicing each letter repeatedly until you find the nuances that make your handwriting unique. Don’t hesitate to refer to calligraphy examples online or in books to inspire your style. Copying established fonts and experimenting with them can lead to discovering your creative voice.
Finally, remember that ink plays a significant role in your calligraphy. Different inks have varying viscosities and drying times, which can affect how your writing turns out. It might take some trial and error to find the perfect ink for your style. Consider keeping a journal where you can mix inks and practice different techniques, documenting what works best for you.
By applying these tips, you’ll not only master the technical aspects of using your Sheaffer calligraphy pen but also refine your personal style. Calligraphy is a journey of patience and practice, so enjoy every moment spent with your pen in hand. Your creativity deserves it.
Exploring Different Ink Options and Their Effects
Experimenting with different inks can significantly elevate your calligraphy game. The right ink not only enhances the appearance of your writing but also affects your technique and flow. It’s crucial to explore various options, as each type brings unique qualities that impact your creative expression.
One significant factor is the viscosity of the ink. Thicker inks provide more control but can sometimes clog your pen, whereas thinner inks offer a smooth flow, perfect for broad strokes. Additionally, drying times matter. Some inks dry instantly, while others remain wet longer, allowing for techniques like layering or blending colors. Consider trying out different types, such as pigment-based inks, which are opaque and great for vibrant colors, or dye-based inks, which are typically more fluid and can create delicate lines.
Here’s a brief overview of popular ink types and their effects:
| Ink Type | Characteristics | Best Used For |
|---|---|---|
| Pigment-based | Thick, opaque, water-resistant | Vibrant, textured styles |
| Dye-based | Thin, fluid, quick-drying | Delicate scripts, blending |
| Iron Gall | Color-changing, archival | Historical styles, permanence |
| Metallic | Shiny, reflective | Decorative elements, unique calligraphy projects |
To find your favorite, try mixing inks in a practice journal to see how they react with your nib. You can even experiment with different color combinations to create custom shades that reflect your style. Don’t hesitate to document your results-keeping a log of what works can help you refine your technique and create a signature style.
Ultimately, the ink you choose can turn your calligraphy from ordinary to extraordinary. Whether you’re working on invitations, art pieces, or simply practicing, aligning the right ink with your pen and technique will bring your artistic vision to life. Enjoy the journey of experimentation; it’s where the magic truly happens!
Understanding Calligraphy Pen Anatomy
Every calligraphy pen is a masterpiece of design and functionality, and understanding its anatomy is crucial for anyone looking to master this elegant art form. A Sheaffer calligraphy pen, in particular, is no exception. When you know the components of your pen, you’ll unlock its full potential and enhance your writing experience.
At the core, a calligraphy pen consists of several key parts:
Nib
The nib is where the magic happens. It directly interacts with the paper and is responsible for the width and flow of your lines. Sheaffer nibs are available in various sizes and styles, each suited for different lettering techniques. A broader nib, for instance, allows for thick, expressive strokes, while a finer nib is perfect for delicate details.
Feed
Beneath the nib lies the feed, a vital component that regulates ink flow. It acts as a reservoir that continuously supplies ink to the nib while you write. Proper alignment between the nib and feed is essential to ensure a smooth and consistent flow of ink. If you notice skipping or an inconsistent line, checking the feed’s alignment can often resolve the issue.
Barrel and Cap
The barrel houses the ink reservoir and provides grip. Sheaffer pens are designed for comfort and balance, making long writing sessions a joy rather than a chore. The cap not only protects the nib from drying out but also adds to the pen’s aesthetic. When assembling your pen, ensure that the cap fits snugly to preserve the nib’s integrity.
Converter or Cartridge
Depending on how you prefer to ink your pen, you might use a converter or a cartridge. A converter allows you to fill your pen with your favorite bottled ink, giving you endless possibilities for color and texture. On the other hand, cartridges are convenient and mess-free. Understanding which system suits your workflow will enhance your overall experience.
Knowing these components helps you navigate the nuances of your Sheaffer calligraphy pen. Each piece plays a critical role in your writing process, and mastering their functionality can elevate your skills to new heights. Whether you’re just starting or looking to refine your technique, this knowledge will empower you to make informed choices that enhance your art of calligraphy.
Customizing Your Sheaffer Pen for Unique Styles
Customizing your Sheaffer calligraphy pen can elevate your writing experience and allow you to express your unique style. Whether you’re looking to enhance functionality, aesthetics, or both, you’ll find that personalization can transform an ordinary pen into a reflection of your artistic personality.
To begin, consider the nib. Sheaffer offers various nib sizes and styles, so picking one that matches your handwriting and calligraphy style is crucial. If you prefer bold strokes for dramatic lettering, choose a broader nib. For more intricate work, a fine nib will do the trick. Mixing and matching nibs based on your project can yield stunning results, so don’t hesitate to experiment.
Beyond the nib, ink selection plays a vital role in customization. Sheaffer pens can be filled with both cartridges and converters, giving you the flexibility to choose your ink type. Opt for vibrant colors or metallic shades to make your work pop; certain inks can produce effects like shading or sheen, adding depth to your calligraphy. If you have a particular color palette in mind for your projects, take the time to explore different inks that complement your vision.
Lastly, consider the body of your pen. While many Sheaffer pens boast elegant designs, you can go a step further. Use decorative washi tapes or custom grips to enhance comfort and add a personal touch. Some aficionados even create wraps or sleeves that reflect their style, making their pen not just a tool but a statement piece.
Incorporating these custom elements will not only improve your writing experience but also make each piece you create feel distinctly yours. Dive in, experiment, and let your Sheaffer pen be a part of your creative journey.
Where to Find Additional Resources and Community Support
Finding the right resources and community support can make a significant difference in your journey with Sheaffer calligraphy pens. Whether you’re just starting or seeking to refine your skills, connecting with others who share your passion can be incredibly rewarding. The good news is there are plenty of avenues you can explore.
Online forums and social media groups dedicated to calligraphy are fantastic places to share your work, seek advice, and ask questions. Platforms like Instagram and Facebook have vibrant communities where artists showcase their techniques and finished pieces. Look for hashtags like #SheafferPens or #CalligraphyCommunity to discover inspiring accounts and connect with fellow enthusiasts.
You might also want to check out dedicated calligraphy websites and blogs, which often feature tutorials, tips, and product reviews. These resources can guide you through complex techniques or introduce you to new styles you might want to try. Sheaffer’s official website is a good starting point for information on their products and any upcoming workshops or events.
For an even more hands-on approach, consider joining local calligraphy classes or workshops. These settings not only provide access to expert guidance but also the chance to meet like-minded individuals who can become part of your creative network. Even if you can’t find classes nearby, many artists offer virtual workshops that make learning accessible from the comfort of your home.
In essence, diving into the world of Sheaffer calligraphy doesn’t have to be a solitary journey. Seek out these resources and connect with others to enhance your skills and keep your passion for calligraphy alive.
Frequently asked questions
Q: What are the first steps to assembly for a Sheaffer Calligraphy Pen?
A: To start assembling your Sheaffer Calligraphy Pen, gather all components, including the pen body, nib, and ink cartridge. Make sure you have a clean workspace to avoid losing any parts. Consider reviewing the Step-by-Step Guide to Assembling Your Pen in your article for detailed instructions.
Q: How do I insert the ink cartridge into a Sheaffer Calligraphy Pen?
A: To insert the ink cartridge, align it with the back of the nib section. Gently push the cartridge until it clicks into place. Ensure the cartridge is properly seated to prevent any ink leakage. If you need a visual guide, check your Step-by-Step Guide section.
Q: Why is my Sheaffer Calligraphy Pen not writing after assembly?
A: If your pen is not writing, it could be due to dried ink or an improperly fitted nib. First, check that the ink cartridge is inserted correctly. If the issue persists, refer to the Troubleshooting Assembly Issues Quickly section for more solutions.
Q: What common mistakes should I avoid when assembling my Sheaffer Calligraphy Pen?
A: Common mistakes include using excessive force while assembling parts, which can damage the pen, and failing to attach the nib securely. Make sure to follow the guidelines in your article on Common Mistakes to Avoid During Assembly to ensure a successful assembly.
Q: Can I customize my Sheaffer Calligraphy Pen after assembly?
A: Yes, you can customize your Sheaffer Calligraphy Pen. Options may include changing the nib size or using different inks for various effects. For detailed information, refer to the Customizing Your Sheaffer Pen for Unique Styles section of your article.
Q: What type of ink should I use for my Sheaffer Calligraphy Pen?
A: Use fountain pen ink specifically designed for calligraphy, which helps achieve the best results. You can explore various brands and colors in the Exploring Different Ink Options and Their Effects section for more guidance.
Q: How often should I clean my Sheaffer Calligraphy Pen?
A: It’s best to clean your Sheaffer Calligraphy Pen after each use or whenever you change ink colors. Regular maintenance prevents clogs and ensures a smooth writing experience. Refer to the Maintenance Tips for Your Sheaffer Calligraphy Pen for thorough cleaning methods.
Q: Where can I find community support for Sheaffer Calligraphy Pen users?
A: You can find community support by visiting platforms like social media groups or forums dedicated to calligraphy. Consider checking the Where to Find Additional Resources and Community Support section for links to online communities and resources.
Wrapping Up
Now that you’ve mastered assembling your Sheaffer calligraphy pen, it’s time to unleash your creativity! Remember, this pen isn’t just a tool; it’s your gateway to elegant writing and stunning artwork. If you want to deepen your calligraphy skills, check out our guides on “Calligraphy Techniques for Beginners” and “Choosing the Right Paper for Calligraphy”.
Don’t forget to share your beautiful creations with us in the comments below, and subscribe to our newsletter for exclusive tips and tricks to elevate your writing experience. Your journey in the art of calligraphy is just beginning-get started today and make each stroke count!