Holding an oblique calligraphy pen correctly can transform your writing, giving it that beautiful flourish that’s so sought after in the art of penmanship. Did you know that the way you grip your pen affects not only your comfort but also the style and flow of your letters? Many beginners struggle with their grip, leading to frustration and uneven results. But mastering the angled grip isn’t just about aesthetics; it can improve your control and precision, making the writing experience more enjoyable. In this guide, we’ll break down the steps to hold your oblique calligraphy pen effortlessly, so you can focus on what truly matters: creating stunning script that wows everyone who sees it. Stick around, and let’s unlock your potential in calligraphy together!
How the Oblique Pen Works for Calligraphy
Using an oblique pen for calligraphy isn’t just a stylistic choice; it’s a game-changer that opens up a world of possibilities in letterforms and flourishes. The beauty of the oblique pen lies in its angled nib, which allows you to create dramatic thick and thin strokes, a hallmark of elegant script. When you understand how it works, you can harness its potential to transform your writing into art.
The oblique pen consists of a holder that is set at an angle, typically around 45 degrees. This design tilts the nib for optimal control, allowing you to achieve those stunning, sweeping curves that can turn simple letters into intricate designs. Each movement you make affects the line’s thickness, giving unique character to your writing. To get started, consider the following key aspects of how an oblique pen functions:
- Nib Angle: The angle of the nib is crucial. It should be aligned with your writing direction for consistent stroke width. Experiment with angles to discover what feels natural.
- Pressure Control: Applying varying pressure while writing changes the thickness of the strokes. Master this to add dimension to your letters.
- Stroke Technique: Use a smooth, controlled motion when drawing each letter. Start with light pressure and gradually increase it on downstrokes for the desired effect.
Make sure to practice frequently – the oblique pen may feel awkward at first, but with dedication, you’ll experience a shift from fumbling to fluidity. Don’t shy away from experimenting with different styles and pressures; the beauty of calligraphy is in personalization. Give yourself the gift of time, and you’ll find that the oblique pen can yield extraordinary results that bring your calligraphy to life.
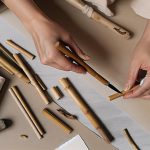
Choosing the Right Oblique Calligraphy Pen
When it comes to crafting beautiful calligraphy, the right pen can make all the difference. An oblique calligraphy pen isn’t just a tool; it’s a gateway to mastering the art of elegant lettering. The key is in the nib setup. Look for a pen that features a holder angled around 45 degrees, which positions the nib ideally for those sweeping strokes and delicate flourishes. But the choice doesn’t stop there-consider nib size and shape as well. Larger nibs can create bolder strokes that stand out, while smaller nibs allow for intricate details and precise control.
It’s also crucial to factor in ergonomics. The perfect pen feels comfortable in your hand, especially during longer writing sessions. Many beginners start with a standard straight pen holder, but exploring different styles, like the curved or flexible holders, can enhance your grip and reduce fatigue. Personalizing your choice makes a significant impact, so try out various options. Don’t hesitate to test different nibs; some produce softer lines that flow effortlessly, while others are stiffer and require more pressure, affecting how you write.
In terms of materials, look for quality construction. Wood or metal holders can provide a different weight and balance, which might influence your writing style. If you’re starting, consider purchasing a starter kit that includes a few different nibs and holders-this way, you can experiment without a big investment. Remember, the right oblique calligraphy pen is out there waiting for you; it just may take a bit of trial and error to find it. Trust your instincts and enjoy the process of discovery!
Essential Grip Techniques for Beginners
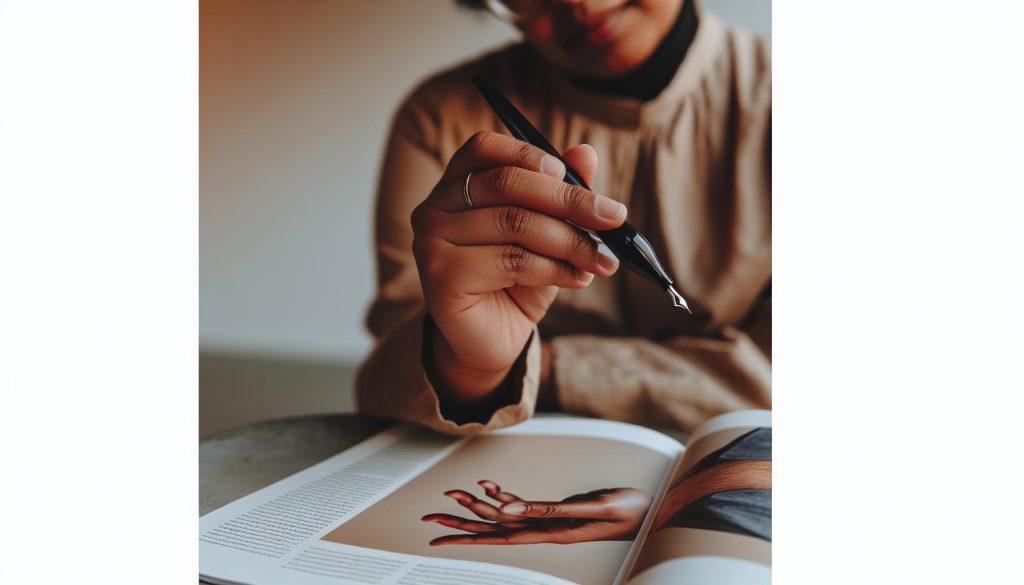
To truly excel in calligraphy with an oblique pen, mastering your grip is non-negotiable. An optimal grip not only enhances control but also allows for smoother movement and more beautiful strokes. Start by holding the pen about an inch from the nib. Your thumb should rest on one side, while your index and middle fingers grasp the other side, forming a relaxed triangle. This positioning will keep your hand steady and your strokes fluid.
Another tip is to ensure your grip is neither too tight nor too loose. A death grip will lead to fatigue and shaky lines, while a grip that’s too relaxed might make the pen slip. Aim for a gentle yet firm hold-think of grabbing a delicate object, just enough to control it without squeezing the life out of it. Practicing with different pressures can help you find that sweet spot where you feel confident and comfortable.
As you get used to your grip, pay attention to the angle at which you hold the pen. Ideally, the nib should point slightly towards your shoulder, aligned with the slant of the letters you want to form. This positioning allows for optimal ink flow and prevents the nib from skipping or dragging. To help visualize this, you might tilt your writing surface slightly and adjust your pen angle to match.
Lastly, don’t underestimate the power of muscle memory. Like any skill, practice is key. Set aside time to write phrases or letters using your oblique pen, continually checking your grip and angle. Over time, you’ll develop a natural feel, and your calligraphy will reflect that newfound confidence and elegance. Each stroke will begin to sing, making your practice feel less like work and more like art in motion.
Common Mistakes in Angled Grip
Many aspiring calligraphers encounter common pitfalls when trying to master the angled grip with an oblique pen. These mistakes can hinder your progress and lead to frustration. One of the biggest issues is gripping the pen too tightly. A stiff grip can restrict fluid movement, causing your strokes to appear shaky and uneven. Instead of holding the pen like it’s a baton, think of it as a delicate instrument. Develop a light yet controlled grip that allows for free motion and balance, akin to holding a bird-enough pressure to guide but gentle enough to prevent squishing.
Another frequent mistake is neglecting the angle at which you hold the pen. If your grip isn’t angled correctly, the nib might not touch the paper properly, leading to inconsistent ink flow. Ideally, the nib should be positioned slightly towards your shoulder, aligning with the natural slant of the letters. Experimenting with this angle during practice can help create that effortless flow that characterizes beautiful calligraphy. Don’t be afraid to tilt your writing surface or adjust your grip; finding the right setup is crucial for optimal performance.
Lastly, many beginners overlook the importance of consistent practice. It’s easy to get discouraged if your initial attempts don’t meet your expectations. In these moments, remember that mastery comes with time and repetition. Create a practice routine that includes a variety of strokes and letters, while paying close attention to your grip and angle. This not only helps reinforce muscle memory but also enhances your overall comfort and confidence with the oblique pen. Embrace the journey, and don’t shy away from making adjustments as you learn what feels right.
Adjusting Your Grip for Comfort and Precision
Adjusting your grip can be the difference between elegant fluidity and clumsy, uneven strokes when using an oblique pen. A comfortable and precise hold is crucial, allowing you to harness the pen’s design effectively without straining your hand. Imagine this: you’re poised to write but find your fingers slipping or the pen wobbling, resulting in frustrating and inconsistent letters. The good news? With a few adjustments, you can achieve a grip that empowers your creativity.
Start with the positioning of the pen. Hold the oblique pen slightly higher than you might with a straight pen, allowing the nib to rest at an angle that promotes smooth ink flow. Your index finger should be placed near the top of the penholder, while your thumb supports the barrel from the opposite side. This triangular grip provides stability and control. Maintain a relaxed hold-think of a gentle pinch rather than a tight squeeze. Your fingers should wrap around the pen lightly, so you can easily maneuver it across the page. If you find your hand tightening as you write, take a break, shake it out, and reset your grip.
Practice is essential, so dedicate time to experimenting with your hand positioning. Try different angles and see what feels most natural. Remember, there’s no one-size-fits-all approach; your hold should reflect your comfort and style. Consider using a mirror to observe your hand as you write, helping you recognize and correct any tension or awkward angles. Celebrate small victories as your grip improves; over time, you’ll notice a direct correlation between a relaxed hold and your calligraphy’s elegance.
Lastly, be mindful of your movements. As you write, let your arm guide the pen rather than just your fingers. Rotate your wrist slightly, allowing for smoother strokes-this adjustment can alleviate fatigue and allow for a more dynamic writing experience. Remember, the goal is to feel at ease while crafting your letters. isn’t just about technique; it’s about finding what resonates with you, so you can fully express your artistic vision.
How to Create Beautiful Flourishes
When it comes to creating beautiful flourishes in your calligraphy, the oblique pen can be your best ally. The angled grip isn’t just a stylistic choice; it opens up a world of fluid movement and graceful design. The elegance of your strokes often hinges on how you manipulate the pen’s position. Start by visualizing the flourishes you want to create-these can be swooping loops, delicate swirls, or intricate accents. Each flourish adds personality and charm to your lettering, setting your work apart.
To achieve stunning flourishes, it’s all about control and confidence in your movements. As you practice, remember to let your wrist guide the pen rather than just your fingers. This allows for smoother transitions and more dynamic strokes. Begin with simple automated motions-lightly lifting the pen at the end of a stroke to create a natural curve. Once you’re comfortable, gradually add complexity. For instance, try incorporating varying pressure as you draw the flourishes; this can produce thicker and thinner lines, enhancing the visual interest of your letters.
Another effective technique is to incorporate your body into the writing process. Stand or sit at a comfortable height where your arm can move freely. Using your entire arm instead of just your fingers will allow for greater fluidity. Experiment with different body angles and postures to see how they affect your flow and line quality. Don’t hesitate to make mistakes; they can lead to unexpected and beautiful designs.
Finally, practice makes perfect. Grab a sketchbook and dedicate space for experimenting with various flourishes. Use guides or templates to help you visualize the shapes before committing to ink. Over time, focus on the connection between letters and flourishes, allowing them to dance together seamlessly. Enjoy the process-each flourish is an expression of your creativity, and the more you practice, the more natural and beautiful they will become.
What to Avoid: Poor Posture and Grip
When you’re diving into the world of calligraphy with an oblique pen, you might think the focus is just on technique. But your posture and grip play crucial roles in how your letters turn out. Maintaining the right position not only influences the quality of your strokes but also impacts your overall comfort during long writing sessions. A poor grip or slouched posture can lead to fatigue, strain, and ultimately, unsightly letters.
One common mistake is holding the oblique pen too tightly. It’s easy to grip the pen like it’s a lifeline, especially when you’re just starting. This tension can hinder your fluidity. Instead, aim for a light grip-think of holding a delicate bird. Your fingers should be relaxed, allowing the pen to move smoothly across the page. Positioning the pen properly, with the nib tilted towards your body at about a 45-degree angle, also helps create the fluid lines characteristic of beautiful calligraphy.
An equally important aspect is your seating. If you’re hunched over your desk or writing surface, you’re setting yourself up for discomfort. Always ensure your seat height allows your elbows to rest comfortably on the table. Your feet should be flat on the ground, providing stability and balance. Never underestimate the power of good posture: sitting up straight allows for better control of your arm movements and reduces the risk of fatigue.
To sum it up, avoid the pitfalls of poor posture and grip through mindful practice. Regularly check in with yourself during your writing sessions. Ask, “Am I holding my pen lightly? Is my back straight?” Adjusting these habits can dramatically improve your calligraphy. Plus, your body will thank you for it! A little awareness can lead to significant strides in your calligraphy journey.
Enhancing Control with the Oblique Grip
To wield an oblique pen effectively, mastering grip control is essential. With the right grip, you can dramatically enhance the fluidity and precision of your strokes, transforming your calligraphy into a work of art. The oblique grip is designed to allow the nib to glide smoothly across the page, but if you’re not holding the pen correctly, even the best intentions can lead to frustration.
Start by positioning the pen at a comfortable angle-typically around 45 degrees towards your body. This angling not only facilitates easier ink flow but also aligns your wrist and arm for better control. It’s crucial not to tense up; think of your fingers as flexible guides. Your thumb should rest comfortably on one side, while your index and middle fingers support the other side of the pen. This triangular grip stabilizes the pen while allowing for a delicately nuanced touch. A common error is gripping the pen too tightly. Instead, cultivate a gentle hold; a relaxed grip leads to fluid, expressive strokes.
Practice is your ally. Make it a habit to periodically check your grip during your writing sessions. Ask yourself: “Is my hold relaxed? Am I maintaining the right angle?” Regular self-assessment can help you fine-tune any unconscious habits that might creep in. When practicing, try to write slowly at first. This deliberate pace helps you develop a deeper connection with the pen, making it easier to adjust your grip as needed.
To truly enhance your control, consider using varied writing surfaces. Experimenting with different papers, textures, and even inks can help you understand how they interact with your grip and nib angle. Remember, every calligrapher has a unique style, and finding the perfect grip that works for you is part of the journey. Keeping your grip relaxed, maintaining the correct angle, and practicing with intention will empower you to create graceful, captivating letters effortlessly.
Practicing the Angled Grip Effectively
Practicing with an oblique grip can transform your calligraphy, turning a simple pen stroke into a graceful, flowing line. It’s essential to understand that mastering this grip isn’t just about holding a pen; it’s about developing a deep connection between your hand movements and the design you’re creating. Consider your grip as your compass-every subtle adjustment impacts the direction and style of your writing.
Start by dedicating time to develop muscle memory. Set aside specific practice sessions where you solely focus on the grip itself, rather than the letters you’re forming. Begin with simple exercises; write out basic strokes at various angles. This practice helps you internalize the feel of the pen in your fingers while you experiment with different angles and pressures. Remember, slow and steady wins the race-speed will come later, but precision is key in the beginning.
Another effective strategy is to incorporate a variety of writing materials into your practice. Use smooth paper, textured surfaces, and even different inks. Each type can yield different results and can teach you how your grip influences the pen’s responsiveness on different mediums. Pay close attention to how the weight of your hand shifts as you write. Is it too heavy? Are you gripping too tightly? You’re aiming for a balance that feels natural-your hand should guide the pen, not force it.
It’s also vital to regularly reassess your grip as you write. A simple check-in can help you identify if you’re relaxing your fingers adequately or if you’re reverting to a tense hold. Take breaks to shake out your hands and reset. Trust me, your forearms and wrists will thank you later! With focused practice and experimentation, you’ll find that your ability to maintain an effective angled grip will become second nature, elevating your calligraphy to new heights.
Advanced Techniques for the Experienced Calligrapher
When you’ve mastered the basics of using an oblique pen, it’s time to elevate your skills with advanced techniques that can transform your calligraphy into a true art form. Start experimenting with varying pressure and speed as you write. This not only adds dynamism to your strokes but also creates a fuller range of line work, from delicate hairlines to bold downstrokes. Always remember: the beauty of calligraphy lies in the contrast.
Exploring Flourishes
One captivating way to enhance your style is by incorporating flourishes. These decorative elements can beautifully frame your letters and make your writing stand out. Start with simple flourishes, focusing on their placement and natural flow. Use your wrist and shoulder more than your fingers. This helps create smooth, continuous movements that enhance the aesthetic appeal without feeling forced. Practicing these embellishments on scrap paper allows you to take risks without the pressure of perfection.
Understanding Variability
A key concept in advanced calligraphy is variability. This means exploring different pen angles and grips to create unique effects. Slightly rotating your pen can dramatically change your stroke; experiment with holding it at various angles while maintaining a consistent pressure. This flexibility not only enriches your writing style but also helps discover your personal nuance as a calligrapher.
Customizing Your Approach
The beauty of calligraphy is that it’s a personal expression. Don’t hesitate to customize your approach. Think about the type of paper you’re using and how it interacts with your ink. Different tools and techniques blend to create a signature style unique to you. Consider keeping a dedicated journal for your experiments, noting what works and what doesn’t. This will serve as both a record of your journey and a source of inspiration as you continue to develop your craft.
With these advanced techniques, you’ll not only enhance your control and precision but also cultivate a unique style that reflects your personality as a calligrapher. Keep pushing your boundaries, and remember, the journey to mastery is just as beautiful as the art you create.
Inspiring Calligraphy Styles to Try
Exploring new calligraphy styles can open your eyes to the stunning possibilities that an oblique pen offers. From elegant scripts to modern artistic expressions, each style not only challenges your grip but also helps you refine your technique. Here are some styles that can inspire your next writing session.
One of the classics is Copperplate, known for its flowing, rhythmic letters and elaborate swashes. It’s a great way to practice the oblique grip, as this style requires precision and control. Start with the basic lowercase letters before venturing into the complex capital letters. Focus on the varying thicknesses of your strokes; the elegance of Copperplate lies in its contrast.
Another style to try is Modern Calligraphy. This trend allows for a lot of creativity and personal expression. It’s less about perfection and more about achieving a beautiful look that reflects your style. You can mix different styles, play with letter forms, and add flourishes freely. Use your trusty oblique pen to create bouncy, casual letters that flow together-it’s all about relaxation and fluidity.
If you’re feeling adventurous, give Brush Lettering a shot. While it typically uses a brush pen, the technique can be mimicked with an oblique fountain pen. This style emphasizes bold strokes and free-spirited designs. Try out thick downstrokes and light upstrokes to capture the brush-like feel, or pivot your pen to achieve distinct effects.
Lastly, Gothic Calligraphy is perfect for making a statement. Those sharp, angular forms can showcase your control over the oblique grip like nothing else. As you write, pay attention to the uniformity and spacing of your letters; this will add to the visual impact of your work.
Don’t hesitate to explore these styles and find what resonates with you. Each one will not only challenge your current skills but enhance your overall understanding of calligraphy, allowing you to develop a distinctive flair that is uniquely yours. Happy writing!
Caring for Your Oblique Calligraphy Pen
Taking care of your oblique calligraphy pen is crucial for ensuring that it performs beautifully and lasts as long as possible. A well-maintained pen not only enhances your writing experience but also allows you to achieve those exquisite strokes and flourishes that make calligraphy so captivating. Start by regularly cleaning your nib and reservoir. After each use, rinse the nib with water to remove any residual ink. If you’re using a fountain pen, fill it with clean water and flush it through until the water runs clear. This prevents dried ink from clogging the nib and maintains smooth ink flow.
When it comes to the body of your pen, handle it with care. Avoid dropping or banging it against hard surfaces, as this can misalign the nib or damage the pen itself. If you notice that your nib is getting dull or uneven, it might be time for a replacement. Many calligraphers find it worthwhile to have a few different nibs on hand to switch up depending on the style they’re working on.
Storage is another vital aspect of pen care. Keep your oblique pen in a protective case, away from extreme temperatures or direct sunlight. This will help avoid warping or damage to the materials. If your pen uses a cartridge or converter, ensure you remove it if you won’t be using the pen for an extended period. It’s also helpful to store your pen upright to prevent ink from pooling in the nib, which can lead to leaks or spills.
Lastly, don’t underestimate the power of a good grip. An improperly held pen not only leads to discomfort but can also affect the nib’s performance. As you master the angled grip, you may find that a comfortable hold minimizes strain on your hand and wrist, making calligraphy more enjoyable. Remember, caring for your tools means better artwork, so treat your oblique pen with the TLC it deserves!
Q&A
Q: What is the best angle to hold an oblique calligraphy pen?
A: The optimal angle for holding an oblique calligraphy pen is generally between 30 to 45 degrees from the paper surface. This position allows for better ink flow and control, contributing to beautiful letterforms. Experiment with slight adjustments until you find what feels comfortable for you.
Q: How do I avoid discomfort while holding an oblique calligraphy pen?
A: To avoid discomfort, ensure your grip is relaxed and not too tight. Use the pads of your fingers to hold the pen lightly, and consider taking breaks during longer sessions. Adjusting the pen position can also help distribute pressure more evenly, enhancing comfort.
Q: What should I do if my lines are uneven with an oblique pen?
A: If your lines are uneven, check your grip and angle. Maintain a consistent angle of about 45 degrees and practice steady strokes without rushing. Regular practice on improving your muscle memory can also enhance your control over the pen, leading to more uniform lines.
Q: Can beginners use an oblique calligraphy pen effectively?
A: Yes, beginners can use an oblique calligraphy pen effectively! Start by practicing essential grip techniques and familiarizing yourself with the pen’s angles. Focus on simple strokes and gradually work on more complex letters as you gain confidence.
Q: How does an oblique calligraphy pen differ from a straight pen?
A: An oblique calligraphy pen features a slanted nib holder that allows for varied line thickness and better control for flourishing. In contrast, a straight pen holder positions the nib directly perpendicular to the paper, resulting in a different writing experience and technique.
Q: What materials are best for practicing with an oblique calligraphy pen?
A: For practice, use smooth, high-quality paper designed for fountain pens or calligraphy to prevent ink bleed. Additionally, select inks that flow well with your pen nib. These materials facilitate easier writing and improve your technique as you practice the angled grip.
Q: How often should I practice using an oblique calligraphy pen?
A: Aim to practice at least 20-30 minutes a few times a week. Consistent practice is key to mastering the angled grip and developing muscle memory, which will significantly improve your calligraphy skills over time.
Q: What common errors should I avoid when using an oblique calligraphy pen?
A: Avoid holding the pen too tightly, which can lead to cramps and poor control. Also, try not to angle the pen incorrectly; it should be between 30 to 45 degrees from the paper. Regularly reviewing your grip and adjusting for comfort can help minimize mistakes.
In Conclusion
Now that you’ve mastered the angled grip for your oblique calligraphy pen, it’s time to practice and unleash your creativity! Remember, the key to beautiful calligraphy lies in tension and relaxation-finding that balance is crucial. Don’t hesitate to revisit our guide if you need a refresher on any techniques, and check out our tips on “Choosing the Right Calligraphy Paper” and “Exploring Different Calligraphy Styles” for more insights.
Feeling inspired? Join our newsletter for exclusive content and updates. Share your progress with us-drop a comment below or show us your work on social media! The journey to perfecting your calligraphy is just beginning, and every stroke counts. Keep practicing, stay engaged, and watch your skills flourish!