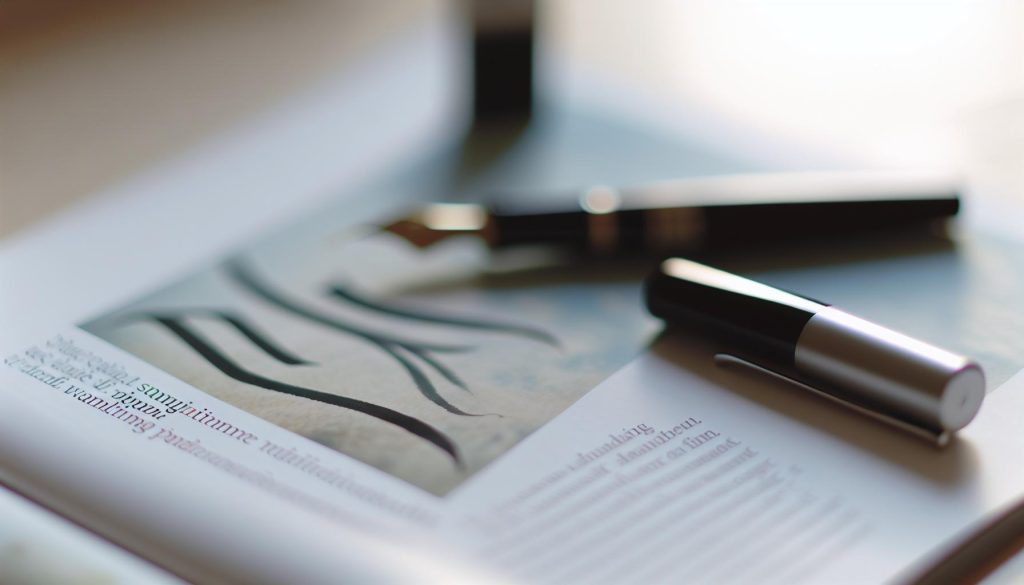
The beauty of calligraphy lies not just in the art itself but in the tools we use to create it. Drawing a calligraphy pen-your instrument for crafting stunning letters-can enhance your appreciation for this elegant art form. Whether you’re a beginner or a seasoned scribe, understanding the anatomy of your favorite pen is crucial. It affects your grip, your flow, and ultimately, your unique style. In this guide, we’ll explore how to draw a calligraphy pen, helping you connect with this vital tool on a deeper level. By the end, you’ll not only improve your drawing skills but also gain insights into the intricate world of calligraphy. So, let’s dive in and bring your favorite pen to life!
Choosing the Right Calligraphy Pen for Beginners
Choosing the right calligraphy pen can be a game-changer for beginners looking to express their creativity and develop their skills in this beautiful art form. A common question newcomers ask is, “Which pen should I start with?” The answer often depends on your goals and style preferences. With so many options available-each offering a unique feel, grip, and line variation-it’s vital to find one that suits your hand and enhances your experience.
When you’re just starting, it’s a good idea to explore a few different types of pens. There are generally three main categories to consider: dip pens, fountain pens, and brush pens. Dip pens offer the most control and versatility, allowing you to switch nibs for various effects. They can be a bit messy, but that tactile engagement is rewarding as you learn the basics of pressure and line thickness. Fountain pens provide a smoother writing experience and are convenient for longer sessions, perfect for developing consistent lettering. Meanwhile, brush pens are fantastic for those drawn to expressive styles, like modern calligraphy. They require a bit of practice but reward you with dynamic strokes and a variety of effects.
Key Features to Look For:
- Comfort: Choose a pen that feels good in your hand; comfort impacts your control and endurance.
- Nib Type: Starter sets often come with different nib sizes-experiment to find which suits your style.
- Ink Flow: Some pens provide uninterrupted ink flow, making it easier for beginners to focus on their technique.
As you navigate through your options, don’t shy away from experimenting with a few different styles. You’ll soon discover your preferences and hone in on the tools that bring out your best work. Remember, the best way to learn is through practice and exploration, so get ready to enjoy the journey of creating captivating calligraphy.
Understanding Different Calligraphy Pen Types
Choosing the right calligraphy pen isn’t just about aesthetics-it’s about finding the instrument that speaks to your artistic style and comfort level. Each type of pen serves a unique purpose, offering different capabilities that can drastically alter your experience. Understanding the fundamental categories of calligraphy pens can help you make an informed decision that enhances your creative journey.
Dip Pens
Dip pens are often the go-to for those seeking full control and versatility. They consist of a nib and a holder, where the nib can be changed to achieve various styles and effects. The beauty of dip pens lies in their ability to allow you to customize your writing experience completely. You can use different nibs for different strokes-fine tips for delicate details or broader nibs for bold, sweeping lines. While dip pens can be a bit messy and require frequent re-dipping in ink, many artists find this tactile experience rewarding. It allows for a deep connection to the ink and paper, making each stroke feel intentional.
Fountain Pens
If you’re looking for convenience combined with style, fountain pens might be your best bet. These pens come with an internal ink reservoir that provides a smooth, uninterrupted flow of ink, making them perfect for longer sessions. They’re also easy to use, which can be a significant advantage for beginners. Many fountain pens offer various nib sizes, allowing you to experiment with line variations without changing tools. This adaptability makes them ideal for creating more consistent lettering while still offering a touch of elegance.
Brush Pens
Brush pens have surged in popularity, especially for modern calligraphy. Unlike traditional pens, they feature flexible brush tips that can create varying line widths depending on how much pressure you apply. This characteristic makes them perfect for expressive styles that require a dynamic touch. While mastering brush pens might take some practice, they reward you with stunning variations in stroke that can elevate your calligraphy. They’re also convenient-most are refillable or come pre-filled with vibrant inks, allowing you to create eye-catching pieces without much hassle.
Conclusion
Each type of pen has its distinct advantages, and what works for you will depend on your style and preference. Don’t hesitate to experiment with all three types. Each offers a unique experience that can enhance not just your calligraphy skills but also your ability to express your creativity in illustrations. Whether you prefer the traditional feel of a dip pen, the smoothness of a fountain pen, or the dynamic strokes of a brush pen, understanding these differences will guide you in illustrating your favorite calligraphy pen with accuracy and passion.
Essential Tools for Drawing a Calligraphy Pen
To bring your drawing of a calligraphy pen to life, having the right tools on hand is essential. Investing in quality equipment not only enhances your illustration but also provides a satisfying experience as you create. Here’s a rundown of must-have tools that can elevate your calligraphy pen drawings.
Start with a good sketchbook. Choosing a sketchbook with decent paper quality is vital-look for smooth, thick pages that can handle various media, from graphite to ink. You want the paper to allow for clean lines and textures without bleeding. Consider different sizes, too; a larger sketchbook can give you more space for details.
Next, gather a range of pencils. A mix of HB and softer pencils will help you sketch out your initial shapes and refine your lines. For outlining, an ink pen or fineliner can offer crisp, defined edges. Micron pens are particularly popular because they come in various nib sizes and provide consistent ink flow. Having a few different sizes on hand can help you capture both fine details and bold outlines effectively.
Don’t forget about erasers-precision erasers, like kneaded or mechanical ones, allow for targeted corrections without smudging. It’s crucial to keep your drawing clean, especially when constructing shapes for a calligraphy pen, which often has intricate details.
Lastly, consider including colored pens or markers if you want to add flair after your line work is complete. Brush pens can also be excellent for adding shading or highlights, as their flexible tips allow for varying thickness in strokes. This versatility mirrors the expressiveness of real calligraphy.
With these tools at your disposal-quality paper, a range of pencils, precision erasers, and inking supplies-you’ll be well-prepared to illustrate a calligraphy pen that’s not only aesthetically pleasing but also rich with character and detail. Happy drawing!
Step-by-Step Guide to Drawing a Calligraphy Pen
To illustrate a calligraphy pen effectively, you don’t need to be an expert artist-just a little guidance and practice can go a long way. Start by visualizing the pen’s shape and how its parts interact with each other. This mental image will help you create a more accurate drawing. Here’s a clear and straightforward approach to capturing the elegance of your favorite calligraphy tool.
Begin with basic shapes to construct the pen’s framework. Use simple geometric forms, like ovals and rectangles, to outline the pen’s body and nib. Sketch lightly with a pencil so you can adjust proportions easily. For instance, the cap should taper gracefully, and the diameter of the barrel can vary based on the pen’s design. Once you have the basic outlines, refine the shapes, ensuring they capture the essence of the pen.
Next, it’s time to focus on the nib. A calligraphy pen typically has a distinctive nib shape, which can be either pointed or broader depending on the style of calligraphy. Pay attention to details like the slit in the nib and any unique design aspects. To add depth, employ shading techniques-notice where the light hits and where shadows fall. This contrast will give your drawing dimension and realism.
After establishing the outline and shading, finalize your drawing by inking over your pencil lines. Use a fine-liner or a brush pen for this, as it echoes the qualities of the calligraphy pen. Emphasize the elegant curve of the pen’s body and ensure that the lines mimic the fluid motion of writing. Once the ink dries, gently erase any remaining pencil marks to clean up the illustration.
Lastly, consider adding elements that reflect the artistic nature of calligraphy. Perhaps you can incorporate a swirl of ink around the pen or use watercolor washes to suggest a splash of color. This final touch can elevate your drawing from a simple illustration to a captivating piece of art that showcases the beauty of the calligraphy pen. Enjoy the process, and let your creativity flow!
Tips for Adding Realistic Details in Your Illustration
To elevate your illustration of a calligraphy pen from basic to beautifully realistic, focus on the details that bring your drawing to life. The essence of a well-drawn pen lies in subtle features that capture both its physical attributes and artistic potential.
First, pay close attention to the finish of the pen’s body. Whether it’s glossy, matte, or metallic, each surface reflects light differently. Use highlights to indicate glossy sections-create small white spots where light hits most directly. For matte finishes, keep shading soft and smooth, avoiding sharp contrasts. This will enhance the illusion of depth and material.
Next, don’t overlook the nib. This part of the pen is paramount in defining its character. Carefully depict the nib’s shape and any engravings or details it may have. Incorporate the characteristic slit and the slight curve, which often gives it a unique personality. Utilizing cross-hatching or stippling techniques can effectively mimic the texture of the nib, implying its metallic quality. Shadowing around the nib adds depth, making it appear as if it’s jutting out from the pen itself.
Consider the context in which the pen exists within your drawing. Adding elements like an inkwell or a swirl of ink can enhance the story your illustration tells. The motion of ink swirling around or dripping can bring a feeling of action and creativity to the piece, inviting viewers to imagine the flow of thoughts that led to the beauty of calligraphy.
Finally, if you’re using color, choose a palette that reflects the understated elegance of calligraphy. Rich, slightly muted tones work beautifully. A splash of color in the ink can make the illustration pop, while maintaining the sophistication associated with elegant writing instruments. Balancing color and detail ensures your drawing not only embodies the calligraphy pen but also resonates with the creative journey it represents.
Common Mistakes to Avoid When Drawing Calligraphy Pens
Illustrating a calligraphy pen can be a rewarding experience, but even seasoned artists often stumble over common pitfalls. One of the most frequent mistakes is neglecting the pen’s proportions and perspective. When drawing, it’s crucial to observe how the pen appears in space. If you get the angles wrong, your pen can end up looking flat or distorted. Take a moment to sketch light guidelines for the main shapes before diving into details; this will help maintain the right proportions.
Another common hiccup is underestimating the importance of texture and material differences. A calligraphy pen often combines various materials, like metal for the nib and plastic or wood for the body. Failing to depict these accurately can make your drawing feel one-dimensional. Remember to incorporate varied shading techniques-sharp highlights for metallic surfaces and softer strokes for matte finishes. This contrast adds realism to your work and captures the attention of viewers.
Also, pay attention to the nib, as it’s the beating heart of the pen. Many beginners rush through this part, treating it as a minor detail. In reality, the nib should be rendered with care-capture its unique shape and any intricate details. Consider how light interacts with the nib to further enhance its dimensionality. Use cross-hatching or stippling to suggest texture and avoid flat lines that don’t convey the material characteristics.
Lastly, don’t forget the context of your illustration. Incorporating elements that complement your pen, like an ink swirl or an inkwell, can elevate your drawing significantly. It’s often the smallest details in a composition that create the largest impact. By avoiding these common mistakes and paying attention to detail, you’ll not only improve your skill but also bring your illustrations of calligraphy pens to life in a way that truly honors this beautiful tool.
Incorporating Calligraphy Pens in Artwork
When you incorporate calligraphy pens into your artwork, you’re not just adding a tool; you’re weaving a narrative that celebrates the beauty of writing. These pens have a character that enhances your artistic compositions, making them feel more dynamic and layered. Start by positioning the pen as a central piece of your illustration. Think about how it interacts with other elements, such as ink splatters, parchment, or existing words. This setup can create a lively scene that captures the essence of calligraphy.
One effective way to showcase your calligraphy pen is to create a themed artwork. For instance, if you’re inspired by the elegance of classic poetry, you could place a beautifully decorated pen atop an ancient script or an open book. This setting not only highlights the pen but also gives context to its usage. Consider employing layers in your designs, using various mediums like watercolors or ink washes in the background to provide depth. This adds a sense of atmosphere and pulls the viewer’s eye to the pen.
Don’t shy away from using combinations of styles. Experimenting with modern design elements against traditional calligraphy can yield striking results. For example, a stark, minimalist background featuring a highly detailed calligraphy pen creates a beautiful contrast that draws attention. Use contrasting colors that enhance the pen’s colors and materials, reflecting light and shadow realistically.
Remember, every detail counts. Incorporate elements that resonate with the theme of your piece, whether it’s a vintage inkwell next to the pen or an ornate cap lying beside it. These small elements tell a richer story, adding layers of meaning and depth to your illustration. The goal is to make your artwork feel alive, capturing the essence and joy of using a calligraphy pen. Through thoughtful integration of your tools into artwork, you’ll not only illustrate a pen; you’ll immortalize its place in the art of writing.
Exploring Styles: Modern vs. Traditional Calligraphy Pens
The world of calligraphy pens is rich and varied, with styles that reflect distinct philosophies and artistic expressions. Whether you’re drawn to the elegant curves of traditional calligraphy or the clean lines of modern design, understanding these differences will not only enhance your appreciation but also inform your illustrations.
Traditional calligraphy pens, often referred to as dip pens or fountain pens, are designed to create beautiful, flowing letters that evoke a sense of history and craftsmanship. Using nibs of varying widths, they allow for intricate line variation, giving each stroke a unique character. Artists often use these pens with ink that flows smoothly, enabling graceful movements typical of classic scripts like Copperplate or Gothic. These pens demand a bit of practice; mastering their nuances can unlock a world of artistic potential. When illustrating a traditional pen, focus on capturing its delicate features-a long slender body, possibly embellished with ornate designs, and a nib that suggests both precision and artistry.
In contrast, modern calligraphy pens and markers often prioritize convenience and versatility. These tools are designed to cater to today’s artists looking for ease of use and vibrant colors. Brush pens, for instance, allow for both broad strokes and fine detail, making them ideal for expressive lettering styles. They come in a rainbow of colors and often feature flexible tips that mimic the effects of traditional brushwork without the steep learning curve. When drawing a modern calligraphy pen, highlight its bold colors and streamlined shape, and consider incorporating hand-lettering elements that reflect contemporary trends.
Both styles have their place in the creative process. Incorporating these elements into your artwork not only showcases your skill with the pen but also tells a story-one of tradition versus innovation. You can create dynamic compositions by juxtaposing modern and traditional elements. For example, imagine a sleek modern brush pen next to an antique, ink-filled dip pen on a canvas, allowing the viewer to appreciate the progression of calligraphy tools over time. By understanding the distinct characteristics and strengths of each pen style, you can better convey their essence in your illustrations, celebrating both the art of writing and the tools that make it possible.
Advanced Techniques for Drawing Calligraphy Pens
To elevate your drawings of calligraphy pens, mastering a few advanced techniques can make all the difference. Instead of just replicating the pen’s shape, focus on creating depth and personality in your illustrations that echo how these instruments make art come alive. Here’s how to add those essential finishing touches and textures that will captivate viewers.
One effective method is to use shading to reflect how light interacts with the pen’s surfaces. Start by determining the light source in your illustration. The areas where the light hits directly should be the brightest, while the opposite sides will have more shadow. Utilize a gradient technique: begin with a lighter shade and gradually blend in darker tones. This approach not only enhances realism but also gives the pen depth, making it feel tangible. Consider using colored pencils or fine-tipped markers for detailed shading, as these allow for smooth transitions and fine control.
Additionally, pay attention to the finer details that differentiate each type of calligraphy pen. For instance, traditional nibs often feature intricate designs or filigree. Use fine liners or ultra-fine pens to replicate these details, ensuring that you capture the essence of craftsmanship. Modern pens may feature a more streamlined, minimalist design, so use clean lines and bold strokes to emphasize their simplicity. An illustration might also benefit from adding drops of ink or strokes of color around the pen to suggest movement or creativity, further engaging the viewer.
Texturing is another key element in your advanced drawing toolkit. For metallic pens, employ cross-hatching techniques to create a sense of sheen. For wooden or matte finishes, a dotted texture can convey a more rustic or tactile vibe. Remember, it’s not just about making the pen look good; it’s about telling the story of the pen through your drawings. Incorporate elements that reflect how you envision this tool being used-perhaps show the ink flowing or hint at letters being formed around it.
Finally, don’t shy away from experimenting with composition. Place the pen in an environment where it feels alive-like in an artist’s hand or beside paper filled with swirling scripts. The context can dramatically enhance your illustration by providing a narrative that captures the viewer’s imagination, making your work not just an image of a pen, but a moment of artistic creation.
By implementing these techniques, you’ll not only produce visually compelling illustrations of calligraphy pens but also infuse them with personality and context that resonate with your audience. Happy drawing!
Inspiration: Famous Calligraphy Artists and Their Pens
Many calligraphy artists have made their mark by skillfully wielding their pens, turning writing into art. Their tools often tell as much of a story as their creations do. For instance, the legendary Edward Johnston, widely regarded as the father of modern calligraphy, famously used a broad-nibbed pen. This style allowed him to create the iconic Johnston Sans typeface, which continues to influence designers today. His emphasis on legibility and a personal touch reshaped how we view calligraphy-a blend of precision and personality that resonates deeply with artists.
Another influential figure is Alice Koeth, known for her exceptional brush lettering. Koeth’s choice of a flexible brush pen enables her to produce graceful and fluid strokes. This tool also allows for dynamic thick and thin transitions, making her work appear lively and expressive. If you admire the art of brush lettering, studying her techniques can offer insights into how to animate your calligraphy illustrations, capturing motion and emotion in your drawings.
Famed calligrapher Seb Lester has taken digital calligraphy to new heights, showcasing his artistry through platforms like Instagram. His use of the classic fountain pen, combined with modern technology, bridges traditional craftsmanship with contemporary aesthetics. Lester’s approach highlights the importance of understanding each pen’s unique characteristics-both analog and digital-to harness its capabilities. As you illustrate your own calligraphy pens, consider how these artists might inspire your perceptions of different tools.
To connect deeper with your subject, investigate the pens used by these artists. Observing their unique styles can ignite your creativity and help you articulate your approach. Whether it’s the elegance of a traditional nib or the playful versatility of a brush pen, capturing the essence of these renowned tools in your artwork will enrich your illustrations, allowing the spirit of calligraphy to shine through. Embrace the inspiration from these masters, and let their stories elevate your drawing practice.
Resources for Further Learning in Calligraphy Drawing
To elevate your skills in calligraphy drawing, tapping into a wealth of resources is essential. You’ll find that learning from various mediums, whether online platforms, books, or workshops, can significantly enhance your understanding and technique. There’s an abundance of materials tailored to both beginners and seasoned artists, making it easier than ever to refine your skills.
Online platforms like YouTube are treasure troves of instructional content. Seek out channels that specialize in calligraphy and illustration; many artists share tutorials that not only cover the basics but also dive into advanced techniques. Supplement your learning with specific courses available on websites like Skillshare or Udemy, where structured lessons guide you through comprehensive topics in both calligraphy and drawing.
Books can also be invaluable. Look for titles that focus on the theory and practice of calligraphy, offering exercises and examples. Notable books include “The Art of Calligraphy” by David Harris, which investigates various styles and techniques, or “Calligraphy for Dummies” for a more straightforward approach. These resources often include practical exercises to help you develop your skills.
Lastly, connecting with a community can greatly enhance your journey. Join local or online calligraphy groups, where you can share your work, get feedback, and find motivation. Websites like Instagram and Pinterest are fantastic for inspiration-follow calligraphy artists, engage in challenges, and participate in discussions. This sense of community not only provides fresh ideas but can also ignite your passion for calligraphy drawing, leading you to create illustrations that truly resonate.
Sharing Your Calligraphy Pen Illustrations Online
can open doors to community engagement, constructive feedback, and even professional opportunities. With platforms like Instagram, Pinterest, and dedicated art forums, you can showcase your unique perspective and connect with fellow art enthusiasts who appreciate the beauty of calligraphy. It’s more than just posting a picture; it’s about sharing your journey and passion for this art form.
Start by curating your content thoughtfully. High-quality images are essential-consider natural lighting and clean backgrounds to make your illustrations pop. Use editing tools to enhance your images, but stay true to the colors and details of your original work. When you post, add engaging captions that tell the story behind your artwork or share insights about your creative process. This personal touch fosters a deeper connection with your audience.
To expand your reach, utilize hashtags strategically. Research popular tags in the calligraphy community, such as #CalligraphyArt or #HandLettering, but don’t hesitate to create a few unique to your style. Engaging with other artists by commenting on their work or participating in challenges helps build relationships and can encourage reciprocity in engagement. Remember, the online art community thrives on collaboration and support.
Also, consider setting up a dedicated art account or blog. This can serve as a portfolio and a space for you to document your artistic growth. Share tips, tutorials, and behind-the-scenes content to attract followers who share your interests. Platforms like Etsy can also provide opportunities to sell prints of your work, giving you a chance to turn your passion into profit.
In summary, is about more than just exposure-it’s about building a community, sharing your passion, and inspiring others. Use all available tools to create a connection that can enrich your artistic journey.
Frequently asked questions
Q: What materials do I need to draw a calligraphy pen?
A: To draw a calligraphy pen, you’ll need high-quality drawing paper, a graphite pencil for sketching, fine-tipped black pens or markers, and optional colored inks or watercolors for detailing. These tools enhance your ability to illustrate the fine features and textures of your favorite calligraphy pen.
Q: How can I make my calligraphy pen drawings look more realistic?
A: To achieve realism in your calligraphy pen drawings, focus on lighting and shadows. Observe how light interacts with the pen’s surfaces, then add highlights and shading accordingly. Incorporating realistic details, like the texture of the nib and the glossy surface of the barrel, can also enhance authenticity.
Q: What are the basic steps for sketching a calligraphy pen?
A: Begin with a light outline of the pen’s shape, then refine the details such as the nib, grip, and decorative elements. Gradually build up layers of ink or color while erasing any stray lines. Refer to images of real pens for accuracy in proportion and details.
Q: Can I draw a calligraphy pen digitally?
A: Yes, you can draw a calligraphy pen digitally using software like Adobe Illustrator or Procreate. Use layers to create outlines, add details, and adjust colors. Digital tools allow for easy corrections and enhancements, making your process more flexible.
Q: What tips can I follow to avoid common drawing mistakes?
A: To avoid common mistakes, take your time with the sketching phase and use reference materials. Regularly step back to assess proportions and perspective. Practice drawing basic shapes before attempting the pen to build confidence in your drawing skills.
Q: How do different calligraphy pen styles influence their illustration?
A: Different calligraphy pen styles, such as pointed vs. flat nibs, affect the way you illustrate features like the tip and grip. Understanding these variations will help you depict the unique characteristics of each pen, enriching your artwork’s diversity.
Q: When is it best to share my calligraphy pen illustrations online?
A: The best time to share your calligraphy pen illustrations is during peak hours when your target audience is most active, typically in the evening or weekend. Engaging with online communities centered on art or calligraphy can also boost visibility and feedback for your work.
Q: Why is understanding historical calligraphy important for my illustrations?
A: Understanding historical calligraphy styles enriches your illustrations by informing you about pen types used in various periods. This knowledge can inspire more authentic designs and help you appreciate the evolution of calligraphy, enhancing your artistic expression.
The Conclusion
Now that you’re equipped with the skills to draw a calligraphy pen, why not take your artistry further? Experiment with different styles, or explore how to create beautiful lettering with your new tool. If you enjoyed this tutorial, check out our guides on “Top Calligraphy Techniques” and “Best Tools for Modern Calligraphy” for more inspiration and expert tips.
Don’t forget to share your creations with us in the comments below! We love seeing what you come up with. And if you want to stay updated on all our latest tutorials, consider signing up for our newsletter. Remember, practice makes perfect, so grab that pen and start illustrating! Your artistic journey is just beginning, and we’re excited to be a part of it.


