Have you ever marveled at the elegance of beautifully penned calligraphy? A glass calligraphy pen can elevate your lettering game to a whole new level. This unique tool not only adds a touch of sophistication to your writing but also allows for intricate designs and stunning color variations. If you’re looking to impress your friends with personalized cards or simply want to explore a new artistic avenue, this guide will show you exactly how to use a glass calligraphy pen effectively. From selecting the right ink to mastering the grip, we’ll walk you through everything you need to know. So grab your pen, let’s unleash your creativity, and transform your writing into art!
How Glass Calligraphy Pens Work: The Basics
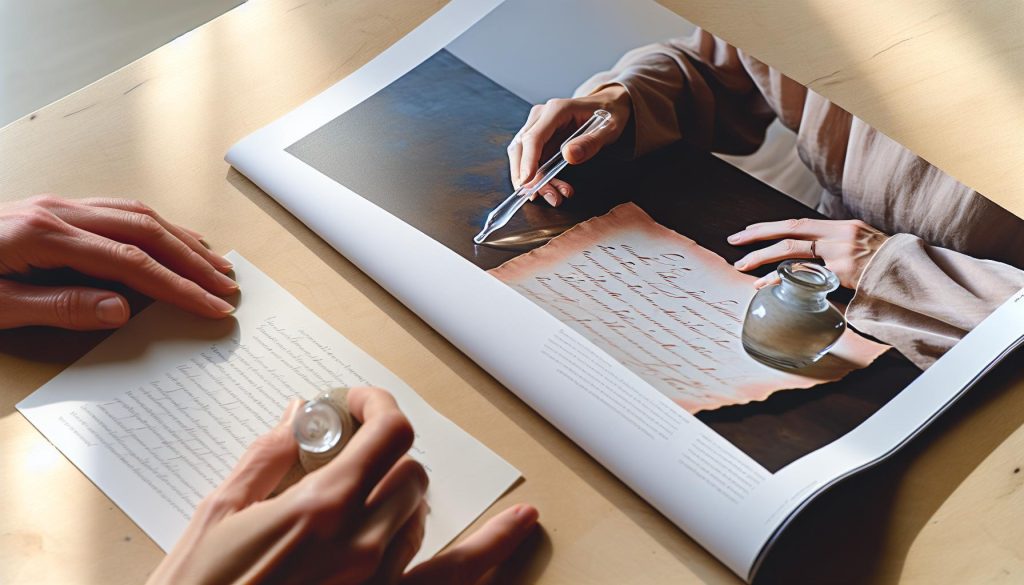
Using a glass calligraphy pen can be both captivating and rewarding. At its core, this unique tool combines artistry with precision. The beauty of glass pens lies in their ability to create smooth, flowing strokes thanks to their hollow, bulbous nibs, which draw ink up through capillary action. They are ideal for achieving fluid line variations, whether you’re writing elegant letters, ornate invitations, or intricate illustrations.
The functionality of these pens is relatively straightforward. First, fill the pen by dipping the nib into ink, allowing it to soak up the color through a simple yet effective process. The curved design of the nib helps to retain enough ink for a multitude of strokes before needing to be re-dipped. As you write, the ink flows smoothly, allowing for controlled pressure and speed. This means you can produce everything from fine hairlines to bold strokes with just a flick of your wrist.
Remember that practice is key. Beginners might find it helpful to experiment with different inks and papers to see how the pen behaves, as these factors can significantly affect the final outcome. Start with basic shapes and letters, focusing on maintaining consistent pressure. Over time, you will find your rhythm, developing both speed and finesse in your calligraphy, allowing your personal style to come to life on the page. Embrace the process, and enjoy the blend of tradition and creativity that glass calligraphy offers.
Choosing the Right Glass Calligraphy Pen for You
Choosing a glass calligraphy pen is more than just picking a pretty tool; it’s about finding the perfect match for your style and skill level. With various options on the market, each designed for different effects and techniques, it’s essential to consider your personal preferences and what you hope to achieve in your calligraphy journey.
When selecting a pen, first, think about the nib size. Finer nibs are great for delicate details and elegant lettering, while bolder nibs allow for more dramatic strokes and thicker lines. If you’re just starting, a medium-sized nib offers a good balance, giving you versatility as you learn. Don’t be afraid to test out several options-most craft stores will let you try a sample if you ask nicely!
Another crucial factor is the weight and balance of the pen. A well-balanced glass pen feels comfortable in your hand and allows for better control during writing. Hold different pens to see which feels right. The grip should be natural; too heavy or too light can affect your stroke consistency.
Material Matters
Most glass pens are made from high-quality, durable glass that can withstand frequent use, but they do vary in design. Some feature intricately twisted or beautifully colored glass, making them not just a writing tool but also a piece of art. If aesthetics are important to you, invest in a pen that aligns beautifully with your creative vision.
Lastly, consider how easy it is to clean and maintain the pen. A pen with a wider nib might be harder to clean thoroughly, while simpler designs might offer easier maintenance. Remember, a little care goes a long way in ensuring the longevity of your pen.
Ultimately, the right glass calligraphy pen depends on your specific needs and artistic goals. Enjoy the exploration, and choose a pen that not only enhances your writing experience but also inspires your creativity. Happy writing!
Essential Supplies for Glass Calligraphy Success
Creating stunning pieces of calligraphy with a glass pen isn’t just about the pen itself-it’s also about having the right supplies at your fingertips. When you gather the essential tools for your glass calligraphy journey, you’ll empower your creativity and elevate your skills.
Start with high-quality inks. The choice of ink dramatically impacts your work. For glass pens, you’ll want to use fluid inks that flow smoothly without clogging the nib. Bottle inks specifically designed for dip pens work best. Consider experimenting with various colors and opacity levels to find what suits your style. Don’t forget to keep a few shades handy; mixing and layering can produce breathtaking effects.
Next up is quality paper. Regular printer paper can be too absorbent and may cause inks to bleed or feather. Instead, opt for smooth, heavyweight paper that holds up well to ink without warping. Look for papers labeled as “calligraphy” or “fine writing.” Practice pads made for ink work can also offer excellent surfaces for honing your skills without the commitment of a final piece.
To maintain your glass calligraphy pen, you’ll need cleaning supplies. A simple setup includes a soft cloth and some distilled water. After each use, cleaning the nib prevents ink buildup and ensures your pen is ready for the next session. If you’re using colored inks, having a dedicated brush or cotton swab can help get into those hard-to-reach places for best results.
Lastly, don’t underestimate the value of a comfortable workspace. A well-lit area with an uncluttered desk makes a significant difference in your creative flow. Strong lighting helps you see your strokes clearly, whether you’re working on intricate designs or simply practicing. Have your supplies organized within arm’s reach, so you spend less time searching and more time creating.
With these essentials-inks, paper, cleaning supplies, and a supportive workspace-you’re ready to dive into the world of glass calligraphy. Each tool helps transform your vision into reality, allowing you to create beautiful, flowing scripts that captivate and inspire.
Mastering Basic Techniques for Beautiful Strokes
Creating beautiful strokes with a glass calligraphy pen is an art form that revolves around mastering a few fundamental techniques. The way you hold the pen, the pressure you apply, and your wrist movement come together to create those elegant lines and curves that are so captivating. It might sound daunting at first, but with practice, you’ll find that the magic happens when you learn to let the pen glide over the paper, using fluid motions to produce varying thicknesses with ease.
One of the first techniques to master is the angle at which you hold the pen. Generally, a 45-degree angle is where most novices start, as it allows for smooth ink flow and better control. However, experimenting with angles as you get comfortable can help you discover what feels right for you. Coupled with this is the importance of pressure; applying more pressure while pushing down creates thicker lines, while lighter touches produce thinner strokes. A simple practice exercise is to create a series of lines, varying the pressure intentionally to see how the stroke width changes.
Practicing Continuous Strokes
Focus on creating continuous strokes without lifting the pen from the paper. This not only improves your muscle memory but also enhances your control and fluidity. Try writing out simple shapes or letters repeatedly, ensuring each stroke connects smoothly with the next. Gradually, you can introduce loops and curls, experimenting with different speeds to find how it affects the stroke quality. Remember, consistency is key.
Emphasizing Curves and Dots
Don’t overlook the power of curves and dot accents in your calligraphy. Start with simple round shapes or spirals to grasp the concept of fluid movement. As you gain confidence, incorporate dots by quickly flicking the pen upwards after completing a stroke. These tiny details can add personality and flair to your work.
Practice is where your abilities will truly blossom. Set aside time each day to experiment with different strokes and techniques. Create a warm-up routine before diving into your projects-think of it as a dance between your hand and the pen. Each stroke is a step closer to mastering the beautiful art of glass calligraphy, leading you towards creating stunning pieces that reflect your unique style. Remember, everyone starts somewhere; embrace your journey, and let your creativity flow!
Advanced Calligraphy Techniques to Impress
To truly elevate your glass calligraphy, mastering advanced techniques can transform your work from simple writing to stunning artistry. One of the most impactful ways to impress is by incorporating varied stroke styles. Play with the contrast between thick and thin lines, using your pen’s angle and pressure to create dynamic flourishes. Think of calligraphy as a musical composition; each stroke has its own rhythm and beat. Adding embellishments like swirls, loops, and underlines not only enhances aesthetic appeal but also adds a personal touch to your pieces.
Utilizing Color and Texture
Don’t underestimate the power of color in your calligraphy. Experiment with different inks, perhaps pairing your glass pen with metallic or iridescent hues for an eye-catching effect. Mixing textures can also add depth; consider combining traditional ink with watercolor washes for a more artistic feel. Remember, the choice of paper impacts your results as well. When you’re using a glass pen, smooth or slightly textured surfaces can yield different ink flows, so test a few options.
Creating Multi-Layered Projects
Another impressive technique is layering text and designs. Start with a foundational layer of calligraphy, then add additional elements like illustrations or patterns around it. This adds complexity and intrigue to your work. Use transparent paper for overlays or try creating shadow effects by slightly offsetting additional layers of ink. It’s like crafting a sophisticated tapestry; each thread tells a part of your story.
Your unique style will shine as you implement these advanced techniques. The goal is not only to capture beauty but to tell a story through your strokes. Don’t be afraid to break the rules-innovation often stems from experimentation. In the world of glass calligraphy, your creativity knows no bounds!
Creating Stunning Artwork with Glass Calligraphy
Creating stunning artwork with a glass calligraphy pen is all about embracing the unique qualities of this beautiful tool. The transparent and delicate nature of glass calligraphy pens allows for exquisite details and vibrant strokes that can elevate your art to new heights. Whether you’re writing a heartfelt letter, crafting invitations, or designing art pieces, the allure of a well-executed stroke can leave a lasting impression.
To begin harnessing the beauty of glass calligraphy, consider your workspace and tools. Start with high-quality paper that can handle the specifics of your ink. Smooth paper often works wonders, but experimenting with lightly textured surfaces can yield exciting results. Choose inks that complement your glass pen; vibrant colors and shimmering metallics can enhance the transparency effect and create depth in your designs.
Don’t shy away from layering your work. One technique is to write your base text and then add embellishments or decorative elements around it. This creates a beautiful, multi-dimensional effect that draws the eye. You can also experiment with different applications of ink-try filling in larger areas with subtle washes or fine lines for contrast. Using your glass pen for both writing and illustration opens a world of versatility.
Also, remember to embrace the imperfections. Glass calligraphy is a journey, and the slight variations in your strokes can add character to your work. Each piece you create tells a unique story, and that authenticity resonates deeply with your audience. So, let your creativity flow, and don’t be afraid to express your individuality. Every mark you make has the potential to become a masterpiece-just trust in your tools and your vision.
Maintaining and Caring for Your Glass Pen
Caring for your glass calligraphy pen is essential for maintaining its performance and ensuring that your artwork remains exquisite. Unlike traditional pens, glass pens require a bit more attention due to their delicate nature. A few simple steps can keep your tool in top shape and lasting for years.
To start off, it’s crucial to clean your glass pen after each use. Inks can dry quickly, especially if you’re using vibrant or metallic colors. After you’re done writing, rinse the pen under warm water. Avoid using hot water, which can lead to thermal shock. Use a soft cloth or a gentle brush to wipe away any leftover ink; this prevents clogging and keeps the nib in pristine condition. If the ink residue is stubborn, a mild soap solution can help, but make sure to rinse thoroughly afterward to avoid any soapy residue interfering with future use.
Storing your glass pen properly is just as important as cleaning it. Always lay it flat or keep it in a soft case that prevents the nib from getting damaged. Avoid standing it upright in a cup, as this can lead to unnecessary pressure on the delicate nib and may cause it to chip or break. If you have multiple pens, consider keeping them in a dedicated pencil case or a padded box-this not only protects them but also keeps them organized.
Lastly, be mindful of how you handle your pen. Glass is beautiful but fragile, so handle it with care to avoid drops or rough handling. Keeping your workspace clutter-free can help prevent accidents. By taking these simple precautions, your glass calligraphy pen will continue to produce beautiful strokes that enhance your calligraphy projects for years to come.
Troubleshooting Common Issues in Glass Calligraphy
Using a glass calligraphy pen opens up a world of beautiful writing possibilities, but you might encounter a few bumps along the way. It’s crucial to tackle these common issues head-on, so your artistic flow remains uninterrupted. Problems like ink skipping, smudging, or clogging can be frustrating, but with some straightforward troubleshooting tips, you can keep your pen performing at its best.
First off, if your pen is skipping or not flowing smoothly, it could be due to a few reasons. Ensure you’re using the right ink; some inks work better with glass pens than others, especially those formulated for dip pens. If you’re experiencing skipping, try gently re-dipping the nib into the ink or adjusting your angle of writing. Sometimes, simply holding the pen differently can make a significant impact. Another strategy is to clean the nib; dried ink can easily cause clogging. A quick rinse under warm water often does the trick.
Smudging can be another pesky issue, especially if you’re using quick-drying inks or working on glossy paper. To minimize smudging, consider using a light touch while writing and allow each stroke to dry fully before moving on. Experiment with different papers as well; some surfaces are more prone to inky chaos than others. If you consistently face smudging, it might be worth switching to a matte finish paper for more control over drying times.
Lastly, if you’re dealing with stubborn ink residue that just won’t come off after cleaning, don’t stress. Soak the nib in a mild soap solution for a short period, then gently scrub with a soft brush to remove any remaining build-up. Rinsing thoroughly afterward is key to ensuring no soap residue gets absorbed the next time you use the pen.
Remember, every artist experiences hiccups on their creative journey. With these troubleshooting tips in hand, you can confidently address common issues and enjoy the elegance and fluidity that glass calligraphy pens provide. You’ll find that most problems are easily resolved, allowing you to focus on creating stunning artwork rather than fretting over your tools.
Inspiring Projects to Try with Glass Calligraphy
Diving into glass calligraphy offers a unique blend of artistry and craftsmanship that can lead to stunning projects. One of the most exciting aspects of using a glass calligraphy pen is the sheer versatility it provides. Not only can these pens produce beautiful lettering, but they can also be used to create intricate designs on various materials. So, let’s explore some inspiring projects that will set your creativity ablaze!
Start by designing personalized greeting cards. The elegance of glass calligraphy can elevate any card, making it a cherished keepsake. Choose a special occasion-birthdays, weddings, or holidays-and let your writing shine. Experiment with different paper types and colors to find the perfect backdrop for your calligraphy. To add a personal touch, incorporate decorative elements like illustrations or watercolor washes that complement your lettering.
Consider branching out into home decor items next. Use your glass calligraphy skills to create framed quotes or wall art. Select inspiring or meaningful phrases and pair them with decorative frames. You can also write directly on mirrors or windows using glass-safe ink for a slightly different effect. This project not only beautifies your space but also provides daily motivation.
For those looking to merge functionality with aesthetics, personalized gifts are a wonderful avenue. Craft custom glassware, such as mugs or vases, adorned with elegant quotes or the recipient’s name. Choose appropriate inks that are dishwasher safe, so your creations remain practical. These gifts tell a story and show thoughtfulness that the recipient will treasure.
Lastly, don’t overlook the opportunity to collaborate with other artists! Join forces with watercolorists or mixed-media creators to combine your calligraphy with their styles. This collaboration can lead to unique results and inspire further creativity, opening up even more project ideas. From making journals to lauding your calligraphy on wedding invitations, the potential is boundless.
By engaging in these projects, you’ll not only hone your skills but also infuse a touch of elegance into everyday life. Remember, the journey of an artist is filled with exploration and discovery, so don’t hesitate to venture into new themes and techniques. Each project is a chance to elevate your glass calligraphy from simple writing to extraordinary art.
Exploring Different Inks and Colors for Unique Effects
Choosing the right ink for your glass calligraphy projects can elevate your work from good to extraordinary. Glass calligraphy pens are designed to create stunning, transparent lettering, and the ink you choose plays a crucial role in achieving that perfect effect. Depending on your vision, you can explore a variety of inks, each offering unique characteristics that can enhance your designs.
Start with the basics-permanent inks are a popular choice for glass surfaces. These inks adhere well and can withstand the test of time, making them ideal for projects like personalized gifts or permanent wall decor. Look for inks specifically formulated for glass, as they will provide a smooth flow and vibrant colors. Opaque inks are another option, providing a solid color that stands out against clear surfaces, which can be particularly eye-catching if layered or combined with other techniques.
When you want to add a bit of flair, consider metallic inks. These inks can give your calligraphy a luxurious look, especially when used on darker backgrounds. They catch the light beautifully, creating an eye-catching shimmer that adds depth to your writing. If you’re feeling adventurous, experiment with iridescent or glitter inks for a whimsical touch. These inks can create unexpected effects and bring a sparkle to events like weddings or celebrations.
To truly unlock your creativity, don’t shy away from mixing colors. Combining different shades and layering them can lead to spectacular outcomes. Practice on scrap materials to find the perfect combinations that suit your style. Remember that the flow and consistency of the ink are essential for achieving clean, beautiful strokes, so always test your inks before starting a significant piece.
Ultimately, the right ink can transform your glass calligraphy projects into meaningful works of art. Take the time to experiment with various inks and colors to discover the best fit for your unique style and project needs. With a little experimentation, you’ll find the perfect combination that resonates with your artistic vision and sets your work apart.
Connecting with the Glass Calligraphy Community
can elevate your practice beyond solitary work to a vibrant exchange of ideas and inspiration. Engaging with fellow enthusiasts provides not just motivation but invaluable feedback that sharpens your skills. Whether you’re a beginner eager to learn or a seasoned artist aiming to share your knowledge, community is essential for growth and creativity.
Online Platforms and Social Media
Start by exploring social media platforms like Instagram and Pinterest, where hashtags such as #GlassCalligraphy and #CalligraphyCommunity flourish. These spaces showcase incredible work and often lead to tutorials and live demonstrations. Joining Facebook groups dedicated to calligraphy can also provide a collaborative environment where members share tips, challenges, and inspire one another with their projects. Consider participating in Instagram challenges that encourage you to create and post within a themed week or month; this not only push your creative boundaries but connects you with others on similar journeys.
Workshops and Local Meetups
Look for workshops or classes in your area or online. Many local art studios offer sessions on glass calligraphy, which are great for hands-on learning and making connections with like-minded creators. Attending craft fairs or art exhibitions can also introduce you to other artists and allow you to showcase your work. Don’t hesitate to collaborate with local calligraphers or to organize meetups-sharing knowledge in person can ignite fresh ideas and foster friendships.
Resources and Continued Learning
Lastly, consider tapping into resources like blogs, YouTube channels, and podcasts focused on calligraphy and lettering. These platforms often feature interviews with experts who provide insights into different styles, techniques, and tools. Engaging with these materials will keep your skills sharp and your creativity flowing, and sharing what you learn within the community helps everyone thrive.
By immersing yourself in the glass calligraphy community, you’ll not only improve your craft but also enjoy the companionship and encouragement that fuels artists everywhere. So reach out, share your journey, and relish the communal joy of creating beautiful art together.
Resources for Further Learning and Inspiration
Exploring the world of glass calligraphy can lead you to some incredibly rich resources that expand your skills and inspire your creativity. Whether you’re just starting out or looking to refine your technique, there’s a wealth of information that can help you navigate this beautiful art form.
Online platforms are an excellent starting point. Websites like YouTube feature countless tutorials where experienced calligraphers demonstrate techniques in real-time, making it easier for you to learn and practice. Blogs dedicated to calligraphy often delve deep into topics ranging from beginner advice to advanced styles. For instance, platforms such as Calligraphy.org provide video workshops and articles that cover everything from the basics to intricate designs. Join communities on Facebook or Reddit related to glass calligraphy; they often have members sharing their work, offering tips, and even organizing group challenges that can rekindle your passion.
Besides the digital realm, don’t underestimate local connections. Local art studios might offer workshops specifically for glass calligraphy. These can provide hands-on experiences that you just can’t get online. Network at craft fairs or art shows where you can meet fellow artists and get inspired by their techniques and styles. Connecting with others in person builds a supportive network that can enrich your learning experience.
Lastly, invest time in books and instructional guides dedicated to calligraphy and lettering. Many authors have compiled extensive knowledge on various styles, tools, and techniques. Check out titles like “The Art of Calligraphy” or “Calligraphy in the Twentieth Century” for both inspiration and practical advice. These resources can deepen your understanding and broaden your artistic vision. By tapping into these learning avenues, you’ll not only improve your skills but also ignite your creativity, turning your glass calligraphy practice into a joyful and fulfilling journey.
Frequently asked questions
Q: What is the best ink for a glass calligraphy pen?
A: The best ink for a glass calligraphy pen is aqueous or water-based ink, as it flows smoothly and dries quickly. Brands like Higgins Eternal and Dr. Ph. Martin’s are popular choices. Always test your ink on scrap paper to ensure it doesn’t clog the nib.
Q: How do you clean a glass calligraphy pen?
A: To clean a glass calligraphy pen, soak the nib in warm water to dissolve any dried ink. Gently wipe the nib with a soft cloth or paper towel. For stubborn ink, use a mild soap. Avoid abrasive materials that can scratch the nib.
Q: Can you use a glass calligraphy pen for watercolor?
A: Yes, you can use a glass calligraphy pen with watercolors. Just ensure the ink is well diluted to avoid clogging the nib. After use, clean the pen thoroughly to prevent any residual paint from drying.
Q: How do you write beautifully with a glass calligraphy pen?
A: To write beautifully with a glass calligraphy pen, maintain a consistent angle and pressure while writing. Practice basic strokes regularly to develop control. Experiment with different inks and styles to find what suits your artistic flair.
Q: What materials do I need for glass calligraphy?
A: Essential materials for glass calligraphy include a glass calligraphy pen, high-quality ink, suitable paper, and cleaning supplies like water and cloths. Optional items are guides and practice sheets to improve your technique.
Q: How can I prevent clogging in my glass calligraphy pen?
A: To prevent clogging, always clean your glass calligraphy pen after each use. Use inks with a consistency that’s neither too thick nor too thin. If you notice clogging, soak the nib in warm water to clear it out.
Q: What are some creative projects to try with a glass calligraphy pen?
A: Try creating greeting cards, personalized stationery, or decorative quotes on canvas. Incorporating different inks and embellishments can enhance your projects. For ideas, refer to the “Inspiring Projects” section of this guide.
Q: Is there a learning curve with glass calligraphy pens?
A: Yes, there is a learning curve with glass calligraphy pens. However, practicing the basic techniques and watching tutorials can significantly shorten this. Embrace mistakes as part of the learning process to improve your skills over time.
The Way Forward
Now that you’ve learned how to beautifully wield your glass calligraphy pen, it’s time to start creating stunning artworks that wow your friends and family. Remember, practice makes perfect, and your journey to mastering this elegant tool will only enhance your creativity over time. Don’t forget to explore our additional resources on calligraphy techniques and the best ink options to keep your pen in top-notch shape!
If you found this guide helpful, share your thoughts in the comments below or check out our tutorials on creating custom calligraphy styles. Want to take your calligraphy skills further? Subscribe to our newsletter for exclusive tips and tricks, and don’t hesitate to browse our collection of calligraphy supplies to elevate your craft. Your artistic journey is just beginning-let’s make it as beautiful as the artworks you’ll create!