Washi tape is a beloved crafting staple known for its vibrant colors and easy application, but one common frustration is its impermanence. If you’ve ever had your carefully crafted projects fall apart or fade over time, you’re not alone. Learning how to make washi tape permanent can transform your creations, ensuring they withstand the test of time. In this guide, you’ll discover effective sealing techniques that will not only enhance the durability of your projects but also keep them looking fresh and beautiful. Whether you’re decorating a journal, wrapping gifts, or creating art, mastering these methods will elevate your crafting game. Let’s dive in and unlock the full potential of your washi tape!
Choosing the Right Washi Tape for Longevity
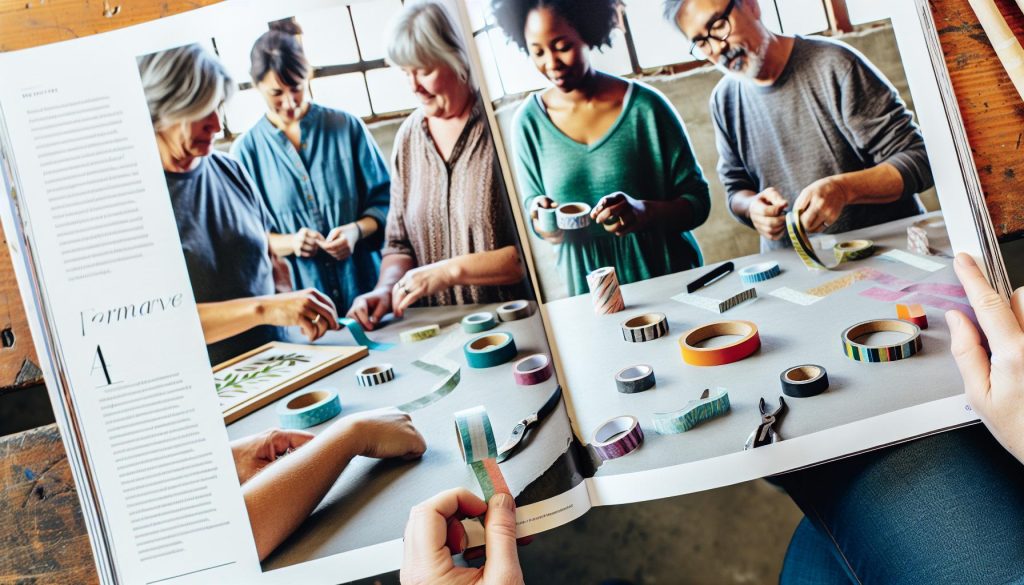
Choosing the right washi tape can make all the difference when it comes to ensuring longevity in your projects. Not all tapes are created equal; some are more durable and adhesive than others, which directly affects how well they hold up over time. Look for washi tapes with a thicker paper construction-these tend to be more robust. Additionally, high-quality inks can resist fading and running, especially if your project is exposed to light or moisture. Brands with a reputation for durability often use a stronger adhesive that can withstand various conditions without losing its stick.
When selecting your washi tape, consider your specific project needs. For example, if you’re planning to use it outdoors, opt for water-resistant varieties. If the tape will be applied to items that will be frequently handled, like bookmarks or greeting cards, choose tapes that are known for their strong adhesion. Reading reviews and testing small samples before committing to a purchase can also help identify the best options for your situation.
Always keep in mind the aesthetics too; the colors and patterns should align with the vision of your project. After all, the most effective washi tape not only lasts but enhances the beauty of your creations. By taking the time to choose wisely, you can ensure that your washi tape projects will shine and stand the test of time.
Essential Supplies for Sealing Washi Tape
To ensure that your washi tape projects last and look fantastic, having the right supplies for sealing is crucial. Many creators overlook this step, but sealing your washi tape minimizes wear and enhances durability, especially if your projects will encounter moisture or frequent handling. Here are the essential items you’ll want to gather before you start sealing.
First and foremost, you’ll need a reliable sealant. Mod Podge is a favorite among crafters because of its versatile properties. It dries clear and offers a waterproof finish, making it perfect for both paper and fabric projects. Another excellent option is clear acrylic sealant spray. This method is slightly faster and can cover larger areas uniformly, ideal for extensive projects. Just make sure to spray in a well-ventilated area and allow it to dry completely.
Along with the sealant, having a high-quality brush or sponge applicator on hand helps. Choose a brush that’s soft and smooth for even application, which prevents texture that might create unsightly bumps on your finished project. You may also want washi-specific scissors to trim your tape cleanly and prevent fraying, keeping your edges sharp and your designs polished.
Finally, don’t forget about your workspace. Keep wipes and a disposable table cover handy for easy cleanup. Craft glue or double-sided tape can provide additional security, especially for edges that might lift over time. By assembling these supplies, you set yourself up for sealing success, ensuring your washi tape creations will endure the test of time and shine brightly in any setting.
Ultimately, investing a little time in gathering these essentials can make all the difference in how well your washi tape projects stand up to wear and tear. With the right tools at your fingertips, sealing your creations will be both easy and effective, allowing you to enjoy them for years to come.
Step-by-Step: How to Seal Washi Tape Properly
When it comes to sealing washi tape properly, the process is all about technique and precision. If you want your creations to withstand time and wear, follow these steps closely for a finish that not only looks professional but also stands up to daily use.
Start by ensuring your surface is clean and dry. Any dirt or moisture can ruin the adhesion of your sealant. Once your area is prepared, apply your chosen sealant. For smaller projects, a brush or sponge applicator works wonders. Dip your brush into the sealant, and apply a thin, even layer over the washi tape. Work gently to avoid saturating the tape, which can cause it to wrinkle or peel back. Allow this layer to dry completely before applying a second coat-this is where you build durability.
For larger projects, a spray sealant is ideal. Hold the can about 6-12 inches away and use a sweeping motion to cover the tape evenly. Be mindful of overspray, especially if you’re working on other surfaces. Let it dry in a well-ventilated area; ventilation is key to getting it to cure correctly without buildup. If you notice any drips, you can gently wipe them away with a damp cloth before they dry.
Once the second layer is dry, check for any areas that might need an extra touch. Sometimes, the edges can lift-simply apply a bit of craft glue or double-sided tape to reinforce them. Your project should now be ready for action! Remember, patience during the sealing process is crucial; don’t rush through drying times if you want lasting results.
By following these steps, you’ll effectively seal your washi tape projects, giving them a professional look that can endure the test of time. Happy crafting!
Best Techniques for Making Washi Tape Permanent
To achieve lasting results with your washi tape projects, mastering the sealing process is essential. One of the best techniques for making your washi tape permanent involves choosing the right sealant and applying it correctly. Not all sealants are created equal, so consider options like clear acrylic sprays or varnishes for flexibility and durability. You might even find matte sealants that won’t alter the finish of your tape.
Layering for Strength
Building up layers is one of the secrets to longevity. Start with a light application of sealant. After it dries, go for a second coat. You can use a brush for precision or a spray can for quicker and more extensive coverage. With these thin layers, the tape remains flexible and won’t get that unsightly crispy feel. Remember, patience is key. Allow ample drying time between coats to enhance adhesion.
Edge Protection
Don’t overlook the edges; they’re often the first to lift. You can reinforce them with a dab of craft glue or a strip of clear double-sided tape. This tip can save many projects from premature peeling. A good rule of thumb is to slightly overlap the sealant over the edge of your washi tape, locking it in and creating a barrier against wear and tear.
Environmental Considerations
Lastly, keep in mind the environment your projects will face. If you’re using washi tape in areas exposed to humidity or sunlight, choose a water-resistant sealant. This ensures that your creative pieces withstand everyday conditions, maintaining their beauty over time.
By applying these techniques-layering, reinforcing edges, and choosing the right sealant-you’ll not only make your washi tape projects permanent but also elevate the overall quality, ensuring they look fabulous for years to come.
Creative Ways to Use Sealed Washi Tape
Using washi tape in creative ways can amplify your crafting projects’ charm and personalization, especially when you’ve taken the time to seal it for durability. Once you’ve made it permanent, consider these engaging avenues to showcase your colorful tape.
One fantastic application is decorating ordinary household items. Think about transforming a plain vase or a notebook. With sealed washi tape, you can create beautiful patterns or borders that withstand wear and tear, making everyday objects pop with personality. Applying washi tape to frames not only enhances their aesthetic but also protects the surfaces beneath with a protective seal, ensuring your creativity lasts.
Another innovative way is using washi tape in gift wrapping. Wrap gifts with a simple brown paper or plain box, and then embellish them using sealed washi tape for a sophisticated yet playful touch. You can layer different colors and patterns to create unique designs, turning your gifts into art pieces. This not only adds a personal touch but also keeps the decoration intact, so the recipient can admire the wrapping even after unboxing.
You can also utilize sealed washi tape in scrapbooking or journaling. With its permanence, it serves as an excellent tool for securing photos and embellishments. The sealed tape will maintain its vibrancy, ensuring your memories are preserved beautifully. You might even want to create borders on your pages that won’t lift over time, allowing your journal or scrapbook to stand up to frequent handling.
Lastly, consider using sealed washi tape for DIY home décor. You can cover furniture edges or create wall art that will last. For example, taping geometric shapes onto canvases or directly onto walls can provide an instant focal point in your living space. Not only does this protect the surfaces, but it also gives you the freedom to change your design whenever inspiration strikes, without worrying about damaging your walls.
With these creative techniques, the possibilities for using sealed washi tape are vast. Embrace your imaginative side and let your projects shine with enduring beauty!
Common Mistakes When Sealing Washi Tape
Sealing washi tape for durability can sometimes feel like navigating a tricky path. One common mistake is underestimating the importance of choosing the right type of sealant. Many crafters opt for regular glue or adhesive sprays, but these can lead to a sticky mess or discoloration of the washi tape. Instead, look for sealants specifically designed for use with paper crafts, such as Mod Podge or archival-safe sprays. These options not only preserve the vibrancy of your tape but also provide a protective layer without altering its original aesthetic.
Another frequent pitfall is neglecting the curing time. After you’ve applied your sealant, it’s crucial to let everything dry properly. Rushing this step can lead to premature wear or peeling. Always check the manufacturer’s recommended drying times and avoid handling your projects until they’re completely dry. If you’re sealing washi tape on surfaces like furniture, allow for extended drying and curing times, especially in humid environments where moisture can interfere with adhesion.
Additionally, many DIYers forget to clean the surface before applying washi tape. Dust, fingerprints, or oil can hinder the adhesive quality of both the tape and the sealant, leading to a project that falls apart over time. Make a habit of wiping down surfaces with rubbing alcohol or a mild cleaner before application. This simple step can dramatically improve the longevity of your washi tape projects.
Lastly, be cautious with excess sealant. It’s tempting to slather on too much in hopes of making everything ‘extra’ durable. However, overdoing it can cause the tape to warp or bubble, ruining its delicate appearance. Instead, apply a thin, even layer, and if necessary, add additional layers once the first has fully cured, ensuring you maintain the tape’s flatness and design integrity. By avoiding these common mistakes, you can enhance the durability and beauty of your washi tape projects.
Maintaining Your Permanent Washi Tape Projects
Maintaining your sealed washi tape projects is crucial for preserving their beauty and longevity. Once you’ve successfully applied a protective seal, there are a few simple yet effective strategies to ensure your creations stand the test of time. First, be mindful of the environment where your projects are displayed. Extreme temperatures and humidity can undermine the adhesive qualities of washi tape and the sealant. Keep your projects in a cool, dry location away from direct sunlight, which can fade colors and weaken the adhesive over time.
Regular maintenance is also key. Depending on the surface of your project, gently dusting off any accumulated dirt or debris can go a long way. Use a soft, dry cloth to wipe down your surfaces without scratching or damaging the tape. If your washi tape decor is on furniture, be careful with cleaning products; some may contain solvents that can dissolve adhesives or discolor the tape. Instead, opt for mild cleaners and always do a spot test in an inconspicuous area.
When it comes to repairs, address peeling or lifting edges quickly. You can use a fine brush or a toothpick to reapply a tiny amount of sealant under the lifted area. Press it down gently, and allow it to cure fully before touching it again. This little bit of care can help prolong the life of your projects.
Finally, think beyond mere aesthetics-consider functionality. If your washi tape project is something hands-on, like a planner or a functional art piece, ensure that the sealant you used is durable enough to withstand regular use. Reassess the seal occasionally, especially if the item is exposed to wear and tear. By incorporating these practices, you’ll keep your washi tape projects looking fresh and vibrant for years to come.
Alternative Methods for Washi Tape Preservation
When it comes to making your washi tape projects last, thinking outside the box can lead to some creative and effective preservation methods. While sealants are the go-to solution, there are various alternative techniques that can enhance the durability and longevity of your creations. For example, if you want to maintain the vibrancy of your designs while protecting them from wear and tear, consider using a layer of clear acrylic spray. This method not only adds a protective shield but also gives your projects a polished finish.
Another effective approach is to laminate your washi tape designs. By running your projects through a laminator, you encapsulate the tape within plastic, safeguarding it from moisture, dirt, and fading. This method is particularly beneficial for items that see frequent handling, like bookmarks or planners. Just be mindful of the thickness of the laminate you choose; too thick can make your items bulky, while too thin may not provide adequate protection.
Utilizing Mod Podge is another game-changer for washi tape preservation. This versatile medium can act as both an adhesive and a sealant. Apply a thin layer over your finished project, ensuring even coverage. Not only does it secure the tape in place, but it also helps resist moisture and dirt. Plus, Mod Podge comes in various finishes-gloss, matte, or satin-allowing you to achieve the look you desire.
Lastly, consider storing completed washi tape projects properly. Use archival-quality boxes or plastic sleeves to keep them safe from dust and damage. This simple step can prevent exposure to elements that can deteriorate the adhesive or color over time. Embracing these alternative methods will not only protect your washi tape creations from the elements but will also elevate their aesthetic appeal, ensuring that they remain beautiful and functional for years to come.
Tips for Customizing Your Washi Tape Seal
When it comes to making your washi tape truly stand out, the seal you choose can be a game-changer. The right customization not only enhances aesthetics but also boosts durability, ensuring your projects last longer and look better. Here are some tips to help you personalize your washi tape seal, making your creative endeavors shine.
Choose Your Sealants Wisely
Opt for sealants that complement your design and offer appropriate protection. For a glossy finish, consider using a clear acrylic spray. It acts as a protective barrier against moisture while enhancing the visual appeal of your tape. If you prefer a matte look, Mod Podge is excellent. It’s versatile and can be applied over the tape without altering its colors. Plus, you can choose between various finishes, so experiment to see which one suits your project best.
Layer Up for Extra Protection
Don’t skimp on layers! Applying multiple thin layers of sealant can significantly increase the longevity of your washi tape projects. After the first coat dries, add another, ensuring even coverage. This not only protects your designs but makes them more resistant to wear and tear. A little patience goes a long way here; the result will be worth the wait.
Incorporate Personal Touches
Customization isn’t just about protective features; it’s also about making your projects feel personal. You can customize your seal by incorporating stickers or embellishments that resonate with your style. For instance, add a sprinkle of glitter or use decorative masking tape to create borders around your washi tape. This can turn an ordinary project into a stunning piece of art.
Test Before Committing
Always conduct a little test run on a scrap piece before applying your chosen sealant on the final project. This step helps you see how the sealant interacts with the washi tape and ensures that colors remain vibrant. It’s a smart way to avoid any mishaps that could compromise your beautifully crafted works.
By following these tips, you can elevate your washi tape creations from simple crafts to beautifully finished artworks. Remember, the seal you choose can significantly impact both the appearance and durability of your projects. So unleash your creativity and let the customization begin!
Troubleshooting: Fixing Issues with Sealed Washi Tape
Sometimes, sealing washi tape can yield unexpected challenges. But don’t worry; troubleshooting these issues isn’t as daunting as it seems. Whether it’s bubbling sealant, peeling edges, or faded colors, there’s a solution for each problem. With a little insight and some handy tips, you can restore your projects to their former glory or even improve them.
One common issue is bubbling or streaks appearing under the sealant. This often happens if the surface was not completely clean or if the sealant was applied too thickly. To fix this, start with a gentle removal of the bubbled sealant, and make sure the area is free from dust or oils. When you reapply, use light, even strokes, allowing each layer to dry before adding the next. This not only helps in preventing bubbles but also creates a smoother finish.
Another frequent problem is the peeling of edges. It can be frustrating when your beautiful washi tape starts to lift away from the base. This usually happens if the tape wasn’t properly pressed down before sealing or if moisture gets under the seal. To address this, gently press down the edges with a clean tool (like a bone folder or your fingers) to ensure a secure bond. If the edges still peel after sealing, consider using a stronger adhesive to reattach them or applying another layer of sealant that can better grasp the tape.
Lastly, if you’re noticing your colors fade or bleed, it can be a sign that the sealant you’ve chosen isn’t compatible with the ink or materials in your washi tape. To avoid this, always test a small patch before committing to full project sealing. If fading occurs, look for a sealant that specifically states it’s safe for use on colored papers or those that offer UV protection. This can make a significant difference in preserving the vibrancy of your designs.
By addressing these common issues head-on, you can maintain the integrity of your washi tape projects and keep your creative endeavors looking fresh and beautiful. Remember, each problem is just an opportunity to learn and enhance your skills. Happy crafting!
Exploring Washi Tape in Home Décor and Crafts
When you unlock the potential of washi tape in your home décor and crafts, you’re diving into a world where creativity meets functionality. This versatile material isn’t just pretty; it can transform everyday objects into stunning pieces that capture attention. Whether you’re personalizing your workspace or adding charm to your living room, sealed washi tape projects can make a lasting impression.
One easy way to incorporate washi tape into your décor is by creating unique wall art. You can take plain canvases and use washi tape to form geometric patterns or bold stripes. Don’t hesitate to seal your artwork with a clear spray sealant to ensure it withstands the test of time. This adds a professional finish and protects your vibrant designs from fading or peeling over time. Consider using a mix of washi tape patterns and colors that complement the room’s existing color palette for a cohesive look.
Another brilliant use for sealed washi tape is in home organization. Adorn storage boxes and bins with decorative washi tape to categorize items while keeping your space stylish. Use a clear varnish over the tape to make sure it holds up against wear and tear. This way, your organized items are not only functional but also aesthetically pleasing. You can also label shelves or books with washi tape for a quirky twist-just write on the tape with a permanent marker or a label maker before sealing.
Embellishing Everyday Items
Imagine your bland living space perked up with washi tape! You can dramatically change the look of flower pots, picture frames, or furniture with just a roll or two. For instance, wrapping washi tape around flower pots adds a splash of color and personality. Make sure to seal the tape properly if the pots will be used for live plants, as moisture can lift the tape. A protective layer will keep your designs intact and vibrant even in a humid environment.
With sealed washi tape, your crafting projects can also take on new life. Use it to create bookmarks, cards, or scrapbook pages that stand out. The key is to ensure your designs are permanent, especially if your crafts will be handled often or stored. Sealing the tape not only preserves your hard work but also enhances the tactile quality of the finished piece. Take advantage of the diverse patterns available in washi tape to reflect your personality and style.
Incorporating sealed washi tape into your home and craft projects opens doors to endless possibilities. With just a bit of creativity and the right sealing techniques, your home can be a vibrant testament to your personal style. So go ahead, experiment, and let your imagination run wild-your living space is your canvas!
Frequently asked questions
Q: How long does it take for washi tape to become permanent after sealing?
A: Once you’ve sealed your washi tape properly, it typically takes about 24 to 48 hours for the sealant to fully cure. During this time, avoid touching or applying pressure to the tape to ensure a durable bond. Consider referring to the Step-by-Step: How to Seal Washi Tape Properly section for best practices.
Q: Can I use regular glue to make washi tape permanent?
A: While regular glue can work, it’s best to use specific sealants designed for washi tape. These products provide a smoother finish and better adhesion. For alternatives, check the Alternative Methods for Washi Tape Preservation section.
Q: What type of sealant works best for washi tape?
A: The best sealants for washi tape are those that dry clear and are water-resistant, like Mod Podge or acrylic sealers. These options will keep your designs intact and vibrant. Explore more in the Essential Supplies for Sealing Washi Tape section.
Q: How do I prevent my washi tape from peeling?
A: To prevent peeling, ensure your tape is sealed properly and use a clear sealant over the tape. Additionally, applying a top coat can help. For more tips, check the Maintaining Your Permanent Washi Tape Projects section.
Q: Is it possible to remove permanent washi tape once sealed?
A: While it’s challenging, you can remove sealed washi tape by carefully using a heat source like a hairdryer to soften the adhesive. This method might damage the surface underneath, so proceed with caution. More on this can be found in the Troubleshooting: Fixing Issues with Sealed Washi Tape section.
Q: Can I write or draw on sealed washi tape?
A: Yes, once your washi tape is sealed, you can write or draw on it using permanent markers or special inks. Ensure the sealant is fully dry before adding any designs. Check out the Tips for Customizing Your Washi Tape Seal section for more customization ideas.
Q: Will sealed washi tape fade over time?
A: Sealed washi tape may fade with prolonged exposure to sunlight or moisture, but using UV-resistant sealants can help maintain its vibrant colors. For longevity tips, visit the Choosing the Right Washi Tape for Longevity section.
Q: How do I apply a top coat to washi tape to make it permanent?
A: To apply a top coat, use a brush to gently spread your sealant over the washi tape, ensuring it’s evenly covered. Allow it to dry according to the manufacturer’s instructions. This process enhances durability, as discussed in Best Techniques for Making Washi Tape Permanent.
The Conclusion
Now that you know how to make washi tape permanent, it’s time to put your newfound skills to the test! Don’t let that creative momentum fade-grab your supplies and start sealing your favorite tapes for lasting projects. Whether you’re customizing home décor or crafting heartfelt gifts, permanent washi tape is your ticket to beautiful, durable designs.
For more tips on maximizing your crafting potential, check out our guides on “Creative Uses for Washi Tape” and “Top Sealing Techniques Every Crafter Should Know.” If you loved this tutorial, consider signing up for our newsletter to stay updated on all things DIY. Got questions or ideas to share? Drop a comment below; we’d love to hear how you’re using washi tape in your projects! Don’t miss out-your next crafting adventure awaits!