Are your trusty Chuck Taylors looking a bit tired? You’re not alone! Sneakers often wear out or fade over time, but there’s an exciting way to breathe new life into them: dyeing. In this guide, we’ll show you how to transform your Chucks at home, giving them a fresh burst of color that reflects your unique style. Not only is this a creative outlet, but it also saves you money compared to buying new shoes. Plus, you’ll have sneakers that no one else has! Whether you’re looking to revamp your classic black pair or go wild with vibrant hues, dyeing your Chuck Taylors is easier than you think. Ready to discover the step-by-step process and tips that will help you achieve professional-looking results? Let’s dive in and unleash your inner artist!
How to Choose the Right Dye for Your Chuck Taylors
Choosing the right dye for your Chuck Taylors isn’t just about picking a color; it’s about finding a product that will adhere properly to the material while giving you the vibrancy and durability you want. Chuck Taylors, typically made of canvas, are an ideal candidate for dyeing, but not all dyes are created equal. You need to consider the type of dye that will best suit your project, as well as the end result you’re aiming for.
Fabric Dyes vs. All-Purpose Dyes
Start by deciding between fabric dyes specifically made for cotton and other textiles or all-purpose dyes that claim to work on a variety of surfaces. Fabric dyes, like those from brands such as RIT or DYLON, penetrate the fibers and offer lasting color. They’re formulated to be permanent, even after many washes. All-purpose dyes, on the other hand, can be hit or miss on canvas-sometimes they wash out quickly or don’t take evenly. If you’re serious about achieving a long-lasting transformation, stick with fabric dyes tailored for sneakers.
Color Considerations
When it comes to color, consider the original hue of your sneakers. If you’re dyeing light-colored Chuck Taylors, you have a wide palette to choose from. Darker shades may require you to use more concentrated dye or consider a color similar to the original. Also, think about whether you want a solid color or something more creative, like ombres or patterns, which will require different techniques and possibly multiple shades.
Test Before Committing
Before diving into the dyeing process, always conduct a small test. Grab a scrap piece of canvas or an inconspicuous area of the shoe to see how the dye reacts. This not only checks the color payoff but also how the fabric responds to the dye, allowing you to make adjustments if necessary.
Choosing the right dye can transform your sneakers from bland to breathtaking when done correctly. So, take your time to select wisely, experiment, and enjoy the process!
Essential Tools and Materials You’ll Need
To achieve that fresh look for your Chuck Taylors, gathering the right tools and materials is essential. Picture this: you’ve dedicated time to pick your favorite dye and thought about the design. The last thing you want is to be missing a critical item during the process. With the right setup, you’ll not only make your dyeing experience smoother but also enhance your chances of a stellar outcome.
Start with the basics. You’ll need a reliable dye, preferably a fabric dye formulated for canvas. Brands like RIT or DYLON are fantastic choices due to their vibrant colors and permanent results. Next, you’ll want a plastic container or bucket for immersion dyeing. This is where your sneakers will soak, so it should be large enough to allow full coverage. Protective gloves are non-negotiable; dye stains can be stubborn on skin. Also, consider old newspaper or an apron to shield your workspace from potential mess.
Essential Tools & Materials:
- Fabric dye (e.g., RIT, DYLON)
- Plastic container or bucket for dyeing
- Protective gloves to avoid skin stains
- Old towels or newspaper to cover your workspace
- Water (hot, as per dye instructions)
- Stirring tool (like a stick or spoon)
- Spray bottle or sponge (if creating patterns)
After you’ve assembled your materials, consider using a test fabric swatch if available. It’s a great way to experiment with your dye and color intensity before committing to your sneakers. Lastly, if you’re looking to add some creativity, gather items like rubber bands or string for unique patterns during the dyeing process. With everything in hand, you’re set to dive into your DIY transformation with confidence.
Step-by-Step Guide to Dyeing Your Sneakers
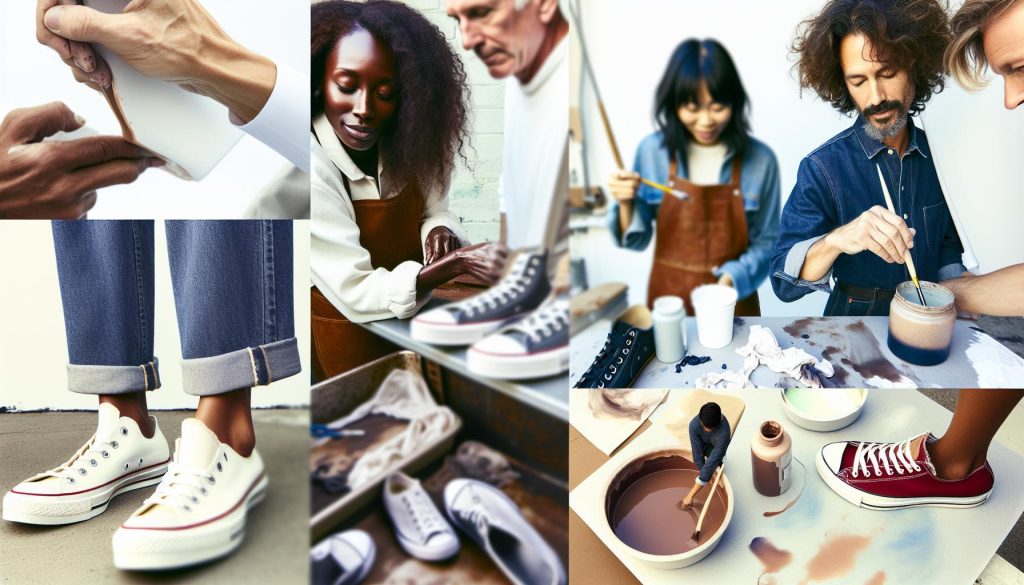
To bring new life to your Chuck Taylors, the dyeing process is both a creative adventure and a practical task. Start by preparing your workspace, ensuring you’re well-protected from any dye splashes. Lay down old newspapers or a plastic cover to catch any spills. With your materials at hand, you’re ready to embark on this transformation.
First, fill your plastic container or bucket with hot water-this is key for activating the dye and helping it penetrate the fabric properly. Check the instructions on your dye for the specific water-to-dye ratio; this will ensure you achieve the vibrant color you desire. Once your water is ready, add the dye and stir thoroughly to mix it well. It’s essential to create an even color solution, so don’t skip this step!
Next, it’s time to dunk in your sneakers. If you’re looking for a solid color, fully submerge them for about five to ten minutes. For a more artistic look, consider a wax paper resist technique or take a rubber band and tie parts of the sneakers tightly for a tie-dye effect. If you’re going for this method, only immerse the untied sections, allowing the tied areas to remain untouched. After achieving your desired shade, rinse the shoes under cold water until the water runs clear, ensuring no excess dye remains.
Once rinsed, let your sneakers air dry completely. Avoid direct sunlight, as UV rays can fade your new color. After drying, consider reinforcing your design with a spray of fabric protector to guard against future stains or fading. Enjoy your freshly dyed Chuck Taylors and wear them proudly!
Tips for Achieving Even Color Distribution
When dyeing your Chuck Taylors, achieving an even color distribution can be tricky but is key for a polished look. First and foremost, make sure you thoroughly mix your dye solution. Any clumps or uneven stirring can lead to blotchy areas on your sneakers. Use a stir stick or a whisk to ensure the dye is fully dissolved in the water, creating a uniform solution.
While dyeing, fully immerse your sneakers in the dye bath. If you’re only dyeing part of the shoe or aiming for an ombre effect, dip and hold the areas you want to color for consistent time intervals. Consistency is crucial-keep track of how long you leave each section submerged. For solid colors, aim for 5 to 10 minutes, but check the color frequently to avoid oversaturation.
Another simple tip to promote even coverage is to periodically swirl the shoes in the dye bath. This gentle motion helps distribute the dye more evenly over the fabric. If you’re going for a tie-dye look, carefully untie sections intermittently as you dip, ensuring dye circulates around each part without pooling in one area.
Lastly, after you’ve rinsed your Chuck Taylors, allow them to dry in a shaded area to prevent direct sunlight from affecting color distribution. Always remember: patience pays off. Taking the time to ensure an even distribution can elevate your DIY sneaker project, giving you a fresh pair of kicks that stand out beautifully.
Avoiding Common Mistakes When Dyeing Chuck Taylors
When it comes to dyeing your Chuck Taylors, avoiding common pitfalls can make all the difference between a stunning transformation and a disappointing outcome. One of the biggest mistakes is skipping the pre-wash step. Before you even think about dyeing, make sure your sneakers are clean. Any dirt, grime, or residue can interfere with the dye absorption, leading to uneven coloring or splotches. A simple wash in mild detergent will do the trick, ensuring you start with a blank canvas that’s ready to soak up all that beautiful color.
Another misstep is rushing the dyeing process. Dyeing is a delicate art that requires time and attention. Don’t just dunk your shoes in and forget about them. Instead, monitor the time closely to prevent over-saturation. If you’re aiming for a specific shade, start by immersing your Chuck Taylors for a shorter period-just a few minutes. You can always return them to the dye bath if you need a deeper hue. Trust me, it’s much easier to darken later than to lighten an over-dyed mess.
Preparing Your Workspace
Setting up your dyeing area is crucial too. Failing to protect surfaces can lead to permanent stains that haunt your crafting sessions. Lay down plastic sheeting or old newspapers to catch any spills, and wear gloves to keep your hands dye-free. Remember, this is a fun project, but it can turn messy if you’re not careful.
Lastly, don’t be afraid to experiment, but do so with caution. Trying out different techniques, like tie-dye or ombre, can yield fantastic results, but make sure you practice first. Test the dye on a small, inconspicuous area of your shoes or even on a scrap fabric to see how the color reacts. This will save you from potential heartbreak if the final product doesn’t match your vision.
Mastering these key elements helps you dodge common mistakes, ensuring your DIY sneaker project turns out beautifully. Happy dyeing!
How to Create Unique Patterns and Designs
Creating unique patterns and designs on your Chuck Taylors is where your creativity truly shines. With the right techniques, you can transform plain sneakers into personalized artworks. One of the most exciting methods is tie-dye, which has made a spectacular comeback. Simply twist sections of your shoe, secure them with rubber bands, and apply different colors of dye to create stunning swirls and patterns. The more tightly you twist, the more intricate the design will be!
Another approach is the ombre effect. Start with a darker shade at the bottom of your shoes and gradually blend into a lighter hue toward the top. This transition can be achieved by dipping the soles of the sneakers into a dye bath for varying amounts of time. The key to a smooth ombre is to work quickly and keep adding dye to maintain that gradient look. For added versatility, you might even consider using fabric paints or markers to draw designs after the dyeing process, giving your shoes even more personality.
If you’re feeling adventurous, try creating a stencil design. Cut shapes or patterns from plastic or cardboard, secure them onto the shoe, and carefully apply dye over them. When you lift the stencil, you’ll reveal a crisp design against the dyed background. This method requires some precision, but the results can be incredibly rewarding.
Lastly, don’t forget about splatter painting! This technique mimics an artful mess and is super easy. Use a small brush to flick dye onto your shoes, creating a graffiti-like effect. Just ensure to protect surrounding areas to avoid unintended stains. Each of these methods can elevate your Chuck Taylors from basic to bold, so don’t hesitate to mix and match techniques for a look that’s uniquely yours. Happy crafting!
Caring for Your Newly Dyed Sneakers
To keep your freshly dyed Chuck Taylors looking vibrant and new, you’ll need to adopt a few care routines that will protect your artistic investment. Remember, the way you care for your sneakers after dyeing can make all the difference in color longevity and overall appearance.
One of the most important steps is letting your sneakers cure properly. After dyeing, allow them to dry completely in a shaded area to prevent fading from direct sunlight. Exposure to harsh light can dull the colors over time. Once dry, consider applying a fabric protector spray designed for sneakers. This magical mist will help repel dirt and water, shielding your handiwork from the elements. Just be sure to follow the product instructions for the best results.
When it comes time to clean your dyed sneakers, opt for gentle methods. Hand-wash with mild soap and water rather than throwing them in the washing machine. Use a soft cloth or sponge to avoid scrubbing too harshly, which could lead to fading or uneven wear. If they get muddy, let the mud dry before gently brushing it off; scrubbing wet mud can further set stains into the fabric.
Storage and Handling Tips:
- Keep them in a cool, dry place away from sunlight.
- Store them in a breathable bag to avoid moisture buildup.
- Use shoe trees or stuff them with newspaper to maintain shape.
Lastly, always mind your environment. If you know you’ll be in a setting where your shoes could get scuffed or excessively dirty, consider rocking a different pair. It’s all about protecting that creative work you’ve poured your time and energy into. By following these simple care tips, you can enjoy your personalized Chuck Taylors for many outings ahead while keeping them looking fresh and colorful.
Frequently Asked Questions About Dyeing Shoes
When it comes to dyeing your Chuck Taylors, you might have questions, and that’s completely normal. Many people wonder about the best methods, what to expect during the process, and tips for maintaining those vibrant colors. Here are some of the most common inquiries answered, helping you confidently dive into your DIY dye project.
Can I dye Chuck Taylors any color?
Absolutely! Chuck Taylors are made from cotton canvas, which takes dye beautifully. You can explore a spectrum of colors with both synthetic and natural dyes. Just keep in mind that the original color of the shoes will impact the final shade. For example, dyeing white shoes offers a clean slate compared to attempting to darken a pair with a vibrant base color.
What materials do I need for dyeing?
To achieve great results, you’ll need a few essential supplies: fabric dye (like Rit Dye), rubber gloves, a large basin or sink, hot water, and possibly a stirring stick. Additionally, consider having some newspaper or plastic sheeting on hand to protect your workspace from spills. If you want to try unique patterns, rubber bands or stencils can be fun!
How do I ensure even color distribution?
Achieving an even color is all about preparation and technique. Before dyeing, make sure your sneakers are clean and dry. When applying the dye, work from the bottom up, ensuring you saturate the fabric thoroughly. If you’re doing immersion dyeing, gently stir the shoes in the dye bath to avoid patchiness. If you’re looking for more controlled designs, consider techniques like tie-dye or ombre effects for a distinct look.
What should I do if the dye doesn’t take?
Sometimes dyeing doesn’t go as planned, and that’s okay! If you notice uneven patches or the color isn’t as vibrant as you’d like, you can re-dye the shoes. Make sure to follow the dye’s instructions carefully, and consider using a different dye type if necessary. Patience is key; allowing the shoes to soak longer can often enhance the color saturation.
Can I wash my dyed Chuck Taylors?
Yes, but with caution. After dyeing, it’s best to let your shoes cure for at least 24 hours before their first wash. Use a gentle hand wash with mild soap, taking care not to scrub too hard, which could fade the dye. For the long-term, storing your shoes properly and avoiding harsh environments will help maintain their beauty.
With these tips and insights, you’re well-equipped to embark on your Chuck Taylor dyeing adventure. Happy dyeing!
Real-Life Transformations: Before and After
Transforming your Chuck Taylors through dyeing can lead to stunning before-and-after results that showcase not only creativity but also the potential to breathe new life into tired sneakers. Just think about it: those scuffed, faded kicks you’ve kept in the back of your closet can become a statement piece with just a bit of dye and imagination.
Real-life transformations often highlight the remarkable versatility of dyed Chuck Taylors. For instance, one common story involves a pair of plain white sneakers that customers felt were too mundane. After dyeing them a vibrant royal blue, those shoes transitioned from ordinary to eye-catching, instantly elevating any outfit. Color choices range from bold brights to soft pastels, and even gradient styles that create a unique ombre effect. This process not only personalizes your shoes but also allows you to show off your personality.
Before diving into the dyeing process, it’s crucial to observe the sneakers’ original state. Some might start with a clean slate, like white or light-colored canvas, while others may come with a bit of character, such as scuffs or previous stains. Embracing these imperfections is part of the charm. Take, for example, a pair of slightly stained beige Chuck Taylors; after a deep-teal dye job, the resulting color not only camouflaged any marks but added a chic and fashionable flair that turned heads.
To inspire your own DIY projects, consider documenting your process. Share your before-and-after pictures on social media to show the world what you’ve accomplished. Not only does this celebrate your creativity, but it may also encourage others to embark on their own sneaker transformations. Each pair of dyed Chuck Taylors tells a story, marking a step towards sustainability where you’re reusing instead of discarding. So, grab that dye and your trusty sneakers; it’s time to make your mark!
Best Practices for Maintaining Color Longevity
When you’ve put in the effort to dye your Chuck Taylors, the last thing you want is for the vibrant colors to fade prematurely. Maintaining the longevity of that brilliant hue is essential for keeping your shoes looking fresh and turning heads. Here’s how to keep your newly dyed kicks in top shape.
First off, consider how you clean your sneakers. Always opt for gentle methods. Instead of throwing them in the washer, which can lead to color loss, hand wash your shoes with mild soap and cold water. A soft cloth or sponge does wonders without damaging the fabric. After washing, avoid direct sunlight for drying; instead, let them air dry in the shade. This protects the color from fading due to harsh UV rays.
Another key practice is to protect your dyed Chuck Taylors from the elements. Rain, mud, and other outdoor conditions can be tough on color-treated fabric. Applying a water-repellent spray specifically designed for canvas can give your shoes an added layer of protection. Just remember to reapply this spray periodically, especially after cleaning.
Lastly, storage matters. When you’re not wearing your sneakers, keep them in a cool, dry place away from direct sunlight. If possible, store them in their original box or a shoe bag. This prevents environmental factors from affecting the dye and keeps your shoes looking new longer.
By following these simple yet effective practices, you’ll not only maintain the vibrant color of your dyed Chuck Taylors but also enjoy them for many adventures to come!
Where to Find Inspiration for Your DIY Project
Finding inspiration for your Chuck Taylor dyeing project can be the most exciting part of the creative process. With countless options out there, your imagination is the only limit. Start by checking out social media platforms like Instagram and Pinterest, where countless DIY enthusiasts share their unique designs. Search using hashtags such as #DyeYourChucks or #CustomSneakers to discover vibrant photos and video tutorials demonstrating various techniques.
Consider visiting local craft stores or fabric shops, where you can often find color palettes that spark ideas. Many stores have swatch books or samples that allow you to see dyes in various lights and fabrics before making a purchase. Don’t hesitate to ask store employees for tips or recommendations on colors that work well with canvas. Often, they can provide insights based on what’s trending in the community.
Real-world inspirations can come from anywhere-a favorite piece of art, a cool print on clothing, or even nature. Think about what colors make you feel good or what themes resonate with your style. Keep a sketchbook handy or use a mood board app to gather ideas. You might find that blending colors directly from your favorite landscapes or artworks leads to a stunning custom sneaker.
Lastly, don’t forget to tap into forums and online communities where DIY sneaker enthusiasts gather. Websites like Reddit and specialized forums often feature threads dedicated to sneaker customization, full of photos, before-and-after results, and detailed process descriptions. Engaging in these communities can provide invaluable feedback on your ideas and help you refine your approach, ensuring that your finished pair stands out and reflects your personality perfectly.
Frequently asked questions
Q: Can I dye my Chuck Taylors a different color than their original shade?
A: Yes, you can dye your Chuck Taylors a different color! It’s recommended to use a suitable fabric dye, preferably one designed for cotton or canvas, to ensure a vibrant color transformation. Check the How to Choose the Right Dye for Your Chuck Taylors section for recommendations.
Q: How long does it take to dye Chuck Taylors at home?
A: Dyeing your Chuck Taylors typically takes about 1 to 2 hours, including setup, dye application, and rinsing. However, allow for additional time to thoroughly dry your sneakers after dyeing. For step-by-step timing details, refer to the Step-by-Step Guide to Dyeing Your Sneakers section.
Q: What is the best dye for canvas shoes like Chuck Taylors?
A: The best dyes for canvas shoes like Chuck Taylors include fabric-specific dyes such as Rit Dye or Dylon Fabric Dye. These dyes penetrate the fibers for lasting color. Explore the How to Choose the Right Dye for Your Chuck Taylors section for more insights.
Q: Will dyeing my Chuck Taylors ruin the material?
A: When done correctly, dyeing will not ruin the material of your Chuck Taylors. Always follow instructions carefully and choose dyes made for fabric to avoid damage. For tips on preserving your shoes, check out the Avoiding Common Mistakes When Dyeing Chuck Taylors section.
Q: How can I achieve a tie-dye effect on my Chuck Taylors?
A: To create a tie-dye effect, twist and bind sections of your Chuck Taylors with rubber bands before applying different colors of dye. Use squirt bottles for precision. Refer to the How to Create Unique Patterns and Designs section for detailed techniques.
Q: How do I prevent colors from bleeding after dyeing my Chuck Taylors?
A: To prevent bleeding, rinse your sneakers thoroughly with cold water immediately after dyeing. Follow up with a fabric fixative to set the color. For best practices, check the Best Practices for Maintaining Color Longevity section.
Q: Can I use regular household dye to color my Chuck Taylors?
A: It’s not advisable to use regular household dye, as it may not effectively bond with the fabric of your Chuck Taylors. Opt for specialized fabric dyes for the best results. More info is found in the How to Choose the Right Dye for Your Chuck Taylors section.
Q: What should I do if the color on my dyed Chuck Taylors doesn’t look right?
A: If the color isn’t as expected, you can re-dye them or experiment with layering different shades. Make sure to follow the instructions carefully. For troubleshooting tips, refer to the Avoiding Common Mistakes When Dyeing Chuck Taylors section for assistance.
Concluding Remarks
Ready to transform your Chuck Taylors? Now that you know how to dye your sneakers at home, it’s time to unleash your creativity! Remember, the right dye and technique can turn those old, tired shoes into unique masterpieces that reflect your personal style. If you’ve got questions or need tips, drop a comment below!
Interested in more DIY projects? Check out our guides on “Sneaker Care Tips” and “Customizing Your Kicks” to keep your footwear looking fresh. Don’t forget to sign up for our newsletter for exclusive tips and tricks sent straight to your inbox!
Let’s keep this creativity going-your perfect pair is just a dye job away. Dive deeper into your sneaker journey and explore all the possibilities today!