Did you know that washi tape isn’t just a craft supply; it’s a secret weapon for personalizing your space? Making your own DIY washi tape can transform everything from kitchen jars to art projects, allowing you to express your creativity while saving money. Whether you want to spruce up dull decor or simply enjoy the art of crafting, this guide will show you how to create vibrant, customized tape right at home. By using materials you likely already have, you can easily craft beautiful designs that reflect your style. Curious about how to get started? Dive into this step-by-step process and unleash your imagination!
Understanding Washi Tape: What Is It and Why DIY?
Washi tape, a colorful, versatile adhesive tape, has taken the crafting world by storm. Unlike conventional tape, its paper-like texture and low-tack adhesive make it easy to reposition without leaving a sticky residue. This means you don’t have to worry about damaging your projects when adding or removing it. Plus, with an endless variety of designs, from bold graphics to delicate patterns, washi tape can elevate any creation. But why go through the trouble of making your own? The answer lies in creativity and personalization.
DIY washi tape allows you to express your unique style, incorporating colors and patterns that resonate with you. Imagine crafting tape that perfectly matches the theme of your next project or a gift for a friend. It’s not just about aesthetics; creating your own washi tape can be a fun and meditative process. You control every aspect, from the materials used to the application technique, ensuring that your tape is truly one-of-a-kind. Plus, making washi tape can be a great way to use up leftover materials from other crafts, giving them new life and purpose.
Engaging in this DIY venture also fosters a sense of accomplishment. Completing a creative project can boost your mood and ignite further inspiration. Plus, sharing your handmade washi tape with friends or using it in gift packaging adds a personal touch that store-bought options simply can’t match. So, whether you’re labeling jars in your kitchen or embellishing your craft room, making your own washi tape is not only practical but also an enjoyable way to enhance your crafting experience.
Essential Materials for DIY Washi Tape Creation
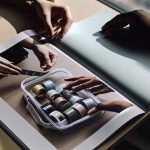
To embark on your DIY washi tape adventure, you’ll want to gather a few essential materials that make the process not only enjoyable but also effective. The beauty of making washi tape is that you can use items you likely already have at home, transforming simple supplies into personalized masterpieces.
Start with decorative paper-this will be your canvas. Options include origami paper, scrapbook paper, or even leftover wrapping paper. Look for patterns, colors, or textures that excite you. The variety is truly endless; floral, geometric, or seasonal themes can all add a unique touch to your creations.
Next, you’ll need a double-sided adhesive tape. This is what gives your washi tape its sticky properties without being too permanent. Choose a tape that allows you to reposition it easily; after all, the charm of washi tape is its versatility. You can also use washi tape itself as a base while layering over it with paper for unique effects.
Finally, consider adding waterproof sealant if you want your designs to stand the test of time. This is especially useful if you plan on using your washi tape in more demanding projects, like decorating items that may get wet or used outdoors.
Here’s a quick summary of the essential materials:
- Decorative Paper: Origami, scrapbook, or wrapping paper.
- Double-Sided Adhesive Tape: Look for repositionable options.
- Waterproof Sealant (Optional): For durability and outdoor use.
With these items in hand, you’re ready to start crafting beautiful, personalized washi tape that reflects your style and creativity. Dive in, and have fun exploring the endless possibilities!
Step-by-Step Guide to Making Washi Tape
Start by gathering your materials. You’ll need decorative paper, double-sided adhesive tape, and optional waterproof sealant. Choose your paper wisely; think vibrant colors, striking patterns, or even your favorite images. This is where your creativity flows right from the start.
Cut your decorative paper into strips. You can decide how wide to make them-commonly, widths range from half an inch to two inches. The key is to find a width that feels right for your projects. Once you have your strips, peel off the backing on one side of your double-sided tape and apply it to the back of your paper strip. Make sure to leave the other side covered for now; this ensures the tape remains sticky until you’re ready to use it.
Once your tape is adhered to the decorative paper, it’s time to trim any excess paper that hangs over. Use sharp scissors for clean edges. If you’ve chosen to add a waterproof sealant, now’s the time to apply it. A light coat will do the trick; let it dry completely to preserve your designs. You should now have beautiful, homemade washi tape ready for your creative projects!
Finally, consider labeling your strips if you’ve made multiple designs. This makes organizing and using them hassle-free later on. Plus, it’s a fun way to showcase your unique creations. Now, you’re not just ready to stick these tapes anywhere; you’re equipped to transform your kitchen, your workspace, or any other space with your newfound washi tape!
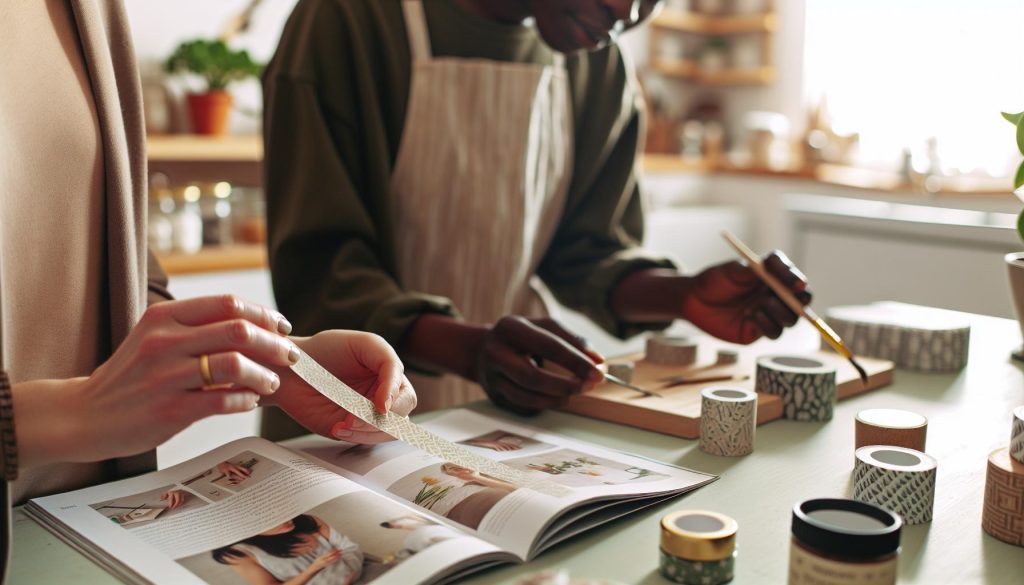
Creative Techniques for Unique Washi Tape Designs
Creating your own washi tape opens up a world of possibilities, where your creativity can truly shine. With just a few tools, you can craft tape that reflects your personality and style. Let’s dive into some innovative techniques that not only give life to your designs but also elevate your projects.
One exciting approach is using transparency and layering. By combining different strips of semi-transparent paper, you can create mesmerizing effects. Start with a base layer-perhaps a colorful patterned paper-and then overlay a sheer layer of a solid color. This technique adds depth and a unique twist to what might otherwise be a straightforward design. Don’t be afraid to experiment with different combinations!
Next, consider incorporating textures. Adding fabric, lace, or even textured paper to your custom washi tape can make your designs pop. For instance, adhering a strip of lace onto your tape creates a lovely vintage feel. Just remember to use your double-sided tape carefully to secure these materials while keeping the overall thickness manageable for functionality.
Another fun method is to use thematic elements tied to events or personal milestones. If you’re celebrating a birthday or a holiday, try creating washi tape that aligns with the theme. You can print images or quotes onto your decorative paper before cutting it into strips. This personalized touch can make your decorations truly memorable and perfectly suited for your occasion.
Lastly, explore mixed media techniques. Use watercolor techniques on your paper strips for a painterly effect, or apply stamps to add intricate patterns. This approach capitalizes on your artistic skills, allowing your tape to serve as more than just an accessory. Remember, the goal is to innovate; let each piece reflect your artistic vision and flair.
Incorporating these techniques can transform your DIY washi tape from simple strips into stunning decorative elements that enhance any project, making your crafting experience all the more rewarding.
From Kitchen Supplies to Craft Room Tools
Crafting your own washi tape can be both fun and rewarding, and the best part? You don’t need a fancy setup. You can easily repurpose common kitchen supplies and everyday items from your craft room to create stunning, personalized tape. Just think about it: that roll of parchment paper or wax paper you have in your kitchen isn’t just for baking. It’s a perfect base for your washi tape projects. Similarly, old fabric scraps, foil, or even recycled gift wrap can take your tape-making to the next level.
Start by gathering supplies you likely already have on hand.
- Parchment or Wax Paper: Excellent for its smooth surface, making it easy to peel off once decorated.
- Double-Sided Tape: This is essential for securing your designs and ensuring your tape sticks well.
- Scissors: Ensure they’re sharp for clean edges on your finished tape.
- Paint or Ink: You can use these to add unique patterns or text.
- Rolls from Toilet Paper or Paper Towels: Save these as they form a perfect holder for your handmade tape.
Transitioning from the kitchen to your craft space opens up a world of possibilities. The texture of different materials (like fabric or paper) can all be incorporated into your designs. Try layering several materials to create depth or mixing paint techniques with stencils for intricate designs. Not only does this blend of home and crafting tools make for cost-effective crafting, but it also fuels creativity. Remember, the essence of DIY is using what you have creatively. So, the next time you’re about to toss that extra parchment paper or scrap fabric, think twice-you might just have the perfect element for your next washi tape masterpiece!
Tips for Choosing Patterns and Colors
Choosing the right patterns and colors for your DIY washi tape can transform a simple project into a true masterpiece. Color can evoke emotion, set a mood, and enhance the purpose of your tape, whether it’s for journaling, scrapbooking, or gift wrapping. A striking combination of colors can grab attention, while subtler hues may convey elegance and serenity. When selecting your palette, consider the context of your project. Are you aiming for vibrant, playful designs, or do you want something more muted and sophisticated?
Start by pulling inspiration from your environment. Look at nature’s colors-the way flowers bloom or the sunset paints the sky. Use these as a springboard for your choices. Pay attention to seasonal trends, too; colors that reflect the season can add a timely touch to your designs. For example, warm hues like oranges and browns can be perfect for autumn-themed projects, while pastels often shine in spring creations.
Equally important is the harmony of patterns. Mix and match but do so carefully. Aim for balance; if one tape is bold, pair it with something subtle. Geometrics can play well with florals, creating a playful yet cohesive look. Consider using patterns that reflect the vibe of your project. Stripes might suit a more casual tone, while damask could evoke a refined feel. Don’t shy away from experimenting-sometimes the most unexpected combinations yield the most delightful results.
Lastly, keep functionality in mind. While it’s tempting to choose patterns and colors that catch your eye, make sure they serve your purpose. If your tape is for labeling, opt for high-contrast colors to enhance legibility. If it’s for decoration, think about how the colors will complement other items in your project, like your scrapbook pages or wrapping paper. A well-thought-out color scheme not only elevates your tape but also amplifies the overall aesthetic of your crafts. Happy crafting!
Storing and Organizing Your Handmade Washi Tape
Keeping your handmade washi tape organized can be just as critical as making it. An effective storage solution not only saves you time but also inspires creativity. Trust me; when you can see your tape collection clearly, you’re much more likely to use it! So let’s dive into some practical ways to store and organize your washi tape in a way that showcases your hard work and boosts your crafting experience.
One of the simplest methods is using clear jars or containers. They not only look great but also allow you to easily see all your beautiful tapes at a glance. You can group them by color, size, or pattern, depending on your preference. Another option is a tiered storage system, where each shelf displays different sets of tapes. This is particularly effective if you have limited space; just make sure it’s sturdy enough to hold your collection without toppling over.
If you want a more DIY approach, try creating a washi tape dispenser using a wooden dowel and some hooks. Mount the dowel horizontally on your wall and hang the tapes from it. This keeps your tapes accessible and prevents them from rolling away. Plus, it turns your washi tape into a decorative element in your craft room!
Storing your handmade washi tape doesn’t have to be boring. You can use decorative boxes or even repurpose old spice jars to add a personal touch. The key is to choose a method that not only keeps your collection tidy but also reflects your style and makes it easy to access. With a well-organized selection, you’ll find yourself reaching for your washi tape more often, leading to more creative projects and fun crafting sessions.
Fun Ways to Use Washi Tape in Your Projects
Washi tape is more than just a decorative element; it’s a versatile tool that can elevate your crafts, home decor, and even everyday organization. You’ll be amazed at how this simple adhesive tape can transform mundane items and projects into eye-catching creations. Here are some fun ways to incorporate washi tape into your life, sparking both creativity and efficiency.
One of the easiest ways to use washi tape is in your journaling or planning. Add a splash of color by decorating the borders of your pages or highlighting important dates in your planner. This not only helps organize your thoughts but also makes your journal visually appealing. You can create unique bookmarks by folding the tape over a piece of paper and cutting it into fun shapes. These quick projects can elevate your planning routine and inspire a more proactive approach to organizing your tasks.
Decorate Everyday Items
Your everyday items can also benefit from a makeover with washi tape. Wrap tape around pen barrels, phone cases, or even the edges of notebooks to give them a personal touch. If you have plain storage boxes, line the edges with colorful washi tape for an instant upgrade. This approach not only adds personality to your items but also makes them easily identifiable.
Gift Wrapping and Cards
Washi tape shines during gift-giving season. Instead of traditional wrapping paper, try using kraft paper and accent it with coordinating washi tape patterns. This method creates a unique and personal touch, making your gifts stand out. You can also create greeting cards with a washi tape theme. Simply adorn the front of a card with tape designs, write a heartfelt message inside, and you’ve got a one-of-a-kind card that’s ready to go.
Incorporate in Home Decor
Add flair to your home decor by using washi tape to create wall art. You can easily design geometric patterns or shapes by applying strips of tape directly to your walls. This is a great non-permanent way to enjoy fresh decor without the hassle of paint. Don’t forget about furniture-accent your shelves or tables by outlining their edges with washi tape for an unexpected pop of color.
With these ideas, it’s clear that washi tape is not just for scrapbooking. Whether you’re adding a personal touch to gifts or sprucing up your workspace, the possibilities are endless. Get creative and let your imagination run wild!
Common Mistakes to Avoid When Making Washi Tape
Making your own washi tape can be a fun and creative endeavor, but it’s all too easy to stumble into pitfalls that can lead to frustration. To help you get the most out of your DIY washi tape projects, let’s explore some common mistakes and how to avoid them.
First off, don’t underestimate the importance of the base layer. Using the wrong adhesive or base material can ruin your tape. Ensure you’re using a substrate that can hold the design without tearing or curling. Thin paper might seem like a good idea, but it may not hold up long-term. Instead, opt for thicker, more durable paper or washi tape style sheets which can provide a strong foundation. Additionally, the adhesive is crucial-test different adhesives to find one that gives you the perfect balance of stickiness without leaving behind residue.
Another common mistake is neglecting to plan your designs ahead of time. Jumping in without a clear vision can lead to mismatched patterns and wasted materials. Spend a little time sketching out your ideas or creating a mood board. This preparation not only streamlines the process but also ensures your handmade wash tapes are consistent and visually appealing. Remember, the beauty of washi tape lies in its aesthetics, so take a moment to think about colors, themes, and patterns that work well together.
Furthermore, many crafters overlook the drying time. Rushing the drying process can lead to smudges or incomplete adhesion. Be patient and let your designs dry fully before cutting or using them. This is especially important if you’re working with paints or inks that require time to set. To avoid accidental mishaps, use a designated area for drying that’s free from dust or debris.
Lastly, don’t forget about storage. After putting so much work into creating beautiful washi tape, it’s essential to protect it. Failing to store your tape correctly can lead to it becoming stuck together or losing its shape. Use small boxes or decorative jars to keep your rolls safe and sound. Label them if necessary, so you can easily find the design you’re looking for next time.
By steering clear of these common errors, you’ll enhance your DIY washi tape-making experience and create beautiful, usable products that you can be proud of. Happy crafting!
Expanding Your Washi Tape Skills: Beyond the Basics
You might think you’ve mastered the basics of creating your own washi tape, but there’s a whole world of techniques waiting to be explored. Just like any craft, there’s always room to grow, and with washi tape, you can elevate your projects to new heights by adopting some advanced skills. Think of it as adding layers of flavor to your favorite dish-you’ll not only enhance the aesthetics but also discover unique applications for your DIY creations.
First, experiment with mixed media. Incorporating materials like fabric, lace, or even dried flowers into your washi tape designs can add texture and visual interest. Don’t be afraid to break the mold. For instance, try using transparent sheets where you can adhere bits of colorful paper or press flowers to create a stunningly unique effect. This technique not only enriches the design but also allows you to personalize your creations like never before.
Next, consider expanding your tape’s functionality. Instead of just creating decorative strips, why not design functional washi tape for specific uses? Make customized planner tape for scheduling or color-coded labels for organization. You can also use your washi tape to transform everyday items; for example, wrapping a plain pen can give it a stylish twist, turning something mundane into a chic accessory.
Another way to broaden your skills is to explore advanced pattern-making techniques. Play with layering patterns, or combine stamps and stencils to achieve intricate designs. Using a brayer or a sponge to apply paint through a stencil on your base tape can create captivating visuals. This approach not only enhances your artistic flair but also opens the door to creating themed washi tapes for different seasons or events.
Lastly, don’t underestimate the importance of feedback and inspiration from the crafting community. Joining a washi tape group on social media can offer you exposure to new ideas and techniques that you might not have considered before. You’ll also find a supportive network of fellow crafters who can share tips, insights, and even swap supplies.
By venturing beyond the basics, you’ll unlock a myriad of possibilities for your DIY washi tape projects. Keep experimenting, stay creative, and let your imagination flow-your crafting journey has barely begun! Happy crafting!
Sources for Inspiration: Where to Find Ideas
Finding inspiration for your DIY washi tape projects is half the fun of crafting! Whether you’re looking to bring a fresh perspective to your existing designs or create something entirely new, there are countless resources available to spark your creativity. Start by diving into the world of social media. Platforms like Instagram and Pinterest are treasure troves of ideas. Simply search for hashtags like #DIYWashiTape or #WashiTapeArt to discover stunning designs and innovative techniques shared by fellow crafters. You’ll often find tutorials that break down the steps and materials needed for each project, making it accessible to everyone.
Don’t overlook the traditional resources either. Craft books and magazines often include sections dedicated to washi tape projects. These can provide not just step-by-step guides but also context about the origins of washi tape and ideas for its use in seasonal décor, gift wrapping, and so much more. Libraries and local bookstores are great places to explore a variety of creative publications.
Another excellent source of inspiration is nature itself. Take your designs outdoors. Observe the colors, patterns, and textures around you, and bring that natural inspiration into your washi tape creations. For example, the shapes of leaves, the colors of flowers, or the patterns in tree bark can influence your next project, guiding you toward unique designs that are both personal and visually striking.
Lastly, consider collaborating with friends or joining local crafting groups. Sometimes, a casual conversation can lead to extraordinary ideas. You’ll not only gain new perspectives but also foster a supportive community where sharing supplies and skills becomes a part of the fun. In the end, inspiration is everywhere if you keep your eyes open and your mind curious!
Sharing and Selling Your DIY Washi Tape Projects
When it comes to showcasing your DIY washi tape creations, sharing and selling can be just as fulfilling as making them. Imagine transforming your passions into profit or simply sharing your artistic efforts with a community that appreciates creativity. Whether you’re looking to sell online, at local markets, or share through social media, there are several avenues to explore that can elevate your washi tape ventures.
First off, social media platforms can be your best friends. Create an Instagram or Pinterest account dedicated solely to your washi tape projects. Not only can you showcase your designs, but you can also engage with a community of like-minded craft enthusiasts. Use relevant hashtags like #WashiTapeDIY and #CraftyCreations to increase your visibility. Consider posting detailed photos of your designs and videos demonstrating their uses. This not only helps to attract followers but can also spark interest from potential buyers.
Setting Up an Online Store
If you’re serious about turning your creations into a small business, setting up an online shop can be a game-changer. Platforms like Etsy or your own website can serve as wonderful showcases for your washi tape. Here are some steps to get you started:
- Choose Your Platform: Etsy is great for handmade items and offers built-in traffic. If you prefer more control, consider using Shopify or WordPress for your own site.
- Photograph Your Products: Invest time in taking high-quality images that highlight your washi tapes. Use natural light and simple backgrounds to make your designs pop.
- Write Descriptive Listings: Be clear about the materials, dimensions, and possible uses for each tape. Good descriptions can greatly influence buying decisions.
- Set Competitive Pricing: Research similar products to determine fair pricing. Remember to account for materials, time spent, and platform fees.
Participating in Local Fairs
Don’t underestimate the power of face-to-face interactions. Participating in local craft fairs or markets can be an exhilarating way to sell your washi tape. Here’s how to make the most of these events:
- Design an Attractive Booth: Use your washi tape to create an eye-catching display. Consider making banners, signage, and decorations that reflect your branding.
- Engage with Customers: Be approachable and ready to explain your tape-making process. Sharing the story behind your designs can create a personal connection.
- Offer Samples or Small Discounts: Entice shoppers by allowing them to feel the product or giving them a discount for purchasing multiple items.
Lastly, if you’re feeling generous, consider donating some washi tape to local schools or community art programs. Not only does this promote your work in your community, but it also supports budding artists who may be inspired by your creations.
By taking these steps, you’ll not only share your passion but also cultivate a thriving community around your craft. Remember, the journey of sharing and selling your DIY washi tape is just as enjoyable as the making itself.
Faq
Q: How can I make DIY washi tape without specialized materials?
A: You can easily create DIY washi tape using regular materials like paper, adhesive, and decorative items. Cut strips of paper, apply a double-sided tape to one side, and decorate it with markers or stamps. This keeps it simple and accessible for anyone, regardless of crafting experience.
Q: What is the best way to store homemade washi tape?
A: Store your homemade washi tape in a cool, dry place away from sunlight. Use a clear container or drawer organizer for easy access and visibility. This keeps them organized and prevents them from sticking together, ensuring they remain ready for your next crafting session.
Q: Can I customize my DIY washi tape designs?
A: Absolutely! Customize your washi tape by using patterned paper, colored inks, or even stickers. You can mix and match various designs to create unique patterns that reflect your personal style. The creative possibilities are endless, so experiment to find what you love!
Q: Are there any common mistakes to avoid when making washi tape?
A: Yes, avoid using too much adhesive, as it can make the tape too sticky and hard to use. Ensure your paper is thin enough to allow for flexibility yet sturdy enough for crafting. Another tip is to let the tape dry completely before rolling to prevent it from sticking together.
Q: What tools do I need to create DIY washi tape in the kitchen?
A: Basic kitchen supplies can be used, such as scissors, a ruler, and double-sided tape. You can also utilize decorative kitchen items like wax paper or parchment paper to make unique tape designs. These tools keep the process straightforward and efficient.
Q: How can I incorporate my DIY washi tape into home decor?
A: Use your homemade washi tape to enhance your home decor by wrapping it around vases, framing pictures, or adding decorative edges to shelves. It’s a simple way to personalize your space and make it vibrant without committing to permanent changes.
Q: Where can I find inspiration for designing washi tape?
A: Inspiration for creating washi tape can come from various sources like nature, fabrics, or even your favorite colors. Pinterest and craft blogs are great places to explore new ideas and techniques that can inspire your next DIY project.
Q: Can I sell my homemade washi tape?
A: Yes, you can sell your DIY washi tape! Consider setting up an online shop or utilizing platforms like Etsy to reach a wider audience. Ensure your designs are unique and high-quality to stand out in the market. Check local regulations if needed for selling handmade goods.
Future Outlook
Now that you’ve learned how to make your very own DIY washi tape, why not put those vibrant creations to good use? This fun project not only adds flair to your crafts but also personalizes your kitchen and craft room. Whether you’re looking to decorate journals, wrap gifts, or create unique wall art, your custom washi tape can do it all. Don’t wait-gather your supplies and start making your own designs today!
For more inspiration, check out our guides on crafting with washi tape and upcycling everyday items into artful décor. And if you’re eager to dive deeper into creative projects, subscribe to our newsletter for fresh ideas delivered straight to your inbox. Join the conversation! Share your washi tape creations in the comments below and inspire fellow crafters to get started. Your next crafting adventure awaits-let’s make it memorable together!