Have you ever gazed longingly at beautiful washi tapes in craft stores, only to be deterred by the price? What if I told you that you can create stunning, customized washi tape using ordinary masking tape? This budget hack not only saves you money but also lets your creativity shine. Imagine adorning your journals, gifts, or home decor with washi tape that reflects your personal style-all without breaking the bank. In this guide, I’ll walk you through a simple, step-by-step process to transform standard masking tape into unique decorative tape. Whether you’re a seasoned crafter or just starting out, you’ll find that making your own washi tape is not only easy but incredibly satisfying. Ready to unleash your imagination? Let’s dive in!
How to Use Masking Tape for Washi Tape Crafting
Using masking tape to create your own washi tape is not just a budget-friendly craft; it’s also an opportunity to express your creativity. This method allows you to personalize your designs and enjoy the satisfaction of making something unique. To get started, simply gather some masking tape, which is typically readily available at home improvement or craft stores. Choose a variety of paints, markers, or even printed paper to transform the plain tape into a decorative masterpiece.
First, lay out your masking tape on a flat surface. You can make it any length you desire. Then, let your imagination roam by painting or drawing directly onto the tape. If you’re using markers, bold colors or intricate patterns can elevate your design, making it truly stand out. Another option is to use printed scrapbook paper; simply cut strips and adhere them to the tape, resulting in a custom look that washi tape typically offers. Once your design is complete, let it dry before cutting the tape into smaller pieces for easier application.
Feel free to experiment with different finishes-matte, glossy, or even glitter-all depending on your project needs. After making your washi tape, it’s versatile enough for a myriad of uses from adorning gifts to enhancing your journaling experience. When you’re ready to use your new creations, remember: applying them is just as simple as peel-and-stick. The beauty here lies in the customization; you can whip up seasonal designs, themed creations for personal projects, or just fun patterns that brighten up everyday items.
In the end, what makes this method special is that it allows you to control both the design and the color scheme. No more being limited by what’s available on store shelves! With just a few basic materials-masking tape and your choice of art supplies-you can create an array of washi tape that speaks to your personal style.
The Benefits of Making Your Own Washi Tape
Creating your own washi tape opens up a world of customization that store-bought options simply can’t match. Not only is it a budget-friendly hack, but it also allows you to channel your creativity in ways you might not have thought possible. Think about it: with just a roll of masking tape and some art supplies, you can craft unique designs that reflect your style, mood, or even the theme of a particular project. You’re not confined to the limited designs available in stores-your imagination is your only limit.
Personalization is key. When you make your own washi tape, you can choose colors, patterns, and finishes that speak to you. Want a floral design for spring? A bold geometric pattern for a scrapbook project? With DIY washi tape, you can tailor your creations to fit any occasion, making your crafts not just functional but truly special. Plus, it’s a fantastic way to use up leftover arts and crafts supplies you’ve got lying around.
The process of making washi tape can be incredibly satisfying. It’s a chance to put your own artistic spin on something that’s usually mass-produced. By painting, drawing, or adhering decorative papers to masking tape, you get to experiment and refine your craft, which can be especially fulfilling if you’re looking to develop your skills in a relaxed environment. It’s an excellent way to unwind, and you end up with practical creations-like decorative tape for gift wrapping, journaling, or even home decor-that showcase your personal touch.
Finally, making your own washi tape is a sustainable choice. It encourages you to repurpose materials, thereby reducing waste and promoting a more eco-friendly approach to crafting. So not only do you save money, but you also contribute positively to the environment by choosing to create rather than consume. Embrace the DIY spirit, and let your creativity run wild with a project that’s as rewarding as it is beautiful!
Essential Materials You’ll Need for This Hack
To create your own washi tape, you’ll need just a few essential materials that are likely already in your crafting arsenal. The beauty of this project is its simplicity and accessibility. Start with masking tape, which serves as the base for your designs. It’s affordable and widely available, making it perfect for this budget-friendly hack. Aim for a roll that’s at least an inch wide to give yourself plenty of space to unleash your creativity.
Next, gather some decorative elements. This could be anything from colored markers and paints to patterned scrapbook paper or even fabric scraps. If you’re looking to get artistic, consider using watercolor paints for a soft, blended effect or stamp designs that can add a unique touch. Glue sticks or double-sided tape are also helpful if you plan to adhere paper designs directly to the masking tape.
Don’t forget the scissors or a craft knife for custom cutting your finished tape. Having a solid cutting mat underneath will protect your workspace and keep your tools sharp. Lastly, a roll of clear packing tape can come in handy if you want to provide extra durability to your designs. This lets you easily stick down elements and gives a polished finish.
With these materials on hand, you’re ready to dive into the crafting process. Each item plays a significant role in allowing you to personalize your washi tape, making it a truly unique reflection of your style. Happy crafting!
Step-by-Step Guide to Creating Washi Tape
Creating your own washi tape is a fun and budget-friendly hack that not only sparks creativity but also gives you a personal touch in your crafting projects. By using simple masking tape as a base, you can easily design beautiful tapes that reflect your style. Here’s how you can do it, step-by-step.
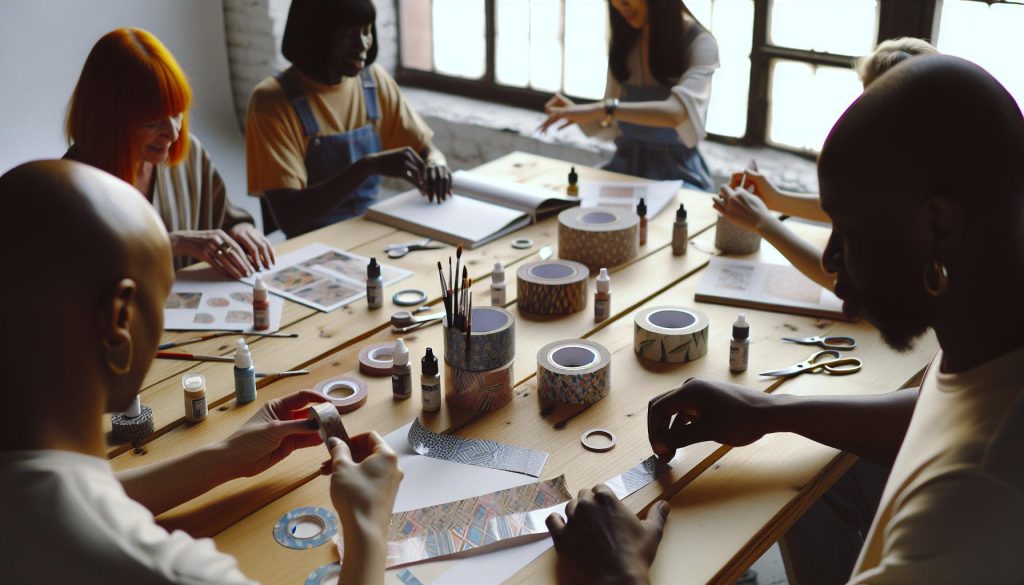
First, lay out your supplies in a clean workspace. You’ll need your masking tape, decorative elements like colored markers, paints, or scrapbook paper, scissors or a craft knife, and optional clear packing tape for added durability. Start by cutting a length of masking tape to your desired size – a few inches is usually manageable.
Now, the fun begins! If you’re using markers or paints, go ahead and start decorating. You can draw patterns, write words, or create illustrations directly on the tape. Alternatively, if you prefer a more tactile approach, cut shapes from scrapbook paper and adhere them to your masking tape using glue sticks or double-sided tape. Be sure to press down firmly to avoid any lifting.
For those who want a more polished finish, consider using clear packing tape over your designs. This not only seals everything in place but also gives your tape a shiny, finished look. Once you’ve completed your designs, cut the tape to the desired width and roll it back up or keep it flat if you plan to store it immediately.
This step-by-step guide makes washi tape creation straightforward and enjoyable. Embrace experimentation-play with different colors, patterns, and techniques until you find combinations you love. Creating your own washi tape lets you personalize your crafts like never before!
Creative Ideas for Decorating with Washi Tape
You might be surprised by just how versatile washi tape can be, especially when you make your own with masking tape! Once you’ve got your unique designs ready, the decorating possibilities are endless. Whether you want to spruce up your journal, create custom gift wrap, or refresh your home decor, washi tape adds a fun and personal touch. Here are some creative ideas to get you started.
Transform Everyday Items
Take a look around your space-everything from paper clips to flower pots can benefit from a dash of color. Try wrapping washi tape around the handle of scissors for a pop of personality or adding some flair to empty jars by covering them with your custom designs. You can even create labels by sticking strips of washi tape on jars and writing on them with a permanent marker.
Elevate Your Planner and Journals
Washi tape is a staple for journaling and planning. Use it to create borders on pages, mark important dates, or even section off portions of your pages for specific themes or tasks. You can mix and match your homemade washi tapes for a cohesive look. Another fun idea is to create “stickers” by cutting shapes or icons from your decorative tapes.
Gift Wrapping with a Personal Touch
Forget bland wrapping paper-washi tape is your new secret weapon for gift wrapping! Use it to decorate plain gift bags or create a design on plain wrapping paper. Lay down strips of your favorite washi designs to form a stylish backdrop, or use the tape to attach gift tags creatively. The recipient will appreciate the personal touch.
Wall Art and Home Decor
Want to refresh a room without a complete overhaul? Washi tape can be used to create temporary wall art. Use it to make geometric patterns, frames for photos, or even a simple mural. It’s easy to remove and reposition if you change your mind. For a smaller scale, you can tape pictures or postcards to walls, creating an ever-changing gallery that reflects your taste.
Fun Crafts with Kids
Get creative with the little ones! Kids can use washi tape to enhance their art projects. Encourage them to create collages or decorate homemade cards. It’s a safe and mess-free way to express their creativity. You can even make little bookmarks or embellish their school supplies with fun designs, making the process as enjoyable as the result.
With these ideas, your custom washi tape can take center stage in all sorts of creative projects. So get ready to unleash your inner artist!
Tips for Achieving the Best Washi Tape Results
To get the most out of your homemade washi tape, you need to pay attention to a few key aspects. First off, thickness matters. Using a masking tape that’s too thick can result in a less flexible and slightly unwieldy tape, while something too thin might not hold up well under use. Aim for a medium-weight masking tape that bends easily yet can hold its shape when decorated.
Design is pivotal-before you start crafting, take time to plan your designs. Whether you’re using stickers, stamps, or drawing directly on the tape, sketch out your ideas first. This helps in visualizing how the colors and patterns work together. Don’t be afraid to experiment! Layering designs and using transparent art that shows the tape’s texture can create stunning effects.
Application Techniques
When applying the designs to your washi tape, ensure clean edges and smooth surfaces. Start from one edge and gradually smooth your way across to eliminate air bubbles. If you’re using a printed design, give it time to dry thoroughly before peeling it off. A ruler or a straight edge can help you maintain a straight cut if you’re personalizing strips.
Maintaining color vibrancy is also crucial. If you’re using markers or watercolors, consider sealing your tape with a light spray of clear acrylic sealer after it’s fully dry. This not only protects your designs but also enhances the vividness of the colors. Just ensure that the tape is fully cured before applying any sealants!
Lastly, always keep your supplies organized. Having a dedicated space for your washi tape will save you time searching for your materials and keep your creative juices flowing. Store them in a way that allows you to see all your options at a glance-whether that’s in jars, on a rack, or as a DIY tape dispenser. This way, you’ll always find just the right color or pattern to complete your projects.
With these tips, you’re well-equipped to make the most beautiful, functional washi tape that enhances your crafting projects. So gather your materials and let your creativity shine!
Customize Your Washi Tape Designs Easily
You can turn plain masking tape into your very own washi tape canvas! The beauty of customizing your washi tape designs lies in the endless possibilities it offers. Whether you’re a seasoned crafter or just starting out, customizing your designs is straightforward and fun. Start by gathering your supplies: markers, paints, stickers, or even bits of fabric. You’ll be amazed at how you can transform simple masking tape into something personal and eye-catching.
One of the most rewarding aspects is designing your patterns. Think outside the traditional box. You can create geometric shapes, floral motifs, or even fun quotes. If you’re not confident in your drawing skills, try using stamps or stencils to achieve precise designs. Layering colors can add depth; consider using lighter shades underneath and deeper tones on top for a striking effect. And don’t hesitate to experiment! Mixing different materials like washi tape with printed scrapbook paper or fabric can yield stunning, one-of-a-kind creations.
To apply your designs seamlessly, keep a few basic principles in mind. Always ensure that you’re working on a clean surface and handle the tape gently when attaching patterns. If you’re using paint or ink, let everything dry completely before using the tape to ensure that your design stays vibrant and intact. For a polished look, consider sealing your finished tape with an acrylic spray-this not only enhances durability but also protects your artwork from scuffs and fading.
Storing your customized washi tape can be just as creative! Use jars, shoeboxes, or even a dedicated craft drawer organized by color or style. This not only keeps your workspace tidy but also makes it easier to find the perfect tape for your next project. Trust me, when your creations are well-organized, you’ll find yourself crafting even more. With these tips, you’ll soon have a remarkable collection of customized washi tape ready to enhance your projects and bring your creative flair to life!
Using Leftover Scrapbook Paper in Your Designs
Using leftover scrapbook paper is a fantastic way to elevate your DIY washi tape game without spending extra cash. If you’re like me, you likely have bits and pieces of scrapbook paper that you can’t bear to throw away. Instead of letting those scraps sit in a drawer, transform them into custom washi tape that reflects your style!
First off, consider the versatility of scrapbook paper. It’s available in an endless array of patterns, colors, and textures, making it perfect for creating unique washi tape designs. Simply cut the paper into strips that match the width of your masking tape, then adhere them to the tape with a glue stick or double-sided tape. You can even create fun shapes or layered designs by combining different paper scraps for a more dynamic look.
Tips for Using Scrapbook Paper
- Mix and Match: Don’t be afraid to combine patterns. A floral paper with a geometric design can create a striking contrast.
- Size Matters: Experiment with different widths for your tape. Thicker strips can make bold statements, while thinner ones might be great for delicate details.
- Finishing Touch: After applying your scrapbook paper, consider sealing your design with a clear acrylic spray to keep it intact and vibrant.
Incorporating scrapbook paper not only helps in personalizing your washi tape but also contributes to sustainability by reducing waste. Plus, every piece you create tells a story, reflecting your creativity and the memories attached to those paper remnants. So next time you’re crafting, dive into that scrap pile – you’ll be amazed at what you can create with a little imagination!
How to Store and Organize Your Washi Tape
When it comes to crafting with washi tape, organization is key. A well-organized stash not only saves you time but also sparks creativity. You want to be able to see your collection at a glance, so you’re inspired to use it! Here are some practical ways to store and organize your washi tape effectively.
One effective method is to use clear storage containers. A container with adjustable dividers allows you to customize the sections based on your tape sizes and allows easy access. For instance, brands like We R Makers offer storage bins that can hold over 200 rolls, making it easy to spot the color or pattern you need when you’re mid-project[2]. Alternatively, a tiered rack can also be fantastic. It keeps your tapes visible and sorted by color or pattern, which can be visually appealing in your workspace.
Another ingenious way to keep your washi tape under control is by using a hanging organizer. A pegboard setup or even a repurposed utensil holder can effectively display your collection. This method not only looks stylish but also allows you to grab what you need without rummaging through drawers. Plus, it opens up valuable workspace on your desk.
Lastly, don’t underestimate the power of labels. If you opt for bins or containers, labeling each section can help you quickly find specific tapes. This is especially useful if you’ve amassed a large collection over time. You’ll save yourself from the frustration of digging through multiple rolls to locate that perfect design for your latest project.
With these organization tips, you can easily streamline your washi tape collection and keep your creative juices flowing. Taking the time to organize means you’ll spend less time searching and more time crafting!
Fun Projects to Try with Your Washi Tape
You can unleash your creativity in countless ways with your homemade washi tape! This versatile crafting tool adds flair to just about anything. From decorating your planner to enhancing your home décor, the possibilities are endless. Here are some engaging project ideas that will inspire you to grab your washi tape and start crafting today.
Gift Wrapping Magic
Transform mundane wrapping paper into a custom gift by using your washi tape as embellishments. You can create stripes, patterns, or even unique shapes. This not only personalizes your gifts but also makes packaging them a fun part of the process. Try layering different tape designs for an eye-catching effect!
Planner and Journal Enhancements
One of the simplest yet effective ways to use your washi tape is to jazz up your planners or journals. Use it to create borders, highlight important dates, or even make custom tabs for easy navigation. You can also set up a mood tracker by using a different tape for each mood you want to represent. It’s a playful way to keep track of your feelings while making your journal visually appealing.
Home Décor Additions
You can easily include washi tape in your home décor. For instance, use it to decorate picture frames, create wall art, or even highlight the edges of shelves. This budget-friendly option allows you to personalize your space without committing fully to paint or permanent decor. Plus, if you ever want to switch things up, washi tape is easy to remove!
Fun Accessories
Create cute and functional accessories using washi tape. Consider making bookmarks, magnets, or even phone cases. Simply wrap a layer of washi tape around the desired item, and you’ve got a personalized piece that’s both stylish and practical. It’s a delightful way to showcase your unique designs and add a pop of color to everyday items.
These projects not only utilize your homemade washi tape effectively but also help you express your creativity. Whether you’re crafting for fun or trying to bring some personal style into your everyday items, playing around with washi tape opens up a world of crafty possibilities. So gather your supplies and let your imagination run wild!
Common Mistakes to Avoid When Making Washi Tape
When making washi tape from masking tape, it’s all too easy to make a few common blunders that can hinder your creative process. Knowing what pitfalls to avoid can save you time and frustration, and elevate your crafting experience. Let’s dig into some of the mistakes that can derail your DIY washi tape creations.
One major misstep is underestimating the importance of surface prep. If your masking tape isn’t clean or if the surface you are decorating isn’t dry, it can lead to bubbling or peeling. Always ensure surfaces are dust-free and dry! Additionally, using glitter or powdered pigments directly on damp paint can cause clumping, preventing that smooth, consistent finish we all desire. Take the time to prep properly; it pays off.
Another frequent error is not testing your designs before you commit to a larger piece. Try creating a few test strips on scrap paper to see how your colors and patterns play together. This not only saves material but allows you to experiment without fear. You might discover unexpected patterns or color combinations that are far better than your initial plan.
Don’t overlook the importance of adequate drying time. If you rush the process, your designs may smudge or not adhere properly. Once you paint or embellish your masking tape, give it ample time to dry completely before cutting or using it. Trust me-this step is crucial for a crisp, clean look.
Finally, keeping your workspace organized can help you avoid accidental mistakes. It’s easy to misplace your tools or materials when surrounded by a mess. A cluttered environment increases the chance of grabbing the wrong item or wasting time searching. Keep your materials grouped and labeled so you can quickly find what you need, enabling a smoother crafting session.
By avoiding these common mistakes, you’ll find making your own washi tape a much more enjoyable and fruitful endeavor. Embrace the learning curve, and don’t hesitate to make adjustments along the way!
Inspiring Ways to Use Washi Tape in Home Decor
Washi tape is a game-changer for home decor, and using your homemade versions made from masking tape just adds to the fun and creativity! You can transform your living space with simple applications that are quick, easy, and cost-effective. Imagine your walls, furniture, and miscellaneous items bursting with color and personality, all thanks to washi tape.
One of the most striking ways to use washi tape is by creating wall art. You don’t need to splurge on expensive paintings; just design shapes or patterns directly on your walls. You could outline geometric shapes or write inspirational quotes that brighten up your space. Pattern layer your tape for a unique look, or create a focal point with a colorful border around a significant artwork or photo.
For furniture, think about dressing up your coffee table or dresser with washi tape. Use it to create fun stripes or designs on drawers and tabletops. If you’re feeling adventurous, you could even use it to reimagine an old chair by lining the edges with colorful tape, giving it a fresh, modern look. Utilize your custom tape designs as a temporary way to experiment with different styles without the commitment!
Additionally, washi tape can be a great ally in creating personalized home accents. Wrap it around vases, jars, or candle holders to add a touch of flair. You can mix and match patterns for a playful, eclectic vibe, or stick to a uniform style for a more polished look. Don’t forget about wrapping gifts or creating custom bookmarks; the possibilities are virtually endless!
Finally, don’t underestimate the power of washi tape for seasonal decorating. Switch out colors and patterns with the changing seasons or holidays. From creating festive decorations for parties to subtly shifting your home’s ambiance throughout the year, washi tape allows you to do it all without breaking the bank. With these ideas, you can easily reinvigorate your home’s decor with personality and style, all while enjoying the satisfaction of a fun DIY project!
FAQ
markdown
Q: How do you make washi tape look store-bought?
A: To make your homemade washi tape look store-bought, use high-quality masking tape and smooth, evenly cut designs. After applying decorative paper, ensure the edges are clean and secure. A light coat of clear adhesive spray can also give it a polished finish.

Q: Can I use regular tape instead of masking tape for washi tape?
A: Regular tape isn't ideal for washi tape. Unlike masking tape, it tends to have stronger adhesive properties, which can make it difficult to reposition and remove without tearing. Stick with masking tape for the best results in crafting.

Q: What types of designs work best on homemade washi tape?
A: Simple patterns like stripes, polka dots, or floral prints work well for homemade washi tape. Opt for designs that can be easily repeated and are not too intricate, ensuring they remain attractive even when cut into smaller pieces.

Q: How can I create unique patterns for my washi tape?
A: Get creative by using stencils or stamps to apply paint or ink onto the masking tape. You can also layer different colored tapes or add embellishments like glitter or metallic tapes for fun, unique patterns that stand out.

Q: Are there any eco-friendly alternatives for making washi tape?
A: Yes! Consider using recycled paper or fabric scraps to create your designs. Alternatively, you can also use biodegradable adhesive washi tape. This keeps your crafting sustainable while still allowing for personalized creations.

Q: How do you remove homemade washi tape without damaging surfaces?
A: To remove homemade washi tape gently, pull it back at a 45-degree angle. If it sticks, apply a bit of heat from a hairdryer to soften the adhesive. This method minimizes the risk of damaging your surfaces.

Q: Can I use washi tape on walls, and will it leave residue?
A: Yes, washi tape is generally safe for walls and can be removed easily without leaving sticky residue. Always test a small area first to ensure it doesn't harm your wall paint.

Q: What are some creative uses for homemade washi tape beyond crafting?
A: Aside from crafting, use homemade washi tape for labeling items, decorating stationery, creating wall art, or even gift wrapping. Its versatility can enhance your DIY projects and personal organization efforts.
To Conclude
Now that you’ve learned how to create stylish washi tape from basic masking tape, why not dive into more creative crafts? This budget-friendly hack not only adds a splash of personality to your projects but also opens the door to endless possibilities. Start customizing your journals or planners with your unique designs today!
If you enjoyed this tip, check out our guides on using stickers and washi tape in your diary decoration for even more inspiration. And don’t forget to explore our other DIY projects – you’ll find plenty of great ideas to keep your creativity flowing! Subscribe to our newsletter for exclusive tips straight to your inbox, and share this with friends who love crafting. Let’s keep the creativity going!