Setting up your Sheaffer calligraphy pen can open up a world of creativity and expression. Did you know that Sheaffer pens are crafted with such precision that they elevate writing to an art form? Whether you’re a seasoned calligrapher or just starting your journey, knowing how to properly assemble your pen is crucial for achieving beautiful results. Many users find the setup process confusing or frustrating, but it doesn’t have to be! With clear, step-by-step instructions, you’ll be ready to create stunning lettering in no time. So, let’s dive in and unlock the full potential of your Sheaffer calligraphy pen!
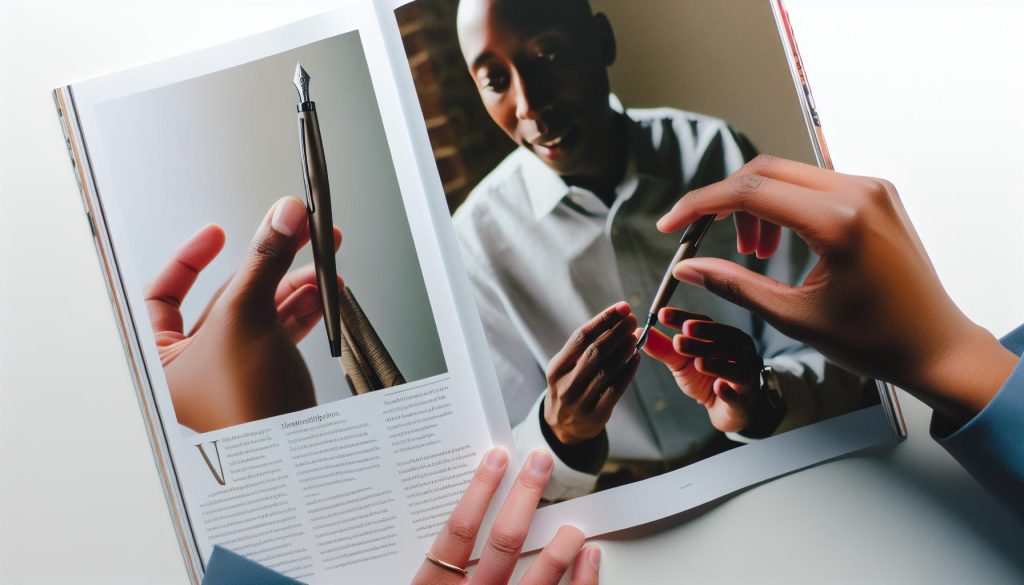
Essential Components of a Sheaffer Calligraphy Pen
To create beautiful and precise calligraphy, understanding the is crucial. Each part plays a significant role in how the pen performs, so let’s break down these components and what they contribute to your writing experience.
First up is the nib, the most vital part of the calligraphy pen. Made from high-quality metal, Sheaffer nibs are designed to deliver a smooth, fluid ink flow while allowing for varying line widths based on the pressure and angle of your strokes. Different nib sizes and styles (such as fine, medium, or broad) are available, catering to various calligraphic styles-from elegant scripts to bold strokes. Choosing the right nib is fundamental to achieving the desired aesthetic in your calligraphy work.
Next, we have the ink reservoir or cartridge. Sheaffer pens often use ink cartridges or converters, enabling you to choose between different ink types and colors. A reliable ink reservoir is essential for consistent ink flow, which is particularly crucial during intricate lettering work. Ensure that the reservoir is properly seated; a loose connection can lead to ink leaks, ruining your masterpiece.
The body of the pen, while often overlooked, is just as important. A well-designed body not only affects the pen’s weight but also its balance in your hand. Sheaffer pens are crafted to be comfortable for prolonged periods of writing, which is vital if you’re practicing or creating extended pieces of calligraphy. Look for pens with ergonomic designs that suit your grip.
Lastly, pay attention to the cap and clip. The cap protects the nib from drying out when not in use, while the clip allows you to secure the pen to a pocket or notebook, keeping it handy. A smooth cap mechanism ensures that your pen is easy to open and close, which can make a big difference during those creative moments when inspiration strikes.
By grasping these essential components, you’re setting yourself up for success. Each part contributes to functionality and performance, helping you master the beautiful art of calligraphy with your Sheaffer pen.
Step-by-Step Assembly Guide
To get your Sheaffer calligraphy pen ready for creating stunning letters and designs, the assembly process is straightforward yet important. A well-assembled pen not only enhances your writing experience but also ensures that you achieve the best results with each stroke. Here’s how to assemble your Sheaffer calligraphy pen step-by-step.
Start by selecting the appropriate nib for your writing style. Sheaffer offers a range of nib sizes like fine, medium, and broad. Once you’ve chosen your nib, gently connect it to the pen body. It should fit snugly, but avoid forcing it to ensure you don’t damage any parts. Make sure you align the nib correctly so that it sits straight and functions optimally.
Next, prepare your ink reservoir. Depending on your model, you can choose either an ink cartridge or a converter. If you’re using an ink cartridge, simply remove the cap and insert the cartridge into the back end of the pen until you hear a click. For converters, place it into the pen, then dip the nib into your chosen ink bottle and twist the converter to draw ink into the reservoir. Always check that the reservoir is secure to prevent any leaks.
Now it’s time to attach the cap. This may seem simple, but ensure that it clicks into place properly. This not only keeps the nib protected but also maintains the ink quality when the pen is not in use. Lastly, take a moment to test the pen’s balance in your hand. Adjusting the grip or the position of the cap can make a significant difference in comfort when you’re practicing your calligraphy.
With these steps, you’re ready to craft beautiful letters! Remember that practice makes perfect, and taking care of your pen will enhance your calligraphy journey. Enjoy exploring the world of writing with your newfound tool!
Common Mistakes to Avoid During Setup
Avoiding common pitfalls when setting up your Sheaffer calligraphy pen can save you time and frustration. Many new users make mistakes that can lead to a less-than-ideal writing experience. By being aware of these issues, you can ensure a smooth and enjoyable assembly process.
First off, one of the most frequent errors is misunderstanding how to attach the nib. Always ensure that the nib is aligned properly before securing it to the body of the pen. This means checking that it sits parallel to the pen and doesn’t wobble. Forcing it into place can lead to damage. If it’s misaligned, your strokes will feel uneven, and you might even ruin your nib. Take a moment to gently test the connection; it should feel snug but not forced.
Another issue to watch out for is not securing the ink reservoir adequately. Whether you’re using a cartridge or a converter, make sure it clicks securely into place. If you encounter leakage, it’s often due to an improperly fitted cartridge. A simple click can save a lot of headaches and keep your writing surface ink-free. Also, remember to clear any excess ink from the nib itself before you begin writing, which can prevent unwanted blots.
Lastly, pay attention to the cap. A common mistake is not capping the pen correctly after use. Ensure that it clicks into place to prevent the nib from drying out or accidentally getting damaged. This habit not only helps maintain the quality of your ink but also prolongs the life of your nib. Proper care during setup and after use transforms a good calligraphy pen into a great writing companion. Enjoy the art of beautiful writing with your Sheaffer calligraphy pen!
Understanding Ink Types for Calligraphy Pens
Choosing the right ink for your calligraphy pen can make all the difference in your writing experience. When it comes to Sheaffer calligraphy pens, understanding the different ink types available is crucial. Not only does ink affect the flow and richness of your strokes, but it also influences drying time, sheen, and overall performance. Each ink type has its own unique characteristics, and making an informed choice can elevate your calligraphy to exquisite levels.
One of the primary options you’ll encounter is water-based ink, known for its smooth flow and vibrant colors. This ink type is often recommended for beginners due to its easy cleanup and the ability to use with a variety of papers. However, keep in mind that it can bleed through thinner paper and may require a bit more drying time. On the other hand, pigment-based inks offer superior lightfastness and water resistance, making them an excellent choice for archival works. They’re generally more suited for experienced calligraphers since they can be more challenging to clean from your nib and may require special care during use.
If you’re looking to experiment with different effects, shimmer ink is another exciting option. This type of ink contains glitter and can add a stunning visual effect to your writing. It’s perfect for special projects or crafts but might need a little extra care to avoid clogging your nib. When selecting a shimmering ink, ensure that your calligraphy pen can handle it-Sheaffer pens generally do well with most inks, but testing a small amount first is a wise precaution.
For those who prefer convenience, using cartridges is a great option, especially when you’re on the go. Sheaffer offers a range of cartridges in various colors that easily fit into their pens. This eliminates the mess of filling the pen with ink while still allowing for a delightful writing experience. However, traditionalists may enjoy the ritual of using bottled ink and a converter, which can lead to a more customized writing experience.
Ultimately, understanding the characteristics of different ink types will prepare you for a rewarding journey in calligraphy. Don’t hesitate to experiment and find what works best for your style and projects-your calligraphy pen, especially a Sheaffer, is a gateway to artistic expression waiting for your personal touch.
Tips for Properly Filling Your Sheaffer Pen
Filling your Sheaffer calligraphy pen properly is crucial for achieving that smooth, consistent flow of ink you desire. Many enthusiasts overlook this step and end up frustrated with interruptions during their writing. The right technique not only ensures uninterrupted use but also extends the life of your pen and enhances your overall calligraphy experience.
To start, ensure your workspace is clean to avoid any unwanted mess. If you’re using bottled ink, grab a small container or inkwell to make dipping easier. When filling your pen, always hold it nib-down to prevent air bubbles from forming in the ink reservoir. Submerge the nib about a quarter inch into the ink while keeping it at a slight angle. Once dipped, gently pull back the plunger or twist the filling mechanism, depending on your pen model. This action creates a vacuum that draws ink into the reservoir.
After filling, remove the pen from the ink, and wipe off any excess with a soft cloth. This step is essential to prevent pooling, which can lead to smudging and unwanted lines on your paper. To test that your pen is adequately filled, give it a gentle shake, and make some practice strokes on a scrap piece of paper. You should see a steady flow of ink without skipping or blotting.
Lastly, don’t forget to clean your pen regularly. If you switch ink types or colors, it’s important to flush out the old ink to prevent clogs and maintain performance. Using warm, soapy water works wonders for cleaning, but make sure to let your pen dry completely before refilling it. Following these tips not only helps you make the most of your Sheaffer calligraphy pen but also keeps your writing experience rewarding each time you put pen to paper.
Troubleshooting Common Assembly Issues
Setting up your Sheaffer calligraphy pen can be a delightful experience, but it can also come with its share of hiccups. Whether you’re a seasoned calligrapher or just starting out, overcoming common assembly issues can enhance your enjoyment and mastery of this elegant tool. Often, the frustration comes from either misunderstanding the parts or not realizing how delicate the setup process can be.
One potential headache is having trouble aligning the nib with the ink reservoir. If you notice that the ink isn’t flowing smoothly, check to ensure that the nib section is securely connected to the barrel. Sometimes, a slight misalignment can block the ink from reaching the nib. Be gentle but firm when screwing the components together; excessive force can damage threads or even crack the pen. If the nib remains dry after assembly, give the pen a gentle shake to help the ink travel through the feed.
Another common issue is encountering air bubbles in the ink reservoir. These bubbles can disrupt the ink flow and cause skipping while you write. To resolve this, try tapping the barrel lightly with your fingers to dislodge any trapped air. If the problem persists, consider re-filling the pen using the right technique: ensure the nib is submerged deeply in the ink and held at an angle to allow for proper ink absorption.
Lastly, don’t overlook the importance of selecting the right ink for your calligraphy pen. Using incompatible ink can lead to clogs and uneven flow. Make sure you choose a fountain pen ink that’s designed for calligraphy. If you find your nib is constantly clogging, it might be time to clean it. Regular maintenance, including flushing the nib with water and allowing it to dry thoroughly, will prevent most issues from developing in the first place.
By staying mindful of these common pitfalls and their solutions, you’ll not only enhance your calligraphy experience but also deepen your appreciation for the craftsmanship of your Sheaffer pen. A little patience and attention can go a long way in ensuring that writing becomes a smooth and fulfilling process.
Caring for Your Calligraphy Pen After Assembly
To make your Sheaffer calligraphy pen last a lifetime, proper care is essential. These pens aren’t just tools; they’re invaluable instruments of art that benefit from regular attention. After you’ve enjoyed the setup, maintaining your pen will keep it performing beautifully and let you express your creativity without interruption.
Start by regularly cleaning your pen to prevent ink buildup. If you switch inks or take a break from writing, flush the nib and feed with lukewarm water. This simple habit can save you from clogs and ensures smooth ink flow. Disassemble your pen carefully: rinse the nib section until the water runs clear, and let it dry completely before reassembling. Avoid using harsh chemicals or soaps; they can damage the finish or get trapped in the nib.
Storing your Sheaffer pen properly is just as important. Always store it upright in a case if possible. This prevents ink from pooling in the nib and helps maintain a consistent flow when you write. If you’ll be storing it for an extended period, consider emptying the ink and cleaning it first. It’s a small effort that goes a long way in keeping your pen in top condition.
Lastly, be gentle with your pen. Calligraphy is an art form, and so is looking after your tools. Avoid applying excessive pressure while writing, as it can wear down the nib over time. Treat your Sheaffer with the same care you’d give to your favorite paintbrush or chisel. This attention to detail will enhance not only the pen’s performance but also your experience as you dive deeper into the art of calligraphy.
Techniques for Practicing Calligraphy
Learning calligraphy isn’t just about holding a pen; it’s an art form that blends practice with precision. To truly master your Sheaffer calligraphy pen, start by familiarizing yourself with basic strokes and the anatomy of letters. Practicing different strokes helps create muscle memory and can drastically improve your control over the nib.
Essential Techniques for Building Skills
- Warm-Up Exercises: Begin each session with warm-ups. This could be simple lines, loops, and curves to get the feel of the pen. These exercises help in developing consistent pressure and flow.
- Study Letter Forms: Break down letters into basic shapes. Focus on one letter at a time; for instance, work on the uppercase ‘A’ by first practicing the diagonal strokes separately before combining them.
- Consistent Pressure: Experiment with applied pressure on the nib. Light pressure creates thin lines, while heavier pressure yields thicker strokes. This dynamic adds depth and dimension to each letter.
Stay mindful of your posture and grip. A relaxed grip leads to better control and fluid movements. While practicing, ensure your hand is at a comfortable angle and your wrist is flexible. Capturing the right flow takes patience, but it’s essential for both neatness and style.
Incorporating Creativity
As you gain confidence, begin to experiment with flourishes and embellishments. Personalizing your letters with swirls or different styles can enhance your calligraphy and make it standout. Try adding decorative elements, like small dots or underlines, to further enhance your designs. Don’t shy away from exploring different paper types and inks, as they can influence your results and inspire new ideas.
Remember, practice doesn’t have to be monotonous. Set goals for each session-whether it’s completing a page of letters or a specific piece of art. And most importantly, have fun with it. The journey of practicing calligraphy unfolds your unique style, so embrace each step you take with your Sheaffer calligraphy pen.
Exploring Advanced Calligraphy Techniques
can elevate your writing to an art form that truly reflects your personality and creativity. Once you’ve mastered the basics, it’s time to dive into more intricate styles and practices that will not only impress but also enhance your skills with your Sheaffer calligraphy pen.
Start by experimenting with different styles of calligraphy, such as Copperplate, Gothic, or Brush lettering. Each style has unique features and nuances, and practicing them can help you broaden your skill set. For instance, Copperplate delivers beautiful, flowing script that relies on fine hairlines and thick downstrokes. You might begin by studying established alphabets for these styles and then gradually incorporate your personal flair. Don’t hesitate to reference examples from seasoned calligraphers for inspiration.
Incorporating color can greatly enhance your calligraphy. Using colored inks or even metallics can add a vibrant touch to your projects. Consider using different nib sizes or styles to explore how they interact with various inks. Practicing calligraphy with a brush pen can also open up new creative avenues, introducing a different texture and feel to your letters.
Another exciting technique is the use of ‘flourishing’-the art of embellishing your letters with swirls or decorative elements. Begin by adding light flourishes to simple letters before progressing to more complex designs. Use flourishes strategically; they can highlight key areas of your work, creating focal points that draw the reader’s eye. Remember, balance is key; too much embellishment can detract from the overall readability of your text.
Experimentation doesn’t stop there; play with composition and layout. Try combining various lettering styles in a single piece or integrating illustrations with your calligraphy. Consider creating greeting cards where your beautifully crafted letters frame a thoughtful message. Keep seasonal themes or personalized touches in mind to make your work more engaging. The most meaningful pieces often reflect your experiences and passions, so let those shine through as you refine your techniques.
With practice and exploration, your confidence will grow, and so will your ability to infuse your personality into your calligraphy. Embrace the journey-each pen stroke is a step forward in your creative endeavors with your Sheaffer calligraphy pen.
Customizing Your Calligraphy Experience
When it comes to personalizing your calligraphy journey, there’s a world of possibilities waiting to be explored. Your Sheaffer calligraphy pen isn’t just a tool; it’s an extension of your creativity and style. The right customization can transform your writing experience into something uniquely yours. Start by selecting the nibs that suit your writing style. Sheaffer offers various nib sizes-each delivering a different line thickness. Going for a broad nib? Expect some dramatic, bold strokes that can make your letters pop.
Moreover, experiment with different inks. The choice between traditional black ink or vibrant hues can completely alter the tone of your work. Consider using metallic inks for special projects, which can add a luxurious finish. If you’re feeling adventurous, mix ink colors on a palette to create a personalized shade that resonates with your artistic voice.
Maintaining the comfort of your pen is also key. Fine-tuning the grip can make a huge difference, especially during long calligraphy sessions. Look for ergonomic grips or tape that allow your fingers to slide effortlessly along the pen’s body while providing the right amount of texture for control. This simple switch can lead to greater comfort and better results.
Lastly, don’t shy away from adding personal touches to your workspace. Surround yourself with inspiring items-such as calligraphy books, swatches of your preferred color palette, or even framed pieces of your own work. A creative environment can spark inspiration and make the process all the more enjoyable. By embracing customization at every level, you’ll not only enhance your writing experience but infuse your personality into each piece you create.
Benefits of Using a Sheaffer Calligraphy Pen
Using a Sheaffer calligraphy pen isn’t just about putting ink to paper; it’s about enhancing your entire writing experience and turning ordinary writing into extraordinary art. The precision and quality that come with a Sheaffer pen make it a standout choice for both beginners and seasoned calligraphers.
One major benefit is control. The ergonomic design and carefully crafted nibs offer a unique feel in your hand that allows for smoother strokes and better maneuverability. This means you can create beautifully consistent lines without exceeding effort, which is essential for the intricate forms of calligraphy. The balance of the pen also contributes to a less fatigued hand, so you can focus on your artistry for longer periods.
Another advantage is versatility. Sheaffer pens are designed to work with various ink types, from traditional dyes to vibrant gel inks. This openness to different media lets you express your creativity fully. Imagine crafting invitations with rich metallic tones or sketching elegant lettering with deep, bold shades. The possibilities are endless, and using the right ink can dramatically alter the character and impact of your work.
Maintenance is a breeze too. Sheaffer pens are known for their durability and ease of cleaning, which means you spend less time worrying about upkeep and more time enjoying your writing. Plus, you’ll find a range of nib sizes to customize your writing style, enabling you to create everything from bold flourishes to delicate details effortlessly.
In summary, selecting a Sheaffer calligraphy pen is an investment in your craft. The combination of comfort, versatility, and ease of use empowers you to elevate your calligraphy skills while enjoying every stroke of the pen. Whether you’re penning a wedding invitation or personalizing a gift, the Sheaffer experience ensures your writing is as beautiful as your intentions.
Where to Find Additional Resources and Support
Finding the right resources and support when you’re diving into calligraphy can make a world of difference, especially when setting up your Sheaffer pen. There are plenty of avenues you can explore to enhance your experience and refine your skills. Here’s where to look:
Online Communities and Forums
Engaging with fellow calligraphy enthusiasts can provide invaluable insights. Websites like Reddit have dedicated forums (subreddits) such as r/calligraphy where you can share your experiences, ask questions, and get tips from seasoned users. Additionally, platforms like Facebook often have groups focused on calligraphy or Sheaffer pens specifically, which can be great for troubleshooting and gathering ideas.
Manufacturer Resources
Don’t overlook the Sheaffer website itself. They often provide detailed product guides, video tutorials, and even downloadable manuals that cover everything from assembly to maintenance. Their customer service is also a resource worth tapping into. If you’re ever stuck or unsure about something, reaching out can provide direct and effective solutions.
Workshops and Classes
Local art supply stores or community colleges may offer calligraphy workshops. These classes can be incredibly beneficial, providing hands-on learning and direct feedback. Plus, connecting with other learners can inspire you and expand your network. Check platforms like Meetup for local calligraphy groups, or search for online classes on platforms like Skillshare or Udemy.
Books and Online Tutorials
There are numerous books dedicated to calligraphy that cater to all skill levels. Look for titles specifically mentioning Sheaffer or general calligraphy techniques. YouTube is another goldmine for visual learners. You’ll find numerous channels that offer step-by-step instructions and tips on using your pen effectively.
Remember, the journey to mastering calligraphy with your Sheaffer pen is a continuous one, enriched by exploring various sources of information and connecting with others who share your passion.
Frequently asked questions
Q: How do I choose the right ink for my Sheaffer calligraphy pen?
A: To choose the right ink for your Sheaffer calligraphy pen, look for high-quality, water-based inks specifically designed for fountain pens. Avoid pigmented inks that can clog the nib. For detailed guidance, check the section on Understanding Ink Types for Calligraphy Pens in your setup article.
Q: What should I do if my Sheaffer pen nib is skipping?
A: If your Sheaffer pen nib is skipping, first check if it’s properly filled with ink. Clean the nib with warm water to remove any dried ink. Ensure the nib is positioned correctly. For more tips, refer to the Troubleshooting Common Assembly Issues section in the article.
Q: Can I use any type of paper with a Sheaffer calligraphy pen?
A: While you can use various types of paper, it’s best to choose smooth, bleed-resistant paper designed for ink. This prevents feathering and ensures crisp lines. More about paper choices can be found in the Techniques for Practicing Calligraphy section.
Q: How often should I clean my Sheaffer calligraphy pen?
A: Clean your Sheaffer calligraphy pen after every ink change or at least every few weeks if not in use. This prevents ink from drying and clogging the nib. For cleaning specifics, see the Caring for Your Calligraphy Pen After Assembly section.
Q: How long does it take to master using a Sheaffer calligraphy pen?
A: Mastering a Sheaffer calligraphy pen can take anywhere from a few weeks to several months, depending on your practice frequency. Regular practice with the right techniques is key. Check out the Techniques for Practicing Calligraphy for effective methods.
Q: What common mistakes should I avoid when assembling my Sheaffer pen?
A: Common mistakes include failing to ensure all components are securely fastened and using incompatible ink types. Refer to the Common Mistakes to Avoid During Setup section for more insights on a seamless assembly process.
Q: Is it possible to customize my Sheaffer calligraphy pen?
A: Yes, you can customize your Sheaffer pen by changing nib sizes or using different ink colors. Look for detailed customization ideas in the Customizing Your Calligraphy Experience section of your guide.
Q: What techniques can help enhance my calligraphy skills?
A: To enhance your calligraphy skills, practice regularly using various strokes and styles. Experiment with different ink and paper combinations for better results. For advanced techniques, refer to the Exploring Advanced Calligraphy Techniques section in the article.
The Conclusion
Congratulations! You’re now ready to unleash your creativity with your Sheaffer Calligraphy Pen. Remember, mastering calligraphy takes practice, but with this pen, you’re equipped to create stunning writing that reflects your unique style. Don’t hesitate to check out our tips on improving your calligraphy skills and discover some inspiring projects to try next.
If you have any questions or need further assistance, drop a comment below or visit our FAQs for more insights. And hey, while you’re here, consider signing up for our newsletter-get exclusive tips and tricks delivered straight to your inbox! Dive deeper into the art of lettering and explore a world of possibilities right at your fingertips. Happy writing!