Imagine being able to transform your Cricut creations with the elegance of calligraphy, adding a personal touch that truly stands out. Using a calligraphy pen on your Cricut machine not only enhances your projects but also lets you express your unique style in ways that pre-made designs simply can’t achieve. Whether you’re crafting invitations, designing home decor, or personalizing gifts, mastering this technique can elevate your work to a whole new level. In this guide, we’ll explore the essential steps to effectively use a calligraphy pen with your Cricut, ensuring that you can bring your artistic visions to life. Get ready to unlock your creativity and impress everyone with beautifully handwritten elements that are both professional and personal!
How Calligraphy Pens Work with Cricut Machines
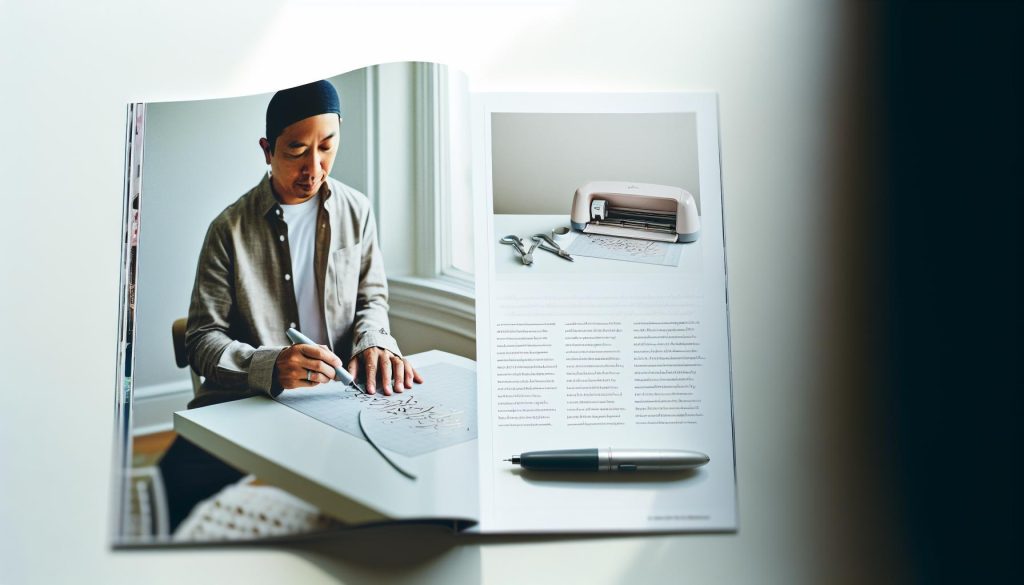
Using calligraphy pens with Cricut machines can elevate your crafting projects, adding a personal touch that’s hard to replicate. These pens are designed to mimic the look of traditional hand lettering, allowing your Cricut to produce beautifully scripted text and intricate designs. When you load a calligraphy pen into your Cricut, the machine converts your text into path lines and adjusts the pressure and speed to create those flowing strokes characteristic of calligraphy.
It’s essential to select the right type of calligraphy pen for your project. Typically, gel pens or marker-style pens work best, as they produce a nice, bold line and can handle the precision of the Cricut’s cutting mechanism. Many crafters find that pens with a soft brush tip offer versatility and a more authentic calligraphic effect. Check for compatibility with your Cricut model, as some machines may require specific pen holders or tips to work effectively.
When you’re ready to create, set your designs in the Cricut Design Space, where you can choose from different fonts that simulate calligraphy. Ensure you adjust the settings to match the pen you’ve chosen; this may involve altering the speed and pressure settings so the machine can adequately mimic the gentle motion of a hand. As a tip, always perform a test run on scrap paper to ensure your settings are dialed in for the best results. This trial-and-error approach can save time and materials, especially when you’re working on a project with multiple layers or intricate details.
Choosing the Right Calligraphy Pen for Cricut
Using the right calligraphy pen can transform your Cricut projects from ordinary to extraordinary. The choice of pen makes a huge difference in how your designs look and how well they function with your machine. For beginners and seasoned crafters alike, understanding the options available can help you achieve stunning results with your calligraphy projects.
Start by considering the type of pen that aligns with your creative goals. Gel pens and marker-style pens are often favorites among crafters because they produce bold, vibrant lines that look aesthetically pleasing. If you’re after that authentic brush-lettering effect, pens with a soft brush tip can be your best friend. These pens mimic the brush strokes of real calligraphy, allowing for fluid, natural designs that bring your text to life.
Before making your final choice, ensure compatibility with your specific Cricut model. Some machines may require special pen holders or adapters to use pens effectively. A little extra planning pays off-spending time on research can save you from frustration down the line. Don’t forget to perform some test runs with different pens on scrap material to find the perfect match for your design needs and machine settings.
In short, choosing the right calligraphy pen isn’t just about aesthetics; it’s also about functional compatibility with your Cricut. Selecting high-quality pens that suit your style and adhering to your machine’s requirements will maximize both your creative potential and the quality of your finished projects.
Preparing Your Cricut for Calligraphy Designs
To achieve stunning calligraphy designs with your Cricut, it’s essential to prepare your machine effectively. The first step is ensuring you have the right settings. Depending on the Cricut model you own, the design software-Cricut Design Space-should be updated to the latest version. This ensures you have access to the latest features and compatibility with various calligraphy pens. When setting up your project, select the appropriate tools for writing, rather than cutting, as this will enable your Cricut to recognize that it needs to use a pen.
Next, you need to select the proper pen holder for your chosen calligraphy pen. Not all pens fit in the standard pen holder, so check compatibility beforehand. You might need an adapter if your pen has a different size or shape. Once you’ve secured your pen, gently insert it into the holder, ensuring it’s snug. A loose fit can lead to uneven lines or the pen skipping, which can ruin an otherwise beautiful design.
Don’t forget to perform test runs with your selected pen on scrap material. This practice allows you to see how the pen interacts with your chosen cardstock or paper and gives you a chance to tweak settings like speed and pressure. Adjusting these settings ensures that your pen glides smoothly and produces clean, crisp lines. For example, if you’re noticing feathering, try a lighter touch or reduce the speed. It’s all about finding that sweet spot for your specific pen and material.
In summary, preparing your Cricut for calligraphy involves setting the right mode in Cricut Design Space, ensuring you have compatible pen holders, and trial runs with scrap materials. These steps aren’t just technical necessities; they significantly enhance the quality of your calligraphy projects and make the creative process far more enjoyable. So go ahead, set everything up, and get ready to bring your calligraphy visions to life!
Step-by-Step Guide to Calligraphy with Cricut
If you’re looking to elevate your projects with beautiful calligraphy, using a Cricut machine can make this process not just easier, but also much more precise. You might be surprised at how effectively you can create stunning calligraphic designs with these machines-here’s a straightforward guide to help you get started.
First up, select your design. Open Cricut Design Space and create or choose a font that matches the style you want. For calligraphy, it’s best to use cursive or script fonts, as they mimic natural handwriting. Once you’ve got your design laid out, adjust the sizing according to your project needs. Always remember to group letters together to avoid awkward spaces that don’t look natural when written.
Next, it’s time to set up your machine. Make sure your Cricut is powered on and connected to your computer or device. Load the pen you’ve chosen into the pen holder, ensuring it’s secure. Select the correct material and pen settings in Design Space. Choosing a higher pressure setting can often help achieve more defined lines, especially with brush pens.
Now it’s all about the actual writing process. Place your chosen paper on the cutting mat, load it into your Cricut, and hit the go button. The machine will draw your design in real-time, faithfully following the lines you’ve set. This is where the magic happens-the precision of the Cricut allows for flawless execution, even with intricate designs.
Finally, once your design is finished, take a moment to add personal touches if desired. You can embellish the calligraphy using colored pencils or markers to fill in or highlight certain areas. Layering with additional cuts of cardstock is another way to enhance the depth and look of your project.
With these steps, you’ll be well on your way to creating beautiful calligraphy that adds a personal touch to any project. Remember, practice makes perfect, so don’t hesitate to experiment with different pens and styles!
Tips for Perfecting Your Calligraphy Technique
Getting the most out of your calligraphy with a Cricut isn’t just about having the right tools-it’s about mastering techniques that ensure every stroke feels intentional and polished. Practice is key, but there are specific strategies that can dramatically enhance the quality of your calligraphy work.
Start by experimenting with different pen types. Brush pens, fineliners, and gel pens each offer unique results. Brush pens can create beautiful varied line thicknesses, giving a classic calligraphy feel, while fineliners provide sharp edges for cleaner, more precise designs. Don’t hesitate to set up a test run with each pen type, observing how the Cricut machine handles them.
One essential tip is to focus on your design placement. Before you cut, visualize how your finished project will look. Use a pencil to lightly outline areas where your calligraphy will go, helping you maintain balance and spacing. Fine-tuning the path your Cricut follows can eliminate distracting gaps and awkward letter placements, making your final piece appear more coherent.
Another important factor is the speed and pressure settings in your Cricut machine. Slower speeds can yield smoother lines, especially with more delicate calligraphy styles. Experiment with these settings in Design Space. If your lines seem too light, increase the pressure; this allows the pen to make a deeper impression on the paper.
Lastly, don’t overlook the power of layering. After your initial design is created, think about overlay techniques. Repeating certain words or phrases in a lighter opacity can add dimension and visual interest to your calligraphy. Remember, the goal is to make your work reflect your style and passion, so allow your creativity to flow, and embrace the joy of exploration in this beautiful art form!
Personalizing Projects with Calligraphy
Adding a personal touch to your projects using calligraphy can truly elevate them from ordinary to extraordinary. Whether you’re creating wedding invitations, personalized gifts, or home decor, calligraphy brings an unmatched elegance and heartfelt quality that speaks volumes. The magic happens when you harness the precision of your Cricut machine alongside the artistry of calligraphy pens, allowing you to channel your creativity without the stress of perfect handwriting.
Embrace Customization
Start by considering the context of your project. Are you crafting a heartfelt greeting card or designing a memorable piece of wall art? Tailoring your calligraphy style to match the theme is crucial. Think about the recipient’s personality or the event’s vibe; this will guide your font choices and design. For instance, a flowing, elegant script suits weddings beautifully, while a bold, modern style might be perfect for a birthday celebration.
You can also personalize text by incorporating names, dates, or meaningful phrases that resonate with the recipient. Using your Cricut, you can create intricate layouts that include these personalized elements seamlessly integrated within the design. Try different pen colors and styles to make names pop or blend harmoniously with the overall aesthetic.
Utilize Layering Techniques
Layering is a powerful technique in calligraphy that can amplify the personalization factor. Consider writing a name in bold, dark letters as the focal point of your design, then overlaying a faint, looping typography in the background that represents a shared memory or sentiment. This approach adds depth and dimensions, turning a simple project into a layered work of art that tells a story.
Consolidate your efforts in Design Space by organizing your layers carefully. Use different pressure settings for your Cricut to distinguish between foreground details and background elements. This gives the effect of natural handwriting while preserving the precision that a machine offers.
Don’t Forget the Details
Finally, remember that small details can have a big impact. Consider adding flourishes, embellishments, or decorative elements around your calligraphy. Think of things like borders, swirls, or even simple doodles that complement your typography. These little touches can add a sense of completeness to your design, making it uniquely yours.
By infusing your projects with thoughtful personalization, you don’t just create something beautiful-you create something meaningful. So go ahead, unleash your creativity, and watch your projects transform into cherished keepsakes that stand out in any setting!
Creative Calligraphy Project Ideas to Try
Looking to unleash your creativity with calligraphy on your Cricut? You’re in for a delightful experience. Here are some inspiring project ideas that will not only showcase your calligraphy skills but also add a personal touch to your crafts.
Start with personalized greeting cards. Imagine creating beautifully handwritten notes for birthdays, weddings, or holidays. Use your Cricut to outline the card designs and then add your calligraphy inside. Try mixing different pen styles-perhaps a bold script for the main greeting and a delicate italic for the inside message. This dual approach adds depth and personality to every card.
Another fantastic idea is to craft home decor items. Picture a wooden sign with a family name or an inspirational quote. Cut the base with your Cricut, then elegantly script the lettering with a calligraphy pen. You can even experiment with different materials; canvas or vinyl works beautifully too. Customize further by adding decorative elements like floral accents or borders, bringing your vision to life.
Consider creating wedding or event invitations that truly reflect the occasion’s charm. Use your Cricut to design intricate layouts that include decorative borders or layered elements, then apply your calligraphy for the names and details. This combination not only adds a personal touch but also elevates the overall aesthetic of the invitations.
Lastly, think about making custom gift tags. With the holidays around the corner or birthdays coming up, personalized gift tags can make your presents stand out. Use your Cricut to cut out creative shapes and then write the recipient’s name in calligraphy. For added flair, you can include little illustrations or icons that relate to the gift, making each tag unique.
These ideas are just the beginning. Calligraphy with your Cricut can transform everyday items into cherished keepsakes, all while allowing you to express your creativity. So grab your favorite pens, fire up your machine, and start crafting!
Troubleshooting Common Calligraphy Issues
When creating beautiful calligraphy with your Cricut, it’s not uncommon to encounter a few bumps along the way. Magic doesn’t happen without some hiccups, right? Let’s dive into troubleshooting some common issues that can crop up during your calligraphy projects.
One frequent issue is inconsistent line thickness. This can happen when the pen isn’t seated properly in the machine or if the pen you’re using doesn’t have a consistent ink flow. To fix this, ensure the pen is inserted correctly and securely. If you’re using a felt tip or gel pen, consider testing it on scrap paper to see if the flow is consistent before you start on your main project. Adjusting the settings on your Cricut can also help; try slowing down the speed of the cut to allow the pen more time to lay down ink.
Another problem you might face is ink smudging, especially on thicker paper or certain materials. This can ruin your beautifully crafted designs. To prevent smudging, let the ink dry completely before handling the piece. You can also use a heat gun on low to speed up drying time, but be cautious not to warp your material. Additionally, searching for pens with quick-drying ink can save you a lot of headaches.
If you find your Cricut isn’t recognizing the design or the pen isn’t writing where it should, double-check the settings. Make sure you’re using the correct material type in the Cricut software, as different materials can require different settings. Also, ensure your design is sized appropriately and that you’ve chosen the right tool for the pen you’re using. It’s a good practice to run a test cut before committing to the final design.
Lastly, if you’re experiencing skipped areas or broken lines, it’s often a sign of a dull or dried-out pen. Regularly check your pens for their condition and replace them as needed. Use high-quality pens suited for your Cricut machine to ensure a smoother writing experience. Keeping a small inventory of various pen types for different projects can also help mitigate this issue in the future.
With these insights, you’re well-equipped to tackle issues head-on and keep your calligraphy projects flowing smoothly. Each challenge is merely a chance to improve your technique and enhance your artistic journey. So keep creating, and enjoy the process!
Enhancing Your Calligraphy with Cricut Settings
Using your Cricut machine to create stunning calligraphy isn’t just about having the right pen; it’s also all about setting it up properly. Fine-tuning Cricut’s settings is crucial for achieving that beautiful handwritten look. Many users underestimate the power of these adjustments, stepping away from their projects frustrated, but your success largely hinges on how you configure your machine before you even start creating.
First things first, make sure you’re using the correct material settings within the Cricut software. Each type of material reacts differently to the pen’s pressure and speed. If you’re writing on heavier cardstock as opposed to lighter paper, adjusting the pressure to a lighter setting can make a significant difference in the flow of ink and the overall appearance of your calligraphy. Slower speeds allow the pen to lay down ink more smoothly, while higher speeds might result in skipped strokes. Consider experimenting with different speeds-a common setting is around 30-40 for calligraphy, but this can vary based on the pen type.
Beyond basic settings, take advantage of Cricut’s customizable options. Use the “Pen” option when selecting your material type, ensuring your machine knows it’s working with a pen-not a blade. You can even set the machine to “Write” mode for specific designs, which tells it to use the pen only rather than cutting into the material. This reduces the chance of misalignment because your Cricut machine understands its task better. For certain projects, you might just find that a double pass-having the machine go over the design twice-enhances the ink flow and results in bolder lettering.
Finally, always run a quick test project using the pen you plan on using before attempting your main piece. It’s a simple yet vital step that can save a lot of time and the disappointment of ruined creations. Use the scrap materials you have lying around, and don’t hesitate to tweak your pressure, speed, or even the pen type based on the results you get. By paying attention to these settings, you’ll turn your Cricut into not just a tool for cutting but a powerful ally in your calligraphy journey, leading to beautiful, personalized creations every time!
Inspiration: Beautiful Calligraphy Examples
Beautiful calligraphy can elevate any project, making it truly unique and heartfelt. Whether you’re crafting a wedding invitation, designing a personal gift, or creating custom home décor, using your Cricut machine with calligraphy pens opens up endless possibilities. Here are some inspiring ideas to ignite your creativity and help you explore the art of calligraphy.
Types of Projects to Consider
- Greeting Cards: Handmade cards with elegant calligraphy can make any occasion special. Personalize messages for birthdays, anniversaries, or holidays.
- Wall Art: Create stunning art pieces by writing out quotes or affirmations. Use decorative frames to showcase your work.
- Event Decor: Enhance your celebrations by designing place cards, banners, or table numbers that feature beautiful calligraphy.
- Scrapbooking: Incorporate calligraphy into your scrapbook layouts with handwritten notes or captions that complement your photos.
Experimenting with different styles of calligraphy can lead to unique outcomes. Consider traditional scripts like Copperplate or modern styles like brush lettering. Each pen you choose will produce varied results, which means your finished project can take on a completely new flair. Always keep in mind that the beauty of calligraphy lies in its imperfections and personal touch, so don’t strive for perfection-embrace your style!
### Adding Color and Flair
Don’t limit yourself to black ink. Explore colored inks or metallic pens for a stunning effect. You can even use glitter pens or dual-tip markers for added depth and texture. Layering different styles-like combining script with block letters-can also enhance the visual interest of your projects.
Lastly, browsing online platforms like Pinterest or Instagram can provide a wealth of inspiration. Search for calligraphy hashtags or follow calligraphy artists to see what they’re creating. This can spark new ideas and techniques to try, pushing your Cricut calligraphy endeavors to new heights.
Incorporating calligraphy into your crafting not only beautifies your projects but also adds a personal touch that will make a lasting impression. So grab your favorite calligraphy pen, set up your Cricut, and unleash your creativity!
Maintenance Tips for Your Calligraphy Pens
Taking care of your calligraphy pens is essential for maintaining their performance and longevity, especially when you’re integrating them with your Cricut machine. A little proactive maintenance can significantly improve the quality of your designs and your overall crafting experience. One of the simplest yet most effective practices is to keep your pens capped when not in use. This prevents the ink from drying out, ensuring a consistent flow when you’re ready to create.
After each use, consider cleaning the nibs of your pens. Just a quick wipe with a damp cloth or paper towel can prevent ink buildup. If you notice your ink flow becoming inconsistent, try dipping the nib in a small amount of warm water. This can help dissolve any dried ink that might be causing blockages. For water-based inks, a simple rinse under a tap can suffice-just ensure they’re fully dry before you use them again.
When storing your calligraphy pens, keep them upright if possible. This helps maintain the ink supply at the nib, preventing it from pooling at the bottom and causing leaks. If you’re using markers, opt for horizontal storage. Grouping similar pens together also makes it easier to find what you need for specific projects. Utilize marker holders or rolling carts to keep them organized.
Lastly, monitor your ink levels regularly. If you notice a pen starting to run low, consider refilling it or replacing it before starting an important project. There’s nothing more frustrating than running out of ink mid-design! By following these maintenance tips, you’ll ensure your calligraphy pens stay in top shape, allowing your creative ideas to flow freely on every project.
Expanding Your Calligraphy Skills Beyond Cricut
Incorporating calligraphy into your projects doesn’t have to stop with your Cricut machine. As a calligraphy enthusiast, there’s a whole world to explore beyond those electronic borders. Whether you’re looking to refine your technique, venture into new styles, or even integrate calligraphy into other crafts, expanding your skills will deepen your artistry and enhance your creative repertoire.
One of the easiest ways to broaden your calligraphy expertise is by experimenting with different styles and mediums. Try traditional tools like brushes or dip pens, which can produce varied textures and strokes that a Cricut might not capture. You can create personalized greeting cards, invitations, and even wall art using these authentic tools. Explore various types of calligraphy-from the classic elegance of copperplate to the bold strokes of modern brush lettering. Each style conveys a different emotion and helps you find your unique voice.
Additionally, consider taking classes or workshops. Many local craft stores or community centers offer courses that focus on specific calligraphy techniques. Online platforms also provide an array of tutorials, from beginner to advanced levels. Engaging with a community of fellow calligraphy lovers can inspire you, offer feedback, and help you stay motivated. Sharing your work on social media or joining forums can lead to new opportunities and collaborations.
Another exciting avenue is to incorporate calligraphy into other crafting projects. Think about adding handwritten quotes to scrapbooks, integrating calligraphy into mixed media art, or transforming your calligraphy into digital prints. You can even create custom designs for textiles or home decor, blending technology and traditional art forms. The possibilities are endless when you think outside the Cricut box.
Finally, don’t forget to participate in challenges or prompts that encourage daily practice. This can range from lettering a new quote every day to creating holiday-themed calligraphy. The more you practice and interact with different styles and projects, the more confident and skilled you’ll become. Embrace this journey, and let your creativity flourish, both with your Cricut and beyond.
Frequently asked questions
Q: Can you use any calligraphy pen on a Cricut machine?
A: No, not all calligraphy pens work with Cricut machines. You need to choose pens that are compatible with your specific Cricut model and designed for use in a writing tool holder. Check the manufacturer’s guidelines for suggestions on the best pens to use for your projects.
Q: How do you set up your Cricut for writing with a calligraphy pen?
A: To set up your Cricut for writing, load your calligraphy pen into the writing tool holder, select the “Write” function in the design software, and adjust the pen settings according to the desired project. This ensures your machine uses the pen for creating beautiful handwritten designs.
Q: What are some tips for achieving better calligraphy results on Cricut?
A: For better results, ensure even pressure when placing the pen on paper, use high-quality cardstock, and adjust your machine’s speed settings. Practice with different pen types and sizes to find the best fit for your calligraphy style. Experimentation leads to improvement!
Q: Why is my Cricut not recognizing the calligraphy pen?
A: If your Cricut isn’t recognizing the pen, ensure it’s securely placed in the holder, and check that you’ve selected the correct writing tool in the software. Additionally, verify that the pen is compatible with your Cricut model. If the issue persists, try restarting the machine.
Q: How can I personalize projects with calligraphy on Cricut?
A: You can personalize projects by using custom text or monograms created in your design software. Select a calligraphy font that aligns with your project and make adjustments in size and spacing. This allows you to add unique touches to cards, invitations, or decor items.
Q: What materials are best for calligraphy projects on Cricut?
A: The best materials for calligraphy projects on Cricut include smooth cardstock, specialty paper, or canvas. Choose materials that will hold ink well and avoid textures that might smudge or bleed. Always test with a sample before starting on your main project.
Q: Can I create a font from my own handwriting for Cricut?
A: Yes, you can! Use a tool like Calligraphr to create a custom font based on your handwriting. Once generated, upload the font to Cricut Design Space to use in your projects. This adds a personal touch that showcases your unique style.
Q: Are there specific Cricut settings for calligraphy designs?
A: Yes, for calligraphy designs, adjust your Cricut settings to the “Write” mode and select a slower speed for more controlled strokes. This will enhance the fluidity of your pen movements and produce more aesthetically pleasing results in your designs.
Insights and Conclusions
You’re now ready to elevate your Cricut projects with the beauty and elegance of calligraphy! By mastering the calligraphy pen techniques, you can add a unique, personal touch that your friends and family will love. Don’t just stop here-dive deeper into our related guides on creating custom fonts and enhancing your designs with our top tips.
Feeling inspired? Go ahead, grab your Cricut, and start experimenting today! If you have questions or want to share your creations, drop a comment below-we’d love to hear from you. For more expert tips and exclusive content, consider signing up for our newsletter. Remember, the world of crafting is just a click away, and you’ll discover endless possibilities to make your projects shine. Happy crafting!