Putting together an Art Maker calligraphy pen might seem daunting, but it’s a rewarding step toward unleashing your creativity. Did you know that the right pen can dramatically improve your writing experience and help you achieve beautiful lettering? Many a frustrated artist has faced issues with pen assembly, leading to inconsistent results and lost motivation. By mastering the assembly process, you’ll not only elevate your calligraphy skills but also gain a deeper understanding of your tools, transforming your art-making experience. In this guide, we’ll break down the steps to assemble your calligraphy pen correctly, ensuring you’re set up for success. So, let’s dive in and unlock the beautiful possibilities that await with your new tool!
Understanding the Components of Your Calligraphy Pen

Every calligraphy pen has a story told through its components. Understanding each part not only enhances your crafting process but also elevates your art. From nibs to bodies, each element plays a crucial role in how your pen performs and how your writing style evolves.
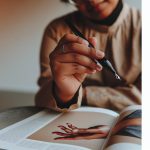
At the very heart of any calligraphy pen is the nib. This small, often overlooked piece is where the magic starts. Nibs come in various shapes and sizes, impacting the line width and flow of your ink. For instance, broad nibs create sweeping strokes ideal for classic scripts, while fine nibs offer precision for intricate designs. You’ll find nibs made from different materials, like steel or gold, each providing unique flex and durability characteristics. Choosing the right nib for your style can refine your overall penmanship.
Next up is the body of the pen, usually crafted from wood, plastic, or metal. The body not only dictates the pen’s weight and feel but also impacts your grip. A well-balanced pen allows for longer writing sessions without fatigue, making it essential for artists who spend hours perfecting their work. Ergonomic designs can significantly improve your comfort and control, so don’t hesitate to try out different styles before settling on one.
Finally, let’s not overlook the ink reservoir, which is often integrated into the body or can be a separate component, like a cartridge or converter. A reliable ink flow can make or break your experience. If you prefer versatility, consider pens that allow for various inks, from vibrant colors to metallics, letting you experiment and express your creativity.
Understanding these components enriches not just your craftsmanship but your appreciation of the art of calligraphy itself. By selecting the right parts, you equip yourself not only to write beautifully but to enjoy the unique journey each pen takes you on.
Choosing the Right Materials for Your Art Maker Pen
Choosing the right materials for your calligraphy pen is as crucial as selecting the right paintbrush for a painter. Your pen isn’t just a tool; it’s an extension of your creativity. The materials you use affect everything from your comfort during writing to the final aesthetic of your work. So, let’s dive into what makes a great calligraphy pen and how to choose materials that suit your style and needs.
A fundamental aspect is the nib. Nibs come in different materials such as stainless steel, gold, and even ceramic. Stainless steel nibs offer durability and a consistent feel, making them perfect for beginners. Gold nibs, on the other hand, provide exceptional flexibility and a smooth glide, often preferred by advanced calligraphers who crave expressive line variations. Think about how you want your writing to feel and represent on paper-your nib material will play a pivotal role in that experience.
Next, consider the body of the pen. This is where personal preference shines. You might opt for a wooden body for a classic feel, or perhaps a lightweight acrylic for versatility and vibrant color. The body’s material not only influences weight but also your grip. If you’re planning to write for long periods, look for ergonomic designs that reduce strain on your hand. Sometimes, trying different materials at a local art supply store can reveal what feels best in your hand-don’t hesitate to experiment!
Lastly, let’s talk about the ink reservoir. Most modern calligraphy pens feature internal reservoirs that can accommodate different types of ink, from bottled to cartridge systems. Ensure that the material used for the ink reservoir complements the ink type. For instance, if you love vibrant, fluid inks, you might want a pen that efficiently manages flow to avoid any unpleasant surprises during your writing session. Look for pens that let you mix and match inks, allowing for creative flexibility.
In summary, your choice of materials can greatly enhance your calligraphy experience. Consider nib type, body material, and ink reservoir design carefully. Each decision you make shapes not just the pen but your entire workflow and artistic expression. By investing thoughtful time in choosing the right components, you unlock a world of creative potential in your calligraphy journey.
Step-by-Step Assembly Guide for Beginners

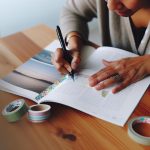
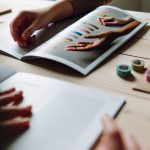
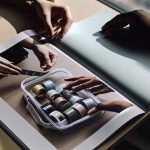
Assembling your calligraphy pen might seem daunting at first, but with the right steps, it can be a satisfying part of your creative process. Start by gathering all the components you’ll need: the nib, pen body, ink reservoir, and any other attachments or decorative elements you’ve chosen. Having everything at hand will make the process smoother and more enjoyable.
First, attach the nib to the pen holder. This piece usually slides or screws on, depending on the design. If it’s a screw-on nib, be careful not to overtighten it; you want it snug, but not so tight that it becomes difficult to remove later. Make sure the nib is facing the right direction; a common mistake is installing it upside down, which can lead to a frustrating writing experience.
Next, when you’re ready to fit the ink reservoir, ensure it’s clean and dry. Align it carefully with the pen body and gently push or twist it into place. If you’re using a cartridge system, make sure it clicks in securely. After that, fill your ink reservoir with your choice of ink. If you’re using bottled ink, a syringe can help you avoid spills. Once filled, check for any leaks by holding the pen upright for a few moments. If all looks good, you’re ready to insert the nib into the pen body, ensuring everything aligns correctly.
Finally, give your pen a quick test. Use scrap paper to see how it writes and if the ink flows smoothly. Remember, the joy of creating with your pen begins with proper assembly-so take your time, enjoy the process, and soon you’ll be crafting beautiful calligraphy!
Common Mistakes When Assembling Your Pen
Assembling your calligraphy pen can feel like a rite of passage, but many dive in unprepared and set themselves up for frustration. Common mistakes can derail your experience, leading to issues that could have been easily avoided. Recognizing these pitfalls not only ensures a smooth assembly but also enhances your overall enjoyment of using the pen.
One of the biggest errors is misaligning the nib. It’s crucial to ensure that the nib is installed correctly, facing the right direction. A nib that’s upside down can ruin the whole writing experience, causing ink to flow poorly or not at all. Before you secure it, double-check its orientation. Don’t rush this step-taking a moment to verify can save you significant disappointment later.
Another common mistake involves the ink reservoir. Many assume that just any reservoir will fit, but each pen has specific requirements. A poor fit can lead to leaks, which is a mess no one wants. Always ensure your ink reservoir is compatible with your pen body and that it’s clean and dry before assembly. Taking the time to inspect each component goes a long way.
Finally, don’t overlook the importance of a leak check after filling the ink reservoir. Some rush to test write without ensuring everything is secure, leading to a messy surprise. Hold your pen upright for a few moments after assembly to catch any leaking ink before it soils your workspace. This small step can save you from a big headache. By avoiding these common mistakes, you’ll not only preserve the integrity of your calligraphy pen but also enhance your artistic experience.
Advanced Techniques to Customize Your Calligraphy Pen

When it comes to customizing your calligraphy pen, the possibilities are as endless as your creativity. Making your pen unique doesn’t just enhance your writing experience; it can also improve your technique and personal style. One of the simplest yet most impactful modifications you can make is adjusting the nib. For instance, using a different nib size can drastically change the thickness and flow of your lines. If you often find yourself struggling with certain strokes, consider exploring nibs designed for specialized techniques, like italic or brush-style writing. These can offer you a fresh perspective on your lettering skills.
Another avenue for customization is the ink. The ink type can alter everything from color vibrancy to fluidity. Opt for different inks-some pens work beautifully with metallic or glitter inks that can make your calligraphy shine. Pigment-based inks can provide rich colors and durability, while dye-based inks flow smoothly and are great for everyday use. Don’t shy away from experimenting; a well-chosen ink can make your work pop off the page and reflect your personal style.
Think about the pen body and grip as well. While many pens come with standard grips, you can find or create ergonomic grips that suit your hand better or add comfort during long sessions. Consider wrapping the grip with soft materials or using a custom paint job to give it your unique flair. A pen that feels good in your hand is not only a tool but a work of art in itself.
Finally, layer in your personality with decorative elements. Integrate washi tape, stickers, or even custom decals on your pen’s body. These touches can be particularly inspiring, reminding you of what you love about calligraphy every time you reach for your pen. Customizing your calligraphy pen isn’t just about looks-it’s about finding a tool that feels right for you and enhances your creative journey. So get out there, play around with these techniques, and make that pen uniquely yours!
Caring for Your Art Maker Calligraphy Pen
Caring for your calligraphy pen is crucial to maintaining its performance and longevity. A well-loved pen can become a trusted companion in your creative journey, but neglecting it can lead to frustrations such as skipped ink or uneven lines. Start by ensuring you clean your pen regularly, especially after using different ink types or colors. Inks like metallic or glitter can clog tips quickly, so a simple rinse with water after each use can save you headaches later.
When you notice your nib isn’t performing as it should, it’s often time for maintenance. Always let it dry completely before storing it to prevent rust or damage. If you’re using a fountain pen, disassemble it according to the manufacturer’s instructions and soak the nib in water to remove any leftover ink. For brush pens, a gentle rinse under running water will do wonders-just avoid pressing down too hard on the bristles.
Storage matters too! Keep your pens in a case or flat position rather than standing upright, as this can lead to leaking ink. Consider using a padded roll or even a customized holder that protects your work and keeps everything organized. If you switch out nibs regularly, make sure to keep them in separate, labeled compartments to avoid mix-ups.
Finally, invest a bit of time understanding the materials you’re using. Different inks and papers can wear down your nibs at various rates. By matching your ink type with the proper paper, you’re not only enhancing your calligraphy work but also prolonging the life of your tools. Treat your tools with respect, and they’ll reward you with better performance and stunning results for your art.
Troubleshooting: Fixing Common Assembly Issues
When assembling an Art Maker calligraphy pen, you might encounter some common pitfalls that can easily derail your creative flow. These issues range from improper alignment of components to difficulties with ink flow. Fortunately, with a little insight, you can troubleshoot these problems effectively and keep your pen in perfect working order.
First, one of the most frequent issues is misalignment of the nib and feed. If you notice uneven ink flow or skipped lines, your nib might not be seated properly. To fix this, disassemble the pen carefully, ensuring that the nib aligns snugly with the feed. If the nib seems loose, check for any debris that might be causing a blockage. A gentle wipe with a microfiber cloth can help clear out minor clogs. Always reassemble with precision; a slight tilt can disrupt the entire writing experience.
Another common concern is ink not flowing as expected. This often happens when the ink reservoir runs low or the cartridge isn’t secured tightly. If your pen has a refillable system, ensure it’s filled with the right ink type and is properly sealed. If flow issues persist even with a full cartridge, consider soaking the nib in warm water for a few minutes to dissolve dried ink. After drying it completely, reassemble and test it on paper; you should see an improvement.
Lastly, if your pen writes inconsistently or feels scratchy, it may be time to examine the nib’s condition. Nibs can wear down from frequent use or may arrive with minor manufacturing defects. If the nib is distressed, gently smooth the tip using fine polishing paper. This technique can significantly enhance its performance and provide a smoother writing experience. Don’t hesitate to reach out to communities or forums dedicated to calligraphy; they can offer valuable tips and shared experiences that will enrich your journey further.
In summary, proper assembly and maintenance of your Art Maker calligraphy pen are crucial to avoiding common assembly issues. Keep an eye out for misalignment, ink flow problems, and nib wear. By taking these proactive steps, you can enjoy a seamless writing experience that enhances your calligraphy skills and creative expression.
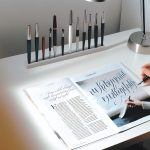
Exploring Different Calligraphy Pen Styles
When it comes to calligraphy, the pen you choose can dramatically affect the results you achieve. There’s a diverse range of calligraphy pen styles, each designed for different effects, techniques, and personal preferences. Understanding these styles not only enhances your skillset but also helps you express your unique artistic voice.
The most common types include dip pens, fountain pens, and brush pens. Dip pens are a classic choice; they consist of a nib and a holder. This style offers a wide variety of nibs, allowing for precision lines and dramatic strokes. The tactile experience of dipping the pen into ink can heighten your connection to the art. On the other hand, fountain pens provide convenience without sacrificing quality. With a built-in ink reservoir, they’re an excellent choice for longer writing sessions and everyday use. If you’re inclined toward more dynamic lettering styles, brush pens are your best friend. They mimic traditional brushes, allowing you to create fluid, expressive strokes and give you the freedom to explore different brush techniques.
Choosing the Right Style for Your Needs
Different styles are suited to specific calligraphy techniques. If you’re aiming for the delicate, intricate strokes of traditional scripts like Copperplate or Spencerian, a flexible nib dip pen is ideal. Alternatively, for modern calligraphy with its expressive curves and varied line weights, a brush pen provides versatility and ease of use. It’s also wise to consider your comfort and how the pen feels in your hand; a well-balanced pen promotes longer, more enjoyable sessions without strain.
Consider experimenting with different styles as you build your Art Maker calligraphy pen. The beauty of customizing your setup means you can mix and match components to suit your artistic endeavors. For instance, pairing a fine nib with a certain ink can yield impressive results for detailed work, while using a broader nib or brush for larger pieces allows for more expressive lettering.
So, before you dive into your next project, take the time to explore various styles and understand how they can shape your outcomes. Whether for everyday use or special projects, the right calligraphy pen can elevate your creations and enhance your enjoyment of the art form. As you hone your skills, you’ll find that each style not only fulfills a functional role but will also inspire your artistic journey.
Enhancing Your Calligraphy Skills with the Right Tools
The right tools can make all the difference in your calligraphy journey, turning a frustrating task into a joyful art form. When putting together your Art Maker calligraphy pen, it’s crucial to understand how each part contributes to your overall experience and results. From nib choices to ink types, every detail matters. So, let’s explore how the right tools can elevate your skills and enhance your creativity.
One of the first decisions you’ll make is choosing the right nib. Different nibs offer varying flexibility and line thicknesses, influencing the style of your lettering. For example, if you’re aiming for smooth, flowing scripts, a flexible nib allows for those beautiful, expressive strokes. Brush pens, on the other hand, can serve both delicate strokes and bold flourishes, making them perfect for modern calligraphy. Experimenting with various nibs can help you discover what feels best and produces the results you want.
Don’t overlook the importance of ink. High-quality ink not only flows smoothly but also improves the vibrancy of your work. Water-based inks are great for beginners due to their ease of use and clean-up, while pigmented inks offer richer colors but may require more effort to clean from your nib. For those looking to create something unique, consider mixing your own ink colors to match your artistic vision. The right combination of nib and ink can transform your practice sessions, allowing you to focus more on technique rather than struggling with inadequate materials.
To round out your toolkit, invest in quality paper. The texture of your paper will directly affect how your pen glides across the surface. Smooth papers are ideal for fine lines, while textured papers can add an appealing depth to your strokes. Don’t be afraid to try different types of paper to see how they change your writing style and the overall look of your work.
Ultimately, enhancing your calligraphy skills is about finding the right tools that resonate with your personal style. The journey may involve some trial and error, but each experiment will bring you closer to mastering this beautiful art form. Embrace the process, enjoy the discovery, and watch your creativity flourish as you build your perfect Art Maker calligraphy pen.
Getting Inspired: Creative Uses for Your Calligraphy Pen
There’s something incredibly rewarding about using a calligraphy pen that transcends mere writing. It’s not just about forming letters; it’s about crafting art. Your Art Maker calligraphy pen can be the gateway to a world of creativity, enabling you to explore various applications that can bring your writing to life in extraordinary ways. Here are some innovative and inspiring uses for your calligraphy pen that can ignite your passion and expand your artistic repertoire.
Start with personalized gifts. Imagine crafting beautifully written letters, poems, or quotes on high-quality paper or card stock, and presenting them as gifts. Consider decorating the front of a gift box with a stunning nameplate or creating custom greeting cards for occasions like birthdays, weddings, or anniversaries. Your pen can turn a simple note into a heartfelt treasure that recipients will cherish.
Next, think about home décor. Calligraphy is a fantastic way to add a personal touch to your living space. Whether it’s a framed inspirational quote in your entryway or a daily reminder in your kitchen, using your pen to create wall art can elevate the aesthetics of your home. You can make beautiful place cards for your dining table or design art prints that reflect your personal style. The versatility of your calligraphy pen allows you to experiment with different styles and colors to match your home’s decor.
Don’t forget about event decorations. If you’re hosting a party or a wedding, your calligraphy skills can shine. Use your pen to create custom signage, such as welcome signs, menus, or table numbers. Adding elegant writing to these elements enhances the overall atmosphere, making your event feel more special and thoughtfully curated.
Lastly, consider using your calligraphy pen for journaling and scrapbooking. Combining beautiful writing with your notes and memories can transform an ordinary journal into a cherished keepsake. Use your pen to highlight important dates, quotes, or reflections in your journal. Feel free to mix media by incorporating doodles, illustrations, and other embellishments alongside your calligraphy.
Incorporating these creative uses for your Art Maker calligraphy pen can not only enhance your skills but also motivate you to think outside the box. Embrace the joy of expressing yourself through artful writing and watch your creativity flourish. Whether for personal enjoyment or sharing with others, there’s no limit to what you can create.
Where to Find Additional Resources and Community Support
When you’re starting your journey with calligraphy, finding reliable resources and community support can make all the difference. There’s a wealth of information out there, but knowing where to look can save you time and enhance your skills much faster.
Online platforms like forums and social media groups are invaluable. Sites such as Reddit have dedicated communities where you can share your experiences, ask questions, and get feedback on your work. Look for groups specifically focused on calligraphy – these places are filled with enthusiasts who are eager to help beginners and share tips on everything from assembling your Art Maker calligraphy pen to mastering advanced techniques.
YouTube is also a treasure trove of tutorials. Many seasoned calligraphers upload step-by-step videos that show everything from basic strokes to complex designs. Engaging with these video tutorials can help you visualize the assembly process and see firsthand how others achieve stunning results with their pens.
For printed resources, consider investing in books about calligraphy techniques and pen maintenance. These often provide in-depth advice and can serve as great reference materials. Local art supply stores may host workshops or classes, which not only enhance your skills but also connect you to like-minded individuals.
Lastly, don’t underestimate the power of practice and patience. Each time you try assembling your pen or practicing a new technique, you’re not just improving; you’re part of a larger community of calligraphers who share your passion. Embrace the journey, and remember, every expert was once a beginner.
Frequently asked questions
Q: What types of inks can I use with my Art Maker calligraphy pen?
A: You can use water-based inks, pigment inks, or metallic inks with your Art Maker calligraphy pen. Make sure the ink is suitable for your pen type to avoid clogging. For best results, try experimenting with different inks to see which gives your calligraphy the desired effect.
Q: How do I clean my calligraphy pen after use?
A: Always clean your calligraphy pen immediately after use to prevent ink buildup. Disassemble the pen, rinse the nib and reservoir under warm water, and gently wipe them with a soft cloth. For stubborn residue, use a bit of mild soap but avoid harsh chemicals.
Q: Can I customize the nib size on my calligraphy pen?
A: Yes, many Art Maker calligraphy pens allow for nib customization. You can purchase additional nibs in different sizes or styles to achieve various calligraphy effects. Simply unscrew the nib from the pen and replace it with your desired size for added versatility.
Q: What are common mistakes to avoid when building a calligraphy pen?
A: Common mistakes include over-tightening screws, using the wrong ink type, and neglecting to clean the nib properly. Ensure all components are securely attached but not overly tightened. Always follow the assembly steps precisely for best performance and longevity of your pen.
Q: How can I troubleshoot ink flow issues with my calligraphy pen?
A: If you’re facing ink flow issues, first check if the nib is clogged. Clean it thoroughly. Also, ensure the ink reservoir is properly filled and air isn’t trapped. If problems persist, consider switching to a different ink that may flow better with your pen.
Q: What styles of calligraphy can I achieve with an Art Maker pen?
A: The Art Maker calligraphy pen can be used for various styles, including Italic, Copperplate, and Brush lettering. Each style may require different techniques and nibs, so exploring tutorials specific to each style can enhance your calligraphy skills.
Q: What’s the best way to store my calligraphy pen?
A: Store your calligraphy pen upright in a cool, dry place, ideally in a pen case to prevent damage. Make sure it’s clean and free of ink residue before storage to prolong its lifespan and maintain the quality of future writing.
Q: Where can I find communities for calligraphy enthusiasts?
A: Online platforms like Instagram, Facebook groups, and Reddit have vibrant communities for calligraphy lovers. They provide resources, tips, and inspiration. Additionally, local art supply stores often host workshops where you can connect with other calligraphers.
To Wrap It Up
Now that you know how to put together your Art Maker calligraphy pen correctly, you’re all set to unleash your creativity! Remember, the right setup can make a world of difference in your calligraphy experience. Don’t wait-grab your pen, try out the tips shared, and let your imagination run wild. If you’re eager to dive deeper into the art of calligraphy, check out our guides on “Beginner Calligraphy Techniques” and “Choosing the Right Paper for Calligraphy” for more expert insights.
Have questions or tips of your own? We’d love to hear your thoughts in the comments below! And if you found this guide helpful, consider subscribing to our newsletter for more drool-worthy calligraphy content and exclusive updates. Keep creating, and remember-your journey in calligraphy is just beginning!