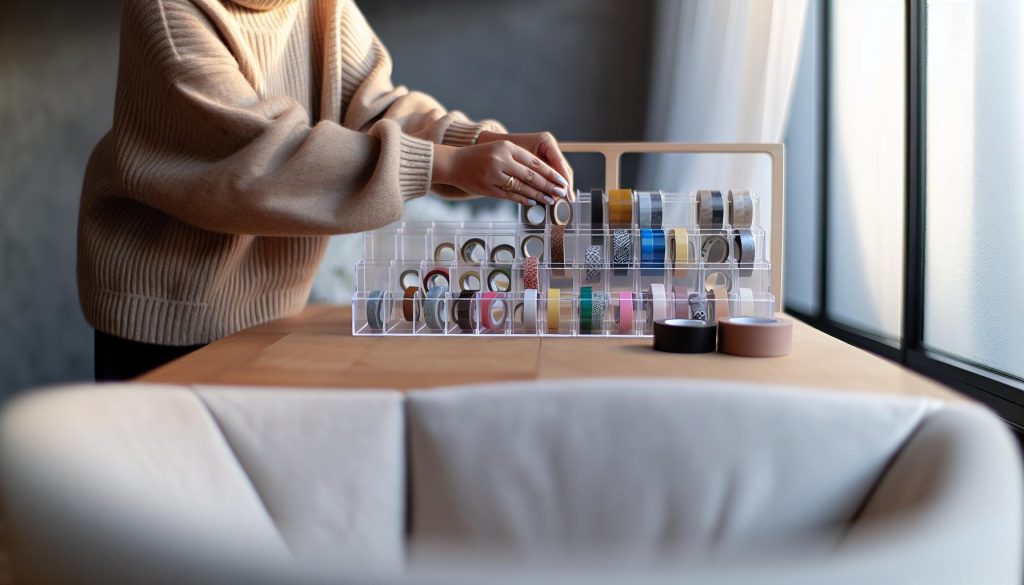
If you’re a washi tape enthusiast, you know how quickly a colorful collection can turn into a cluttered mess. Did you know that an organized space not only makes it easier to find your favorite patterns but also sparks creativity? By storing your washi tape effectively, you’ll save time, reduce stress, and fully enjoy your crafting projects. In this guide, we’ll explore practical tips and innovative ideas to help you stay organized and make the most of your washi tape stash. Whether you have a few rolls or a whole drawer full, these strategies will keep your collection accessible and beautifully displayed. Get ready to transform your crafting space and uncover the endless possibilities of washi tape organization!
Tips for Organizing Your Washi Tape Collection
To truly enjoy your washi tape collection, you need an efficient organization system. Think of it this way: a well-organized collection makes it easy to find the perfect tape for your next project. Start by grouping your rolls based on color, theme, or occasion. For example, dedicate sections for seasonal tapes, floral designs, or more vibrant hues. This not only streamlines your creative process but also adds a touch of visual appeal to your storage setup.
Storage Solutions are crucial as well. Consider using clear containers or drawer organizers so you can see your collection at a glance. This prevents the frustration of rummaging through different boxes and ensures you’re constantly inspired by what you have. For smaller rolls, binder clips can act as a great temporary holder. They keep the rolls from unraveling, and you can attach labels for easy identification.
When it comes to maintaining your washi tape, keeping it away from direct sunlight is key. Overexposure can lead to fading and weakened adhesive. Instead, store your tapes in a cool, dry place. You might also consider using acid-free paper to wrap your washi tape, protecting it from dust and potential damage.
With a little thought into how you categorize and store your collection, you’ll not only keep it tidy but also enhance your creative process. Staying organized will transform the way you use your washi tape-making crafting more enjoyable and efficient.
Best Storage Solutions for Washi Tape
The right storage solutions can transform your washi tape collection from a chaotic mess into a beautifully organized display that’s a joy to use. A well-thought-out system not only protects your tapes but also makes your creative process smoother and more enjoyable. There are several effective methods to keep your washi tapes organized, easily accessible, and visually appealing.
Start with clear plastic containers or drawer organizers. These allow you to see your collection at a glance, minimizing the time spent rummaging through boxes. You can separate your tapes by color, theme, or size, making it easier to grab the perfect roll for any project. If you prefer something more compact, consider using small stackable bins, which maximize vertical space and keep your collection neat.
For those who love a creative twist, washi tape dispensers are a fantastic choice. These dispensers not only provide easy access to your tape but also come in various styles that can enhance your crafting space. They often hold multiple rolls and can prevent your tapes from tangling or unraveling, ensuring they stay in pristine condition. You’ll find options ranging from simple, economical dispensers to more elaborate storage solutions designed specifically for craft spaces [2].
Finally, don’t underestimate the power of DIY projects. You can create beautiful displays using items like old jars, spice racks, or even a picture frame with twine for hanging rolls. Not only do these solutions save money, but they also allow you to personalize your storage to fit your style. Whether you’re going for minimalist or whimsical, the joy of crafting your own storage can be incredibly rewarding. Remember, the goal is to create a system that inspires you every time you craft!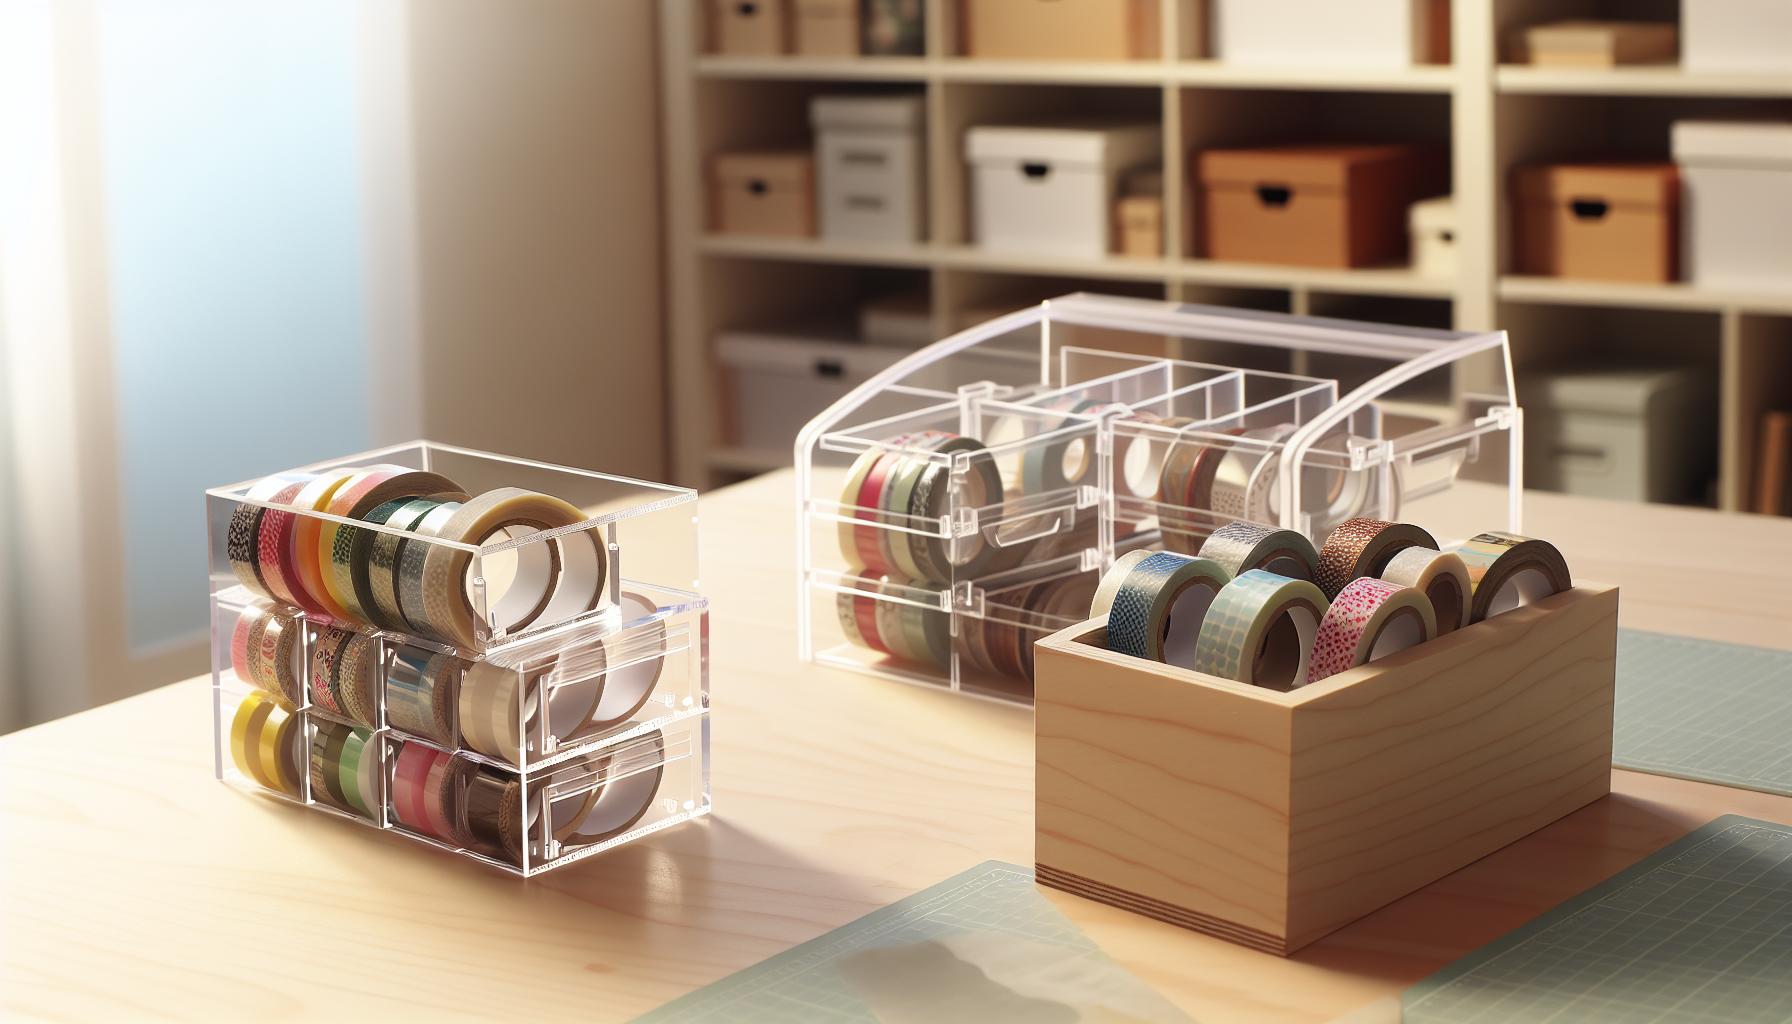
DIY Projects for Creative Washi Tape Storage
You don’t need to spend a fortune to create an eye-catching storage solution for your washi tape. With a little creativity and some readily available materials, you can craft a personalized organization system that fits your style and makes your tape easy to access. Let’s dive into some fun DIY projects that will turn your washi tape collection into a beautiful display.
One of the simplest and most effective methods involves using old glass jars. These jars not only provide a decorative touch but also allow you to see your tapes at a glance. Arrange your washi tape rolls by color in a few jars on a shelf or your workspace. You can even label the jars for easy identification, making it a breeze to find the tape you need. To add a bit of flair, consider painting the lids or wrapping them in coordinating paper or fabric.
Another creative option is repurposing a spice rack. If you have an unused rack lying around, remove the spice containers and fill them with washi tape instead. This vertical storage solution not only saves space but also turns your tape into a colorful display that adds charm to your crafting area. You can paint or stain the wood to match your décor, or leave it natural for a rustic vibe.
For those who enjoy a more artistic touch, try making a washi tape holder from a picture frame and some twine. Stretch the twine across the frame and secure it on the back. Hang the frame on your wall and use clothespins to clip your washi rolls securely to the twine. This method allows for easy access and instant visual appeal, plus it gives you the flexibility to customize your frame and twine choice to fit your space décor.
Lastly, think about creating a tube holder using a cardboard tube, like the ones from paper towels. Cut the tube to a manageable size and glue it to a base for stability. Slide your washi tape rolls onto the tube, and you have a simple, functional dispenser that keeps rolls organized and at your fingertips. This method is particularly great for those who like a minimalist setup without much bulk.
By tapping into these DIY ideas, you can not only organize your washi tape but also enhance the aesthetic of your workspace. Plus, there’s something rewarding about crafting your own storage solutions that makes your crafting experience even more enjoyable. Enjoy getting crafty with your washi tape organization!
Essential Tools for Washi Tape Organization
One critical component of keeping your washi tape collection organized is having the right tools on hand. Without the right setup, even the most beautifully patterned tapes can become a jumbled mass of confusion. Let’s explore some essential tools that can elevate your washi tape organization game and ensure your favorite rolls are both accessible and visually appealing.
Storage Bins and Boxes
Utilizing storage bins or boxes specifically designed for crafting supplies can dramatically streamline how you organize your washi tape. Look for bins with dividers or compartments that can accommodate washi rolls without them rolling around. Clear plastic containers are ideal because they let you see your collection at a glance, making it easier to choose which tape to use. Many crafters find that assigning a bin to specific colors, themes, or sizes keeps everything neatly separated.
Tape Dispensers
Investing in a good tape dispenser can transform your crafting experience. There are many stylish dispensers on the market; some even come with built-in cutting blades. By keeping your washi tape rolls in dispensers, you can dispense them with ease and cut off the desired length without any fuss. This not only saves time but also keeps your workspace tidy. You can also create DIY dispensers from items like wooden dowels or old jars-this way, you can customize both function and aesthetics.
Labels and Tags
Labeling is often an overlooked but effective way to maintain order. Use simple tags or a label maker to tag your washi tape rolls by color, pattern, or purpose. This might seem simple, but it minimizes the time spent searching for that perfect roll when you’re in the middle of a project. Plus, it adds a level of charm to your organization system-turning your collection into a well-curated display rather than just storage.
Wall-Mounted Organizers
If space is at a premium, consider wall-mounted organizers. These come in various forms, from pegboards to specialized racks designed to hold rolls of tape. A wall-mounted solution lets you free up desk space while also creating a fun, decorative focal point in your crafting area. You could even DIY a wall organizer using wooden crates or small shelves painted to fit your style.
By harnessing these essential tools, you’ll not only save time and effort when crafting but also inspire yourself each time you see your beautifully organized washi tape collection. Remember, the key is to choose solutions that resonate with your personal style and fit seamlessly into your workspace. Happy organizing!
Creative Ways to Display Your Washi Tape
Creative displays can make organizing your washi tape both functional and aesthetically pleasing. One of the most effective methods is to showcase your washi tape rolls on a decorative rack or stand. A simple wooden dowel suspended between two brackets can be a charming way to hang your favorite designs, making them easy to see and access. Additionally, you can customize the dowel’s length to fit your wall or desk space perfectly. This not only keeps your rolls untangled but also turns your collection into a piece of art.
Repurposed Items
Don’t overlook the potential of repurposing items for unique displays. For instance, old spice racks or small wooden crates can become multi-functional storage options. Just remove the spices and replace them with your washi tapes. This approach gives your craft area a rustic charm while brilliantly displaying your colorful collection. You can also use mason jars to house smaller rolls. Label each jar for better organization-plus, they add a cute touch to your workspace!
Wall-Mounted Solutions
For those tight on space, wall-mounted solutions can be a game-changer. Pegboards are incredibly versatile; you can attach hooks for individual rolls or even DIY some holders from clothespins. This showcases your washi tape while keeping it off your desk. Paint the pegboard to match your decor, and you’ve got a personalized project that’s as functional as it is stylish.
Seasonal Displays
Consider rotating your washi tape display based on the seasons or holidays. For example, keep fall-themed designs visible in autumn, and switch to winter patterns as the holidays approach. Use a dedicated wire or string line along a wall to clip different rolls. This allows you to easily swap tapes and keep the visual interest alive.
The way you display your washi tape can reflect your personality and style while making it more accessible for your crafting needs. By employing a little creativity and using items you might already have, you’ll find that organizing and showcasing your collection can be just as enjoyable as using the washi tape itself.
Mistakes to Avoid When Storing Washi Tape
When it comes to storing washi tape, it’s easy to make a few critical missteps that can lead to frustration later on. Many crafters think any box or drawer will suffice, but this is a common pitfall. Poor storage choices can lead to tangled rolls, damaged tape, and ultimately the loss of your favorite designs. Always remember: organization isn’t just about finding space; it’s about finding the right space.
One key mistake is assuming all washi tape is the same size. While most rolls are similar in width, there can be variations in length, diameter, and core size. Storing them all in one container without consideration for these differences often results in a cluttered mess. Make it a point to keep different sizes together in a way that respects their dimensions. Use dividers in drawers or specific containers to separate smaller rolls from larger ones. This keeps your collection tidy and prevents the frustration of searching through a tangled heap to find that perfect pattern.
Another common error is neglecting light and humidity considerations. Washi tape is paper-based, which makes it susceptible to damage from excessive moisture and light. Storing your rolls in a bright, humid area can cause the adhesive to weaken or the colors to fade. Combat this by choosing a cool, dark location in your craft area for storage. Consider opaque containers or dark shelving to shield them from direct light. Your washi tape will thank you by staying vibrant and sticky, ready for your next project.
Additionally, don’t overlook the power of labeling. Many crafters store their tape rolls in jars or boxes but forget to label what’s inside. This can lead to wasted time searching through your collection when you’re looking for something specific. Invest a little time in creating labels for your containers, or even better, use a digital inventory system that keeps track of your stock. This simple step can save you from pulling out roll after roll, hoping to stumble upon the one you need.
By avoiding these pitfalls and setting up a thoughtful storage system, you can enhance your crafting experience and ensure your washi tape remains a joy to use rather than a source of stress.
Innovative Ideas for Multi-Purpose Storage
Finding efficient methods for multi-purpose storage can transform how you organize your washi tape collection and even enhance your overall crafting experience. Think beyond traditional boxes or drawers; instead, consider solutions that keep your washi handy while serving dual roles. A little creativity can help you turn ordinary items into fantastic organizers.
One innovative approach is to utilize a spice rack. The tiered structure allows you to see all your washi tapes at a glance, making it easy to pick out the perfect one for your project. Simply attach small wooden dowels to the rungs, where you can slide the rolls on. Not only does this keep your rolls organized, but it also makes a colorful display perfect for a crafting area.
Repurposing Common Items
Another smart idea is repurposing old office supplies. Consider using a file organizer each shelf can hold multiple upright rolls. If you have some clipboards lying around, attach rolls with clip hooks for an organized and visually attractive setup. Each clip keeps the tape secured while allowing for straightforward access.
You might also explore using clear plastic containers with dividers or compartmentalized boxes. They’re perfect for sorting washi tape by color, size, or theme. A set of stackable containers saves space while providing visibility, so you quickly find what you need without diving into disarray. Customize these containers with labels to enhance your efficiency further.
Finally, consider a wall-mounted pegboard. This allows you to keep your washi tape rolls visible and accessible while utilizing vertical space. You can hang them by inserting dowels through the rolls or using clips that hold them in place. Add small hooks to hold scissors, washi cutters, or markers-it’s a holistic solution that keeps everything you need in one spot and only inches away.
Making the most of multi-purpose storage doesn’t just organize your washi tape; it creates a crafty environment that’s both functional and inspiring. Experiment with these ideas to discover what resonates most with your creativity and workspace!
Seasonal Storage: Adapting for Different Needs
When the seasons change, so do our crafting needs, and your washi tape storage should adapt accordingly. Keeping your collection organized not only helps you find what you need faster but also gets you excited for seasonal projects. Whether you’re gearing up for the holidays or welcoming spring blooms, there are practical strategies to manage your washi tape with seasonal flair.
Start by creating a seasonal sorting system. Assign specific bins or containers for each season’s colors and themes. For instance, during fall, gather warm colors like oranges, browns, and yellows, and store them together. This makes it easy to grab the right washi tapes for autumn crafts. You can choose clear, stackable containers, which allow you to see at a glance what you have. Label each container with the season or specific holiday to streamline your process even further.
Additionally, consider integrating your washi tape into your seasonal décor. For winter, you might incorporate metallics and festive patterns into your displays, using a cheerful spice rack or a decorative tray. During these seasons, leave some of your most vibrant rolls on your workspace or in visual spots where they can encourage creative ideas. Swap out your displays regularly to keep your crafting area fresh and inspiring, which helps to rekindle your enthusiasm and creativity with each new season.
Lastly, remember to evaluate your stock with each seasonal change. This is a great time to assess what you have, use up older tapes, and even make room for new finds. If you discover rolls you haven’t used in a while, consider setting them aside for special projects or giveaways. This practice not only clears clutter but also keeps your collection curated and relevant to your current crafting interests. Adapting your washi tape storage to seasonal needs not only organizes but also invites creativity and excitement into your crafting routine.
Maintaining Your Washi Tape: Care Tips
Washi tape is not just a craft supply; it’s a vibrant expression of creativity. But what’s the point of having a beautiful collection if it’s not well-maintained? To keep your rolls looking fresh and ready for your next project, give them the care they deserve. Here are some straightforward tips to ensure your washi tape stays in top shape.
First, consider the environment where you store your washi tape. Extreme temperatures can warp adhesive and affect the tape’s stickiness. A cool, dry location away from direct sunlight is ideal. Ultraviolet rays can fade colors over time, so keep your collection out of the sunlight-this is where a dedicated drawer or an opaque storage box becomes invaluable.
Next, keep your rolls organized to prevent them from getting tangled or damaged. Use a dedicated washi tape organizer, like tiered racks or a simple spice rack. These not only save space but also keep your rolls visible and accessible. If you do use small containers or bins, ensure they have a solid bottom to prevent the rolls from rolling around and potentially tearing. Regularly check your supplies; a simple visual inspection can help you catch any adhesive issues before they become a problem.
Lastly, store your washi tape with the backings intact whenever possible. The backing protects the adhesive, ensuring it remains usable for longer. If you need to cut washi tape, consider leaving a small part of the tape on the roll to preserve the integrity of the remaining tape. When you’re ready to use a roll, carefully remove it from storage, and make sure to press it down firmly against your project-this promotes a better stick and reduces the chances of peeling later.
Incorporate these care tips into your routine, and your washi tape will stay vibrant, sticky, and ready for whatever creative journey you embark upon.
Space-Saving Hacks for Washi Tape Storage
Not having enough space for your washi tape collection can be frustrating, but with some clever hacks, you can store them neatly and securely without taking up too much room. Here are a few space-saving ideas that have worked wonders for me and can help you maximize your storage potential while keeping your washi tape accessible and organized.
One of the simplest solutions is to repurpose items you already have. For instance, glass jars or small mason jars can store several rolls of washi tape while adding a decorative touch to your workspace. These jars can be placed on shelves or your crafting table, making it easy to see what you have at a glance. Another clever hack is to use a tension rod mounted inside a cabinet door or drawer. Hang your washi tapes from curtain clips or S-hooks attached to the rod. This approach keeps them tidy and out of the way, making use of otherwise wasted vertical space.
If you prefer a more DIY approach, consider creating a tiered shelf. Using cardboard, wood, or even an old shoe organizer can help you display and store your rolls horizontally. You can easily slide out different levels to access the tape you want without sifting through a chaotic mess. Additionally, you can design customized dividers to separate different colors or themes, giving each category its own designated space.
Don’t overlook the use of a pegboard or magnetic strip. Both can be installed on walls, allowing you to hang your washi tape rolls while freeing up desk and drawer space. This method also doubles as a decorative display, turning your washi tape into art in itself. In addition, don’t forget that you can combine these hacks for even more efficient storage-like using jars on a tiered shelf or hanging a pegboard inside a cabinet door.
By employing these strategies, you’ll not only save space but also enhance your crafting experience with an organized and visually appealing washi tape storage solution. Remember, the key is to think creatively and utilize vertical space wherever possible, making your collection both functional and beautiful. With a little effort, you can transform clutter into a captivating display that inspires your next project.
How to Sort and Categorize Your Washi Tape
To make your washi tape collection manageable and accessible, sorting and categorizing your rolls is key. Imagine opening your storage solution and instantly finding the exact design you want without rummaging through a chaotic pile. The right categorization system saves time and keeps inspiration flowing.
A good start is to group your washi tape by themes or colors. For instance, you might have categories like floral, geometric, seasonal, or solid colors. Use labeled bins, jars, or shelves for each category. When you see your collection neatly organized, you’ll not only enjoy it more but also spark your creative ideas. Color coding can also be effective-arranging tapes in a gradient from light to dark creates a visually pleasing and functional display.
| Category | Examples |
|---|---|
| Floral | Rose patterns, sunflower designs |
| Geometric | Stripes, polka dots, chevrons |
| Seasonal | Christmas, Halloween, Spring themes |
Another effective method is to consider project-based organization. For instance, if you often create cards for birthdays, dedicate a section of your washi tape storage to birthday-themed tapes. This approach enables you to grab everything you need at once when inspiration strikes for a specific project.
Don’t hesitate to involve your personal taste in arranging your collection. You might find joy in displaying your washi tape on a pegboard or a wall-mounted organizer where you can see all your tapes at once. This not only keeps things tidy but also makes a fabulous decorative element in your workspace.
Finally, conduct regular reviews of your collection. As trends change, you might find some tapes that no longer inspire you. Consider donating these to fellow crafters or using them in community projects. This keeps your collection fresh and ensures you’re only holding onto items that genuinely ignite your creativity. With these sorting strategies, organizing your washi tape becomes a straightforward and satisfying task.
Inspiration: Washi Tape Organization from the Pros
Looking for some top-notch inspiration to elevate your washi tape organization? You’re in luck! Seasoned crafters have developed ingenious strategies that not only streamline their crafting process but also turn their storage solutions into decorative displays.
One standout approach is using tiered storage solutions. Think about it: vertical space can be your best friend. Stacking organizers or tiered trays allow you to see all your washi tape at a glance, making it easy to find that perfect roll without digging through an endless drawer. Additionally, clear acrylic containers provide not just functionality but a beautiful view of your colorful collection.
Transformative DIY Solutions
Crafters love to get creative, and many have crafted their very own custom holders. A popular choice includes using PVC pipes cut to size. These pipes can be mounted on walls or arranged in attractive tabletop displays. Not only do they keep your tapes organized, but they also add a modern, industrial flair to your workspace.
Color Coordination & Themes
Another powerful tip is to organize by color or theme. This method resonates with many pros who swear by a color-coded system. By grouping tapes into specific hues or themes-like floral, geometric, or seasonal-you’ll make visual choices much easier and more enjoyable. Consider using labeled bins or jars to take this a step further. Create an eye-catching display that brings life to your workspace while keeping everything orderly.
Ultimately, the heart of exceptional organization lies in personal expression. Whether you choose a minimalistic approach or a vibrant display, your storage should reflect your style and inspiration. So roll up your sleeves and make your washi tape collection a source of joy and creativity!
Q&A
markdown
Q: What are the best materials for DIY washi tape storage?
A: The best materials for DIY washi tape storage include clear plastic bins, wooden dowels, and cardboard organizers. Using clear bins helps you see your tapes easily, while wooden dowels allow for dispensing rolls like paper towels. Check out the DIY section of your article for creative solutions!

Q: How can I categorize my washi tape collection effectively?
A: To categorize your washi tape collection, group them by color, pattern, or theme. You could also organize by seasonal use or size. Use labeled bins or drawer organizers for easy access and a neat presentation, as suggested in the organizing tips section of your article.

Q: What size storage bins are best for washi tape?
A: Storage bins specifically designed for washi tape should be large enough to hold several rolls yet compact enough to fit your workspace. A bin size of approximately 14x13x4 inches is ideal for storing over 200 rolls, as highlighted in your best storage solutions section.

Q: Where should I display my washi tape for easy access?
A: Display your washi tape on shelves, pegboards, or hanging organizers. This keeps them visible and accessible while adding a decorative element to your craft space. Check the creative display ideas section of your article for added inspiration!

Q: How do I protect my washi tape from damage?
A: To protect your washi tape, store it away from direct sunlight and moisture. Keeping them in a cool, dry area will prevent fading and stickiness. Consider storing them in a sealed container, as mentioned in the maintenance tips section of your article.

Q: What mistakes should I avoid when organizing washi tape?
A: Common mistakes include overcrowding storage bins, neglecting to label, and mixing similar tapes. Avoid frustration by ensuring you have enough space and clarity in your organization methods. For more pitfalls to watch out for, refer to your mistakes section.

Q: How can I make the most of limited storage space for washi tape?
A: Use vertical storage solutions like wall-mounted racks or hanging baskets to save space. Combining storage with display can also help you optimize every inch. Your article's space-saving hacks section offers additional practical tips!

Q: When is the best time to reorganize my washi tape collection?
A: The best time to reorganize your washi tape collection is at the start of a new craft project or season. This ensures you're working with a tidy and efficient space, making your crafting experience more enjoyable. Keep an eye on the section about seasonal storage for more strategies!
Key Takeaways
Now that you’ve got the essentials for effective washi tape storage, it’s time to take action! By implementing these strategies, you’ll not only keep your crafting area tidy but also make your creative process more enjoyable. Don’t wait-start organizing today and transform the way you work with your washi tape!
If you’re looking for more inspiration, check out our guides on creative crafting organization and tips on how to maximize your craft space. Have questions or want to share your favorite storage hacks? Comment below; I’d love to hear from you! And remember, every little step towards organization makes a big difference. Subscribe to our newsletter for more expert tips and tricks delivered right to your inbox. Let’s get crafting!