✨ This article was AI edited. Editorial responsibility: Wedgienet.Net.
WashiPro is a precision crafting methodology and cutting framework optimized for decorative Japanese washi tapes, combining specialized low-tack release backing, fine-point rotary or electronic cutting blades, and calibrated pressure profiles. It enables papercrafters, journalers, and designers to execute clean, intricate, tear-free cutouts from delicate fiber tape without tearing or adhesive degradation.
Decorative washi tape has evolved far beyond simple border accents in bullet journals and gift wrapping. Modern papercrafting enthusiasts, cardmakers, and mixed-media designers are pushing the boundaries of what is possible with traditional Japanese washi—a lightweight paper handcrafted from renewable fibers of the gampi tree, mitsumata shrub, or paper mulberry (kozo). However, translating complex vector designs and micro-intricate patterns onto thin, semi-translucent tape presents severe technical hurdles: standard craft knife drag can snag fibers, excessive plotter blade pressure slices through liners, and inconsistent adhesive tack leaves torn edges.
The WashiPro approach solves these engineering bottlenecks. By standardizing blade angles, mat adhesion, and digital plotter calibrations (such as Cricut Washi Sheet profiles and Silhouette Kraft settings), crafters can transform standard washi rolls into bespoke die-cut stickers, lace borders, geometric inlays, and multi-layered masking decals. In this comprehensive master guide, we break down the science of washi paper fibers, cutting configurations, troubleshooting matrices, and pro-tier finishing techniques.
The Anatomy of Washi Tape: Why Fiber Composition Matters for Cutting
To master precision cutting with a washipro workflow, one must understand what separates authentic washi tape from common synthetic masking tapes. Western masking tapes rely heavily on wood-pulp crepe paper saturated with synthetic rubber adhesives, resulting in brittle tearing under curved blade travel. True washi utilizes long, unbleached botanical fibers intertwining in multidirectional webs, granting remarkable tensile strength despite featherlight paper weights (typically between 25 and 45 GSM).
| Property | Authentic Japanese Washi Tape | Commercial Synthetic Paper Tape | WashiPro Implication |
|---|---|---|---|
| Base Fiber | Kozo (mulberry), Mitsumata, Gampi | Bleached wood pulp & cellulose | Requires ultra-sharp 45° or 60° carbide blades to slice long fibers cleanly |
| Adhesive Base | Low-tack, repositionable natural acrylic | Pressure-sensitive synthetic rubber | Leaves zero gummy residue on cutting mats; clean weedability |
| Tensile Modulus | High lateral flex; low puncture shear | Rigid lateral; rapid brittle tear | Must be supported with wax release backing or light-grip carrier sheet |
| Translucency | Semi-transparent; fiber clouds visible | Opaque or heavily bleached | Enables exquisite multi-layer color blending in architectural collage |
Machine Cutting Setup: Cricut, Silhouette, and Brother Calibrations
Automating washi cutting requires matching machine feed rates, downforce, and blade tip offset to the delicate thickness of the tape layer. The most common error is using standard copy paper or vinyl settings, which instantly shreds washi fiber. The following table provides optimal starting parameters for leading electronic craft cutting plotters:
| Plotter System | Material Selection Profile | Blade Depth | Pressure (grams) | Cutting Mat |
|---|---|---|---|---|
| Cricut Maker / Explore 3 | Washi Sheet (0.06mm) | Premium Fine-Point (German Carbide) | 85–95 (Default) | LightGrip (Blue Mat) |
| Cricut Joy / Joy Xtra | Washi Tape Sheet | Joy Fine Point Blade | 70–80 (Less Pressure) | LightGrip Mat |
| Silhouette Cameo 4 / Portrait | Washi Sheets | AutoBlade Setting 1 | Force 6–8; Speed 3 | Light Hold Mat |
| Brother ScanNCut DX | Thin Fabric / Washi Paper | Auto-detect Blade (Thin) | Auto pressure (-1 offset) | Low Tack Adhesive Mat |
Step-by-Step Methodology: Preparing Washi Sheets for Precision Cutting
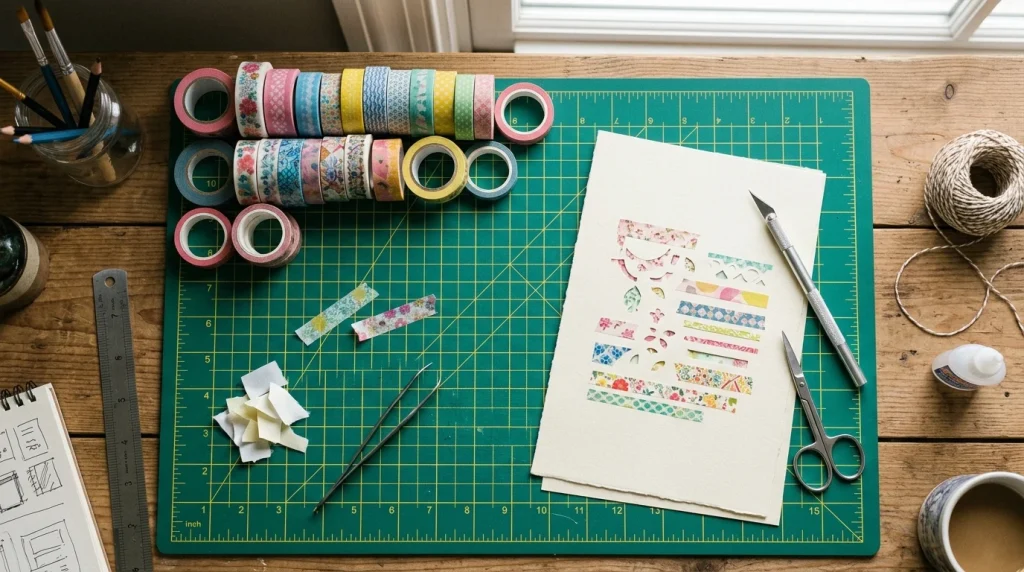
Standard washi tape comes on continuous rolls without a backing liner. Attempting to stick raw washi tape directly onto a sticky cutting mat creates two problems: peeling the cut shapes off can distort them, and adhesive residue quickly fouls the mat. The WashiPro sheet preparation technique guarantees pristine results:
- Create a Carrier Sheet: Secure a clean sheet of silicone release paper, parchment backing, or glossy wax paper to your work surface.
- Edge-to-Edge Tape Alignment: Lay strips of your chosen washi tape horizontally across the release paper, overlapping each seam by exactly 0.5 millimeters to form an unbroken mosaic canvas.
- Burnish Smooth: Using a felt-edge squeegee or bone folder, burnish the tape firmly against the release paper to eliminate trapped micro-bubbles and activate the acrylic pressure bond.
- Adhere to LightGrip Mat: Place your composite washi sheet onto a blue Cricut LightGrip or Silhouette Light Hold mat, smoothing from center to outer edges.
- Perform a Test Kiss-Cut: Cut a 10mm test square with a small star inside. The blade must cleanly sever the washi fiber without scoring through the release backing paper underneath.
- Weed Negative Space: Using fine angled tweezers or a surgical weeding hook, gently peel the excess background tape at a 45-degree angle, leaving your intricate washi die-cuts ready for transfer.
Manual Precision Cutting Tools: Scalpel vs Swivel Knife
For crafters cutting freehand or using metal acrylic rulers, tool selection dictates the margin between professional craftsmanship and ragged edges. Conventional utility knives and heavy-duty box cutters lack the acute geometry needed for paper mulberry fibers.
Top paper artists universally endorse two handheld instruments for washipro cutting:
- No. 11 Surgical Scalpel / X-Acto Z-Series: Ground to a razor-sharp 23-degree acute angle, the No. 11 blade allows millimeter-accurate straight lines, corner notches, and stencil tracing. Ensure the blade is changed every 2–3 crafting sessions; a microscopic burr on the tip is the number one cause of fiber tearing.
- 360-Degree Swivel Blade Knife: For freehand floral cuts, calligraphy banners, and curved ribbon motifs, a swivel-head craft cutter rotates effortlessly with hand motion, preventing the torque drag that pulls washi tape away from the substrate.
Troubleshooting WashiPro Cutting Issues
| Symptom | Root Cause | Corrective Action |
|---|---|---|
| Ragged, frayed edges along cutline | Dull blade tip or cutting speed too high | Swap blade immediately; reduce machine speed to 2 or 3 |
| Tape lifts or bunches during blade drag | Insufficient burnishing or worn cutting mat grip | Re-burnish with bone folder; tape edges of carrier sheet with painter’s tape |
| Backing sheet completely severed | Downforce/pressure too high for thin liner | Select ‘Less’ pressure modifier in Design Space or reduce force by 15g |
| Cut pieces lift off during background weeding | Overcut gap or dull blade corner drag | Use fine-point tweezers to pin shape down while peeling matrix backward |
FAQ: Frequently Asked Questions About WashiPro Cutting
What is the best Cricut setting for cutting washi tape?
The optimal Cricut setting is ‘Washi Sheet (0.06mm)’ with default or ‘Less’ pressure using a Premium Fine-Point blade on a blue LightGrip mat. If cutting tape mounted on heavy sticker backing, use ‘Washi Tape Sheet’ with pressure adjusted to 90g.
Can you make custom die-cut stickers with washi tape?
Yes! By aligning strips of washi tape across wax release paper or double-sided adhesive film, you create a custom washi sticker sheet. You can then kiss-cut any vector design using a plotter or punch it out with handheld shape punches.
Why does my craft cutter tear washi tape instead of cutting it?
Tearing occurs when the blade is dull, the paper is loosely bonded to its release backing, or the cutting speed is set too fast. High-speed cutter movement creates drag across the mulberry fibers rather than cleanly shearing through them.
Can washi tape be cut with scissors without leaving glue on the blades?
High-quality Japanese washi tape uses a gentle acrylic adhesive that rarely gums up scissors. However, using Teflon-coated or non-stick craft scissors guarantees that adhesive buildup will never mar delicate cut lines.
Get our latest guides, news, and insights highlighted in your Google Search & AI Overviews.