
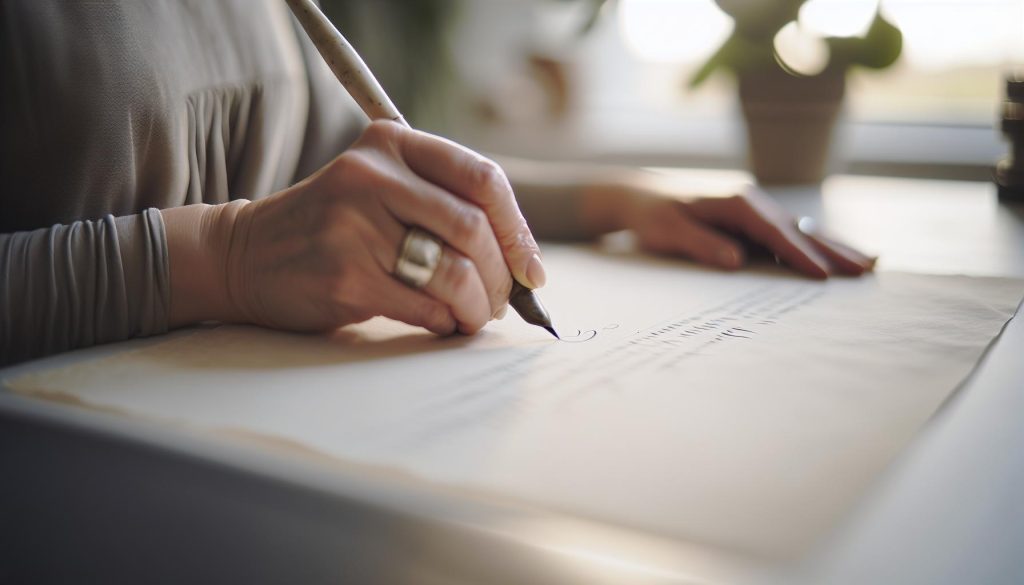
Using a manuscript calligraphy pen can transform your writing experience into an art form. Whether you’re crafting invitations, journaling, or simply expressing your creativity, mastering this tool can significantly enhance the quality of your work. Did you know that the right calligraphy pen can not only improve your handwriting but also boost your confidence in your artistic abilities? Many people struggle with finding the right techniques or tools to elevate their writing, but it doesn’t have to be overwhelming. In this guide, we’ll explore the basics of using trusted manuscript calligraphy brands, providing you with practical tips and insights. By the end, you’ll feel equipped to bring your writing to life with elegance and style, making every stroke count. Let’s dive in!
Understanding Manuscript Calligraphy Pen Types
To truly delve into the world of manuscript calligraphy, it’s essential to understand the various types of pens available. Each pen type offers unique features that cater to different styles and preferences. For instance, fountain pens with italic or broad nibs are popular among calligraphers who appreciate the fluidity and smooth writing experience they deliver. The nib’s angled shape allows for a dynamic contrast between thick downstrokes and thin upstrokes, a hallmark of calligraphy.
Another noteworthy option is the calligraphy dip pen, which consists of a nib and a holder. This pen type offers versatility; you can easily switch out nibs to achieve different effects or line widths. With dip pens, you can experiment with various inks and find the right consistency that suits your technique. Brush pens are also gaining traction, especially among beginners. They combine the characteristics of a brush with the convenience of a pen, making them easier to handle while still producing beautiful, expressive strokes.
When selecting a pen, consider how comfortable it feels in your hand. Different weights and sizes can greatly impact your writing experience. Starter sets can be a great way to explore various types without making a hefty investment upfront. You might even find that specific styles resonate more with your creative vision as you practice. Exploring pen types is not just about function; it’s about finding a tool that inspires your artistic journey and enhances your calligraphic expression.
Essential Tools for Beginners in Calligraphy
Getting started with calligraphy is an exciting journey, and having the right tools can make all the difference. Many beginners jump straight to pens without considering other essentials, but trust me, there’s more to it than just the writing instrument. You’ll want to set yourself up for success right from the beginning.
First off, choose a quality manuscript calligraphy pen. If you’re opting for a dip pen, look for a reliable holder and a variety of nibs to experiment with different styles. For those starting with brush pens, select a few that have flexible tips, which allow for expressive strokes as you learn. Don’t forget to invest in quality ink! It’s tempting to buy the cheapest option, but good ink will flow better and yield better results.
Next, grab some suitable paper. Regular printer paper can lead to bleed-through and frustration. Instead, consider using smooth, heavier-weight paper designed for calligraphy, which allows your pen to glide effortlessly without skipping or smudging. And while you’re at it, include some practice sheets with guidelines; these are invaluable for mastering letterforms and maintaining consistent size and spacing.
Finally, don’t underestimate the power of a comfortable workspace. You need a flat surface where you can spread out your materials comfortably. Good lighting is essential; natural light is best but if that’s not possible, a decent desk lamp will help you see your work clearly. Organizing your pens, inks, and papers will keep your creative process flowing efficiently, letting you focus solely on refining your skills and enjoying your craft.
By curating your toolkit thoughtfully, you’re setting the stage for a rich and rewarding calligraphy experience. So, gather your essentials, and get ready to unleash your creativity on the page!
Choosing the Right Manuscript Calligraphy Pen
can make or break your experience in this elegant art form. With countless options available, it’s essential to understand what works best for your style and goals. Don’t settle for the first pen you find; the right choice can dramatically enhance your ability to create beautiful lettering. When it comes down to it, the best pen is one that feels comfortable in your hand and complements your writing technique.
Types of Manuscript Calligraphy Pens
You’ll primarily encounter two types of pens: dip pens and brush pens. Dip pens consist of a nib and a holder, which allows for versatility with different nib types. For instance, pointed nibs are excellent for delicate script, while broad-tipped nibs are great for bold lettering. On the other hand, brush pens mimic the feel of a paintbrush, offering flexibility and ease of use perfect for beginners. They often come pre-filled with ink, eliminating the hassle of refilling.
Finding Your Perfect Fit
When choosing between these options, consider your specific needs. If you prefer traditional techniques and are drawn to the intricacies of fine scripts, investing in a quality dip pen with interchangeable nibs is a wise choice. It allows you to experiment with various styles and effects, giving you creative freedom. Conversely, if you’re looking for a more straightforward, travel-friendly solution, brush pens are fantastic. They’re easier to control, especially for those just starting out or for on-the-go projects.
Here are a few trusted brands to consider:
| Brand | Type | Best For |
|---|---|---|
| Speedball | Dip Pen | Traditional Calligraphy |
| Tachikawa | Dip Pen | Fine Lines and Detailing |
| Sakura | Brush Pen | Beginners and Versatility |
| Faber-Castell | Brush Pen | Consistent Quality |
Comfort and Versatility
Above all, comfort is key. Hold the pen and ensure it feels natural in your grip. Try out different nib sizes and pen weights to find what suits you best. A pen that feels good will encourage you to practice more, which is what you need as you refine your skills. Remember, calligraphy isn’t just about the pen but how it connects you to the paper. Take the time to explore your options and you’ll find the perfect tool for your calligraphic journey.
Mastering Basic Calligraphy Techniques
Diving into the world of calligraphy might seem daunting at first, but mastering basic techniques can unlock a rewarding array of creative possibilities. Developing your skills with the manuscript calligraphy pen starts with understanding how to control it. A gentle yet steady hand is crucial. Begin by practicing basic strokes: upstrokes, downstrokes, and curves. Each stroke is the building block of letters, so invest time in perfecting them. To make this easier, try using lined paper to maintain consistency in size and angle as you practice.
Posture and Grip
Your posture affects your writing significantly. Sit up straight with your feet flat on the floor, and rest your arm comfortably on the table. This stable position helps in controlling the pen better. When gripping the pen, hold it lightly between your thumb and index finger while resting the pen against the middle finger. This grip allows for flexibility without straining your hand.
Creating Contrast
The beauty of calligraphy lies in the contrast between thick and thin lines. To achieve this, you need to vary the pressure you apply to the pen. Press harder for downstrokes to create thicker lines and lighten your touch for upstrokes to achieve thin lines. Practice this pressure variation by writing out each letter slowly, focusing on the transitions between thick and thin.
Tools and Practice
To build muscle memory, keep practicing with the right tools. If using a dip pen, go for quality ink that flows smoothly. Brush pens are great for beginners due to their forgiving nature, but once you’re comfortable, transitioning to dip pens can enhance your skill set. Consider setting aside a few minutes each day for practice. Simple drills like writing the alphabet repeatedly or creating flourishes can significantly improve your confidence and skill level.
Through consistent practice and attention to technique, you’ll soon find that basic calligraphy becomes second nature. The strokes you master today will lay the foundation for elaborate designs tomorrow. Embrace the journey, and let your creativity shine!
Setting Up Your Workspace for Success
Creating an inviting and effective workspace can make all the difference in your calligraphy practice. When everything you need is at your fingertips, it becomes easier to focus on your craft and less about searching for supplies. Start by selecting a comfortable, well-lit spot where you can spread out your materials. Natural light is a bonus; it not only illuminates your work but can also elevate your mood. If you’re working in a less natural light area, invest in a good desk lamp that mimics daylight.
Your work surface should be stable and spacious enough for your paper, inks, and any other tools you use. If you often find ink splatters annoying, consider using a large, heavy plastic sheet or a dedicated calligraphy mat that can be easily cleaned. This way, you protect your table and have a wonderful surface for practice.
Essential Setup Tips:
- Posture: Make sure your chair and desk height allow you to sit comfortably while maintaining good posture. Your feet should rest flat on the floor, and your arm should have room to move without restriction.
- Tool Organization: Sets up a small caddy or drawer with your go-to tools-pens, nibs, ink, and practice paper-so they are always within reach. Clear containers are great to see what you have at a glance.
- Practice Paper: Use lined or grid paper for initial practice, but keep quality, thicker paper on hand for more finished pieces. It can be discouraging to practice on inadequate materials.
- Reference Material: Keep a small inspiration board nearby with samples of calligraphy styles you admire or techniques you want to try. This can motivate you during practice sessions.
Finally, remember to create a calming atmosphere. Some people find that having a plant nearby or soft music playing in the background can enhance their creative flow. Setting the right tone can turn your workspace into a personal sanctuary, making it easier for you to dive into the world of calligraphy with enthusiasm and focus.
Step-by-Step Guide to Using a Calligraphy Pen
Using a calligraphy pen can feel daunting at first, but once you get the hang of it, it’s incredibly rewarding. In this guide, I’ll walk you through a straightforward process to help you use a manuscript calligraphy pen with confidence. Whether you’re crafting invitations, designing personalized gifts, or simply enjoying the art of lettering, mastering your tool is the first step to beautiful results.
Start by preparing your pen. If you’re using a dip pen, make sure to insert the nib correctly before inking it. It should fit snugly into the holder without wobbling. Once you’ve got it securely in place, it’s time to fill the nib with ink. Dip the nib into your ink bottle, ensuring just the tip is submerged. Too much ink can cause blotting, and too little will make it hard to write smoothly. A good rule of thumb is to lightly draw it out and tap it against the rim of the bottle to remove excess.
Next comes the actual writing. Hold your pen at about a 45-degree angle to the paper. This angle not only enhances your control but also affects the thickness of your lines. When you start writing, focus on the pressure you apply. For calligraphy, you’ll want to maintain light pressure while drawing up strokes (the fine lines) and heavier pressure while pulling down (the thick lines). This contrast is what gives calligraphy its characteristic elegance. Practice forming simple letters and gradually progress to more complex shapes and styles.
Lastly, consistency is key. Use grid or guideline paper to help maintain uniformity in size and slant. As you practice, take note of your grip and posture. You want to be both comfortable and stable to produce the best strokes. Don’t rush; take your time to enjoy the flow of the ink across the paper. Remember, calligraphy is as much about the process as it is about the final product. Embrace your mistakes and learn from them-they often lead to new styles and techniques. Happy lettering!
Common Mistakes to Avoid in Calligraphy
Many new calligraphers trip over the same common pitfalls that can stifle their creativity and progress. Avoiding these mistakes can save you frustration and enhance your learning experience. Here’s a rundown of some critical missteps to steer clear of and tips on how to fix them.
One major error is inconsistent pressure on the pen. The beauty of calligraphy lies in the contrast between thick and thin lines, which are achieved by varying pressure. If you apply too much pressure on upward strokes or not enough on downward strokes, your letters will lack the elegance you’re aiming for. Practice applying light pressure on upward strokes and heavier pressure on downward strokes. Using a flexible nib can help you feel this difference as you write.
Another common mistake is improper nib angle. Holding your pen at the wrong angle can lead to awkward, scratchy lines and even damage the nib. Aim for a consistent angle of about 45 degrees to maintain control and create smooth strokes. A helpful tip is to slightly tilt your paper rather than your pen; it can make a world of difference in achieving the desired effect.
Then there’s the tendency to rush. Calligraphy is not about speed; it’s about grace and precision. Skimming through the basics or not allowing time for practice can hinder your progress. Start with slow, deliberate movements and give yourself permission to take breaks-your hands (and mind) will thank you! Use grid or guide paper to help manage spacing and alignment while you get the hang of it.
Lastly, don’t overlook ink choice and its qualities. Using the wrong ink can lead to feathering or bleeding, ruining your hard work. Experiment with different inks to find one that flows well with your manuscript pen without smudging. Always test your ink on a scrap piece of paper before starting on your project.
By recognizing these frequent hurdles, you can approach your calligraphy practice with more confidence and clarity. The more you practice while being mindful of these tips, the more your skills will flourish. Happy writing!
Advanced Calligraphy Techniques to Try
Calligraphy isn’t just about mastering the basics; it’s also about exploring the depths of creativity through advanced techniques. Once you feel comfortable with your manuscript pen, dive into these methods to elevate your work and add unique flair to your pieces.
One technique worth mastering is flourishing. This involves adding decorative strokes to your letters, which can really enhance the visual appeal of your writing. Start with simple embellishments-think little loops and swirls at the end of your strokes. As you gain confidence, experiment with more intricate designs. Flourishing can turn a standard letter into a stunning piece of art, but remember to keep it balanced and not overdo it.
Another exciting direction to explore is layering. By writing the same letter multiple times or layering different colors, you can create depth and shadow effects. Use a lighter color for the first stroke, let it dry, and then overlay it with a darker shade. This can add dimension to your work that catches the eye. Just ensure your inks are compatible to avoid bleeding or smudging.
Incorporating color transitions can also transform your calligraphy. Try blending colors directly on the nib or using water to achieve a gradient effect. This playfulness allows you to personalize your pieces dramatically. For instance, write your name in a smooth gradient that transitions from blue to green-a sure way to make an impression.
Don’t overlook the power of spacing and alignment adjustments. Advanced calligraphers often manipulate the space between letters and lines to achieve a more dynamic layout. Use a ruler or templates to maintain consistent intervals, but feel free to experiment. Sometimes irregular spacing can create a modern, artistic look that stands out.
These advanced techniques are not just about making your work look good; they’re about expressing your individuality as an artist. Embrace the learning process, stay patient with yourself, and don’t hesitate to combine different styles. As you practice, you’ll develop a unique flair that reflects your personality-the hallmark of a great calligrapher. Happy writing!
Maintaining Your Manuscript Calligraphy Pen
Properly is a game-changer for the quality of your writing and the longevity of your tools. If you want smooth, flowing lines with every stroke, there’s no room for neglect. A well-cared-for pen not only performs better but can also inspire your creativity and enhance your overall experience. Here’s how to keep your pen in top shape.
Start with the basics: cleaning. After each use, especially if you’re working with vibrant inks that can dry quickly, it’s crucial to clean your nib thoroughly. Use warm water to rinse it off and gently wipe any residue with a soft cloth. For stubborn inks, a mild soap can help, but make sure to rinse well afterward. Avoid harsh chemicals too-they can ruin the nib and feed of your pen. This simple step can prevent clogging and ensure that your ink flows freely.
Another element of maintenance is checking the nib alignment. Over time, with regular use, nibs can get bent or misaligned, which negatively affects your writing quality. If you notice your pen dragging or skipping, take a minute to examine the nib. Gently adjust it if it’s out of alignment. It’s a delicate process-too much pressure can cause permanent damage.
You also need to think about ink selection. Using the right kind of ink is essential not just for performance but for cleaning as well. Water-based inks are generally easier to clean. If you’re using thicker inks, be prepared for a longer cleaning process. Always fill your pen with fresh ink; old ink can dry up and create clogs. Regularly empty the pen and give it a good clean to maintain optimal function.
Lastly, store your pen properly. Avoid leaving it nib-down in an ink bottle or an upright position for long periods, as this can lead to leaks or dried ink in the nib. Instead, store your pen horizontally in a protective case to maintain the integrity of the nib and the feed.
Taking these steps will keep your calligraphy pen operating smoothly and help you achieve consistently beautiful results in your work. Regular maintenance isn’t just a chore-it’s an investment in your craft that will pay off with every masterpiece you create. Happy writing!
Exploring Creative Projects with Calligraphy
There’s something magical about transforming simple letters into beautiful works of art with a calligraphy pen. Whether you’re an avid letter writer, a crafter, or just looking to add a personal touch to your projects, exploring creative outlets with calligraphy can spark joy and enhance your skills.
One exciting project to dive into is creating personalized stationery. Start by designing a set of note cards or envelopes decorated with your favorite quotes or exercises with your pen. Choose a beautiful paper that complements your ink, and experiment with different styles-flourished script, block letters, or even combining styles within a single piece. Not only will this project enhance your calligraphy skills, but it will also give you stunning, custom stationery to impress friends and family.
Another intriguing idea is to make art pieces. Consider framing your calligraphy creations in stylish frames to display around your home or office. You could write inspirational quotes, important dates, or even your family name in a decorative style. This not only serves as a lovely decor but can also be a conversation starter. Make use of colored inks or even watercolor washes behind your lettering for a vibrant background that adds depth to your work.
Don’t forget about gift-giving opportunities. Personalized gifts never go out of style. Use your calligraphy skills to label homemade goodies, write on gift tags, or craft beautiful cards for special occasions. Think of birthday celebrations or holidays-your beautifully handwritten notes will add a heartfelt touch that store-bought cards can’t match.
Lastly, add a dash of elegance to events with place cards or signage. If you’re hosting a dinner party or wedding, using your calligraphy pen to create place cards can elevate your event’s atmosphere. Choose a layout that reflects the theme of the occasion, and ensure your lettering is clear yet decorative. Not only does this show attention to detail, but it also leaves a lasting impression on your guests.
Exploring creative projects with your calligraphy pen can transform your practice into something both meaningful and visually stunning. So, gather your pens, pick a project, and let your creativity flow!
Tips for Improving Your Calligraphy Skills
To elevate your calligraphy game, focus on a few key practices that can turn effort into real skill. Think of it this way: improving at calligraphy isn’t just about perfecting letters; it’s about developing a unique style and mastering the flow of the pen.
Start with regular practice. I cannot emphasize enough how crucial consistent practice is. Set aside time daily or weekly. Use practice sheets that outline each letter and encourage you to try different styles. Experiment with pressure and angles, as these factors create the beautiful variations in thickness that make calligraphy so visually interesting. As you practice, focus on forming each letter correctly before trying to connect them into words. This foundational work will pay off big time when you start joining your letters elegantly.
Embrace Feedback
Don’t shy away from constructive criticism. Share your work with fellow calligraphy enthusiasts or online forums. Getting feedback from others can open your eyes to areas you might overlook. A fresh pair of eyes can suggest adjustments in your technique or even help you discover a style that resonates with you. Additionally, consider participating in workshops or taking online classes. There’s something invaluable about learning directly from experienced calligraphers and connecting with a community that shares your passion.
Incorporate Different Tools
Another helpful tip is experimenting with various nibs and inks. Each tool can dramatically change the look of your work and help you determine which suits your style best. For instance, try a flexible nib for expressive strokes, or switch to a fine nib for more delicate lettering. Don’t forget about the importance of good quality ink. Experimenting with colors can also inspire your creativity and push you to create different aesthetics that might set your work apart.
Remember, the journey of mastering calligraphy is just as beautiful as the final product. Enjoy the process, stay patient with yourself, and before you know it, your skills will flourish!
Inspiration: Beautiful Calligraphy Examples
Discovering the beauty of calligraphy often starts with the inspiration drawn from others’ work. Observing stunning examples of calligraphy not only fuels creativity but also provides insight into diverse styles and techniques that can elevate your own practice. From elegant wedding invitations to intricate art pieces, the possibilities are endless when using a manuscript calligraphy pen.
One of the most captivating aspects of calligraphy is how different styles come to life through the same basic tools. For instance, consider the dramatic differences between a flourishing script and a minimalist modern style. Each piece can convey a unique emotion or purpose, whether you’re crafting personalized gifts or designing your own stationery. When exploring beautiful examples, pay attention to how different colors, ink types, and pen nibs influence the overall aesthetic. Incorporating these elements can inspire you to experiment and find your personal style.
To find inspiration, check out platforms like Instagram or Pinterest where talented calligraphers share their work. Follow hashtags like #CalligraphyArt or #HandLettering to discover a plethora of breathtaking designs. You might also consider visiting local art shows or calligraphy workshops where you can see live demonstrations and interact with skilled artists. Seeing their passion firsthand can ignite your own enthusiasm and provide practical insights into achieving similar results.
As you gather ideas, don’t hesitate to recreate techniques you admire. Copying styles is a great way to learn and understand the nuances of letterforms, spacing, and technique. Just remember to infuse your personality into your work, creating a balance between inspiration and originality. Beautiful calligraphy lies not only in flawless execution but also in the soul you put into each stroke. With a manuscript calligraphy pen in hand and the right inspiration, you’re well on your way to developing your style that resonates with you.
FAQ
Q: What are the key features to look for in a Manuscript calligraphy pen?
A: When selecting a Manuscript calligraphy pen, focus on the nib quality, ink flow, and grip comfort. A good nib offers flexibility, while consistent ink flow prevents skipping. A comfortable grip is essential for long writing sessions. Explore the “Choosing the Right Manuscript Calligraphy Pen” section for more details.
Q: How do I prepare my Manuscript calligraphy pen before use?
A: To prepare your Manuscript calligraphy pen, first ensure the nib is clean and properly fitted. If using a converter, fill it with ink. For cartridge pens, insert an ink cartridge securely. Always test the pen on scrap paper to confirm the ink flows well before starting your project.
Q: What types of ink are best for use with Manuscript calligraphy pens?
A: The best inks for Manuscript calligraphy pens are water-based and non-clogging. Look for high-quality calligraphy inks that are designed for smooth flow and vibrant colors. Avoid using india ink or pigment inks unless specifically meant for calligraphy, as they can clog the nib.
Q: Can beginners use a Manuscript calligraphy pen effectively?
A: Yes, beginners can effectively use a Manuscript calligraphy pen by starting with basic techniques and the right pen type. Follow the “Mastering Basic Calligraphy Techniques” section for simple steps and practice to develop a steady hand and eye for detail.
Q: How can I fix common issues with my Manuscript calligraphy pen?
A: Common issues like skipping or hard starts can usually be fixed by cleaning the nib and ensuring proper ink flow. If the nib is damaged, consider replacing it. Regular maintenance, as outlined in the “Maintaining Your Manuscript Calligraphy Pen” section, can prevent these problems.
Q: What paper is suitable for use with Manuscript calligraphy pens?
A: Use smooth, high-quality paper designed for calligraphy to achieve the best results. It minimizes bleed-through and feathering. Look for paper labeled as heavyweight or calligraphy-specific for optimal writing experiences.
Q: How often should I clean my Manuscript calligraphy pen?
A: Clean your Manuscript calligraphy pen regularly, especially if you switch colors or types of ink. A thorough clean after each use is ideal to maintain nib performance and prevent clogging, as discussed in the “Maintaining Your Manuscript Calligraphy Pen” section.
Q: What projects can I create using a Manuscript calligraphy pen?
A: You can create an array of projects with a Manuscript calligraphy pen, such as personalized greeting cards, decorative invitations, and elegant wall art. Explore the “Exploring Creative Projects with Calligraphy” section for inspiration and ideas to kickstart your creativity.
In Retrospect
Now that you know how to use a Manuscript calligraphy pen, it’s time to unleash your creativity! Remember, mastering this delicate art not only enhances your writing but transforms it into a form of self-expression. If you’re eager to create stunning personalized stationery or gifts, don’t wait-dive into your next project today!
For further tips, check out our guides on “Calligraphy Techniques for Beginners” and “Choosing the Right Calligraphy Paper.” And if you haven’t already, subscribe to our newsletter for the latest updates and exclusive content that will elevate your calligraphy journey. Have questions or want to share your progress? We’d love to hear from you in the comments below. Your journey into the world of calligraphy has just begun-let’s explore it together!
Get our latest guides, news, and insights highlighted in your Google Search & AI Overviews.










