Are you struggling to get those perfect strokes with your brush pen? You’re not alone! Understanding how to hold a brush pen for calligraphy is crucial for achieving the graceful lines and elegant flourishes that make this art form so captivating. Proper grip not only enhances control but also allows your personal style to shine through.
In this guide, we’ll explore essential techniques that will empower you to develop confidence in your brush pen practice. Whether you’re a beginner or looking to refine your skills, you’ll find valuable insights that address common challenges. The way you hold your pen can transform your lettering, turning everyday writing into expressive masterpieces. Let’s dive in and discover how the right grip can elevate your calligraphy journey!
Understanding the Anatomy of a Brush Pen
Understanding a brush pen’s anatomy is essential for effective calligraphy. Each component plays a critical role in how you create strokes, and knowing these parts can enhance your grip and control over your writing.
At the heart of it is the nib, which is the tip of the pen. Brush pen nibs come in various shapes and sizes, from soft and flexible to firm and rigid. A flexible nib allows for dynamic line variation, essential for creating elegant script, while a firmer nib offers more control, which is beneficial for beginners.
The body of the brush pen can vary too. Some are designed for comfort with ergonomic shapes that fit snugly in your hand, reducing fatigue during longer writing sessions. Look for a pen that feels natural to hold-this helps you maintain a relaxed grip, which is key to fluid strokes.
Don’t overlook the ink reservoir. A good brush pen should have an adequate ink supply, allowing for uninterrupted writing. Some pens even feature refillable reservoirs, which can be a sustainable option for frequent users. Remember, a pen that runs out of ink at a critical moment can be frustrating, so consider the ink flow as part of your selection process.
In summary, understanding these elements will not only inform your choice of brush pen but also enhance your overall calligraphy practice. Spend time experimenting with different nibs, body types, and ink qualities to find what works best for you.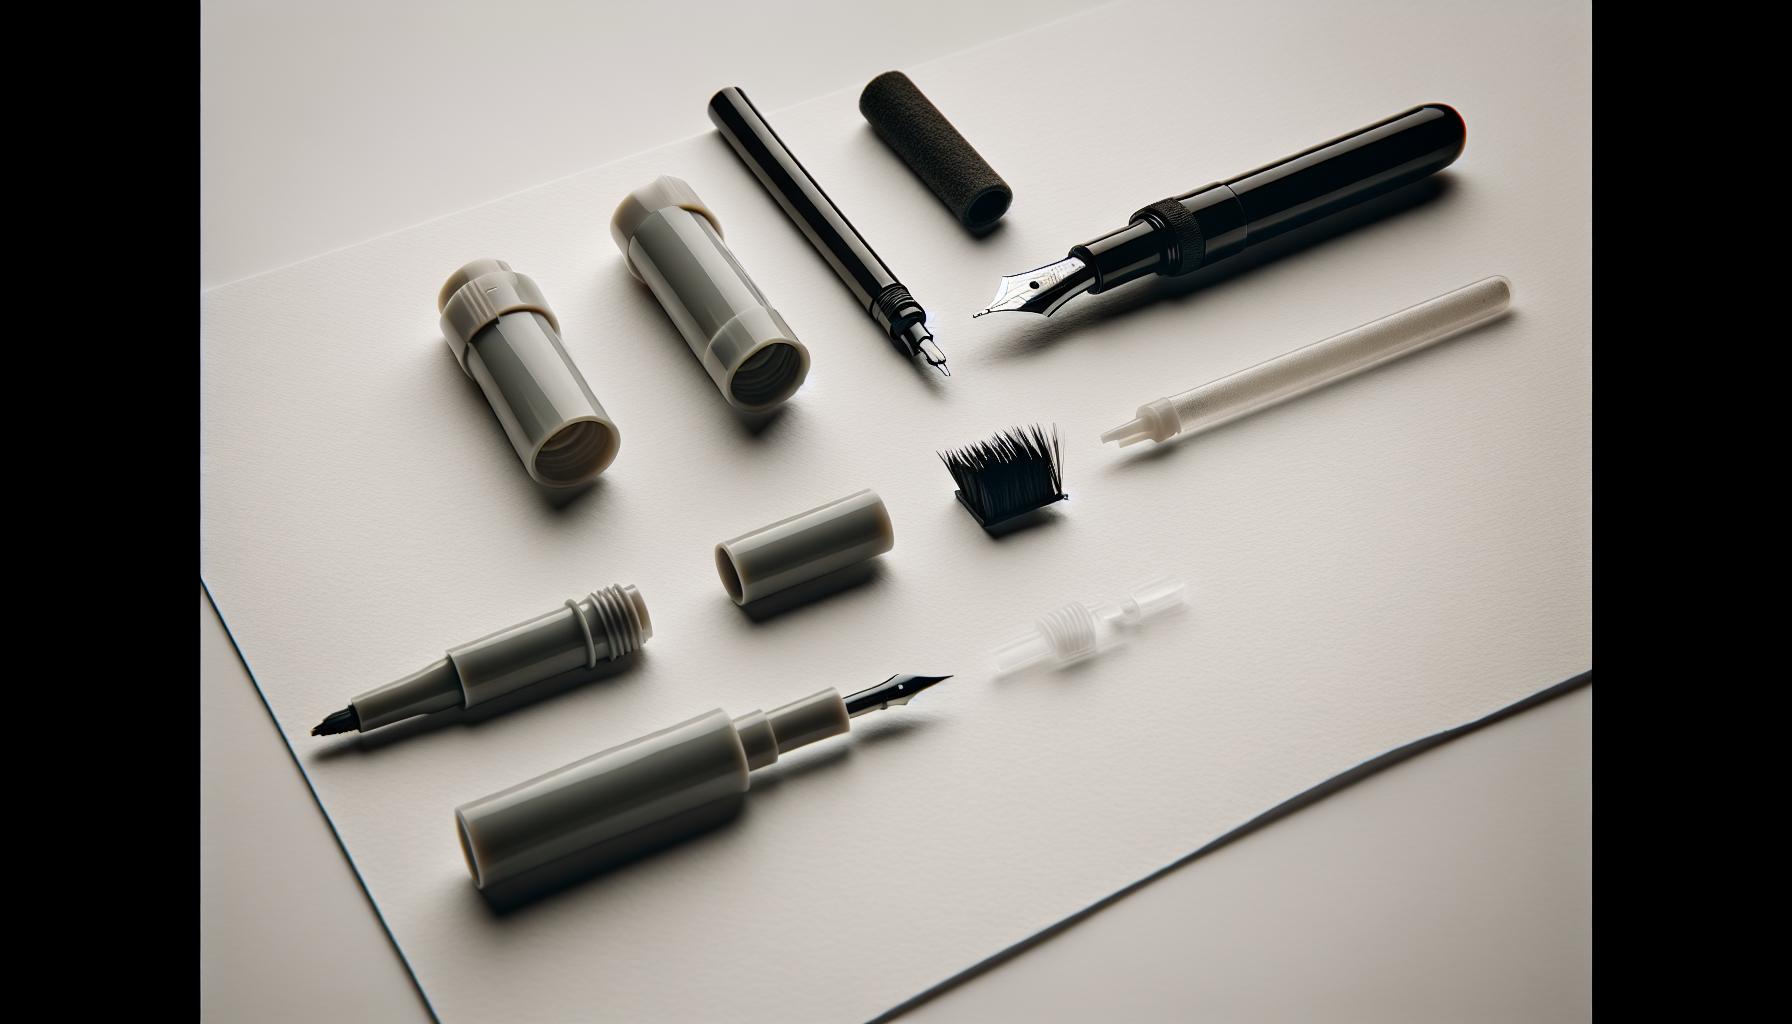
Essential Grip Techniques for Calligraphy Success
The way you grip your brush pen can make or break your calligraphy experience. When holding the pen, you’ll want to ensure that your grip is both comfortable and conducive to fluid strokes. A common approach is the tripod grip, where the pen rests against your thumb, index, and middle finger; this allows for greater control and precision. Your fingers should gently cradle the pen, avoiding excessive pressure that can lead to fatigue and hinder your movements.
Consider the positioning of your hand as well. Hold the pen at about a 45-degree angle to the paper; this angle can help you harness the pen’s flexibility while producing varying line widths. It’s also essential to let your hand move freely rather than just your fingers. Your wrist should stay relaxed to allow for smooth motions, which are critical for achieving those elegant curves and flourishes.
As you practice, pay attention to where you’re applying pressure. A light touch enables you to create delicate lines, while pressing down slightly harder will yield bold strokes. It’s all about finding that sweet spot and adjusting based on the style you’re aiming for. Experiment with your grip and angle-sometimes just shifting the pen a bit can lead to significant improvements in your strokes.
Remember, grip techniques evolve with practice. Don’t hesitate to explore different grips or hand positions that feel right to you. What works best is often a personal journey, so take the time to find your ideal way to hold your brush pen for the most satisfying calligraphy experience.
The Importance of Angle in Brush Pen Control
The angle at which you hold your brush pen can significantly impact the control and aesthetics of your calligraphy. Many aspiring calligraphers overlook this crucial aspect, yet it’s the difference between merely writing and creating art. Holding your pen at a 45-degree angle to the paper allows the bristles to flex properly, enabling smoother transitions between thick and thin lines. This angle maximizes the pen’s potential, letting you achieve those elegant strokes that define beautiful lettering.
When you maintain this angle, you also promote better wrist movement, which is vital for fluidity. Allowing your wrist to lead instead of your fingers can create a natural flow, resulting in more expressive curves and flourishes. It not only enhances the legibility of your work but also gives you the confidence to experiment with different styles and techniques. If you find your lines are inconsistent, try adjusting this angle slightly. Just a minor shift can lead to significant difference in the outcome of your strokes.
Moreover, remember that each brush pen may require a slightly different approach. The type of bristles and the ink flow can dictate how much pressure you need to apply and at what angle to hold it. Thus, feel free to experiment within a range of angles between 30 to 60 degrees to find what feels right for you. The most important part is that your hand is comfortable and can move freely-this is where creativity flourishes. Practice regularly with different angles and observe how your control improves, leading you to more satisfying calligraphy results.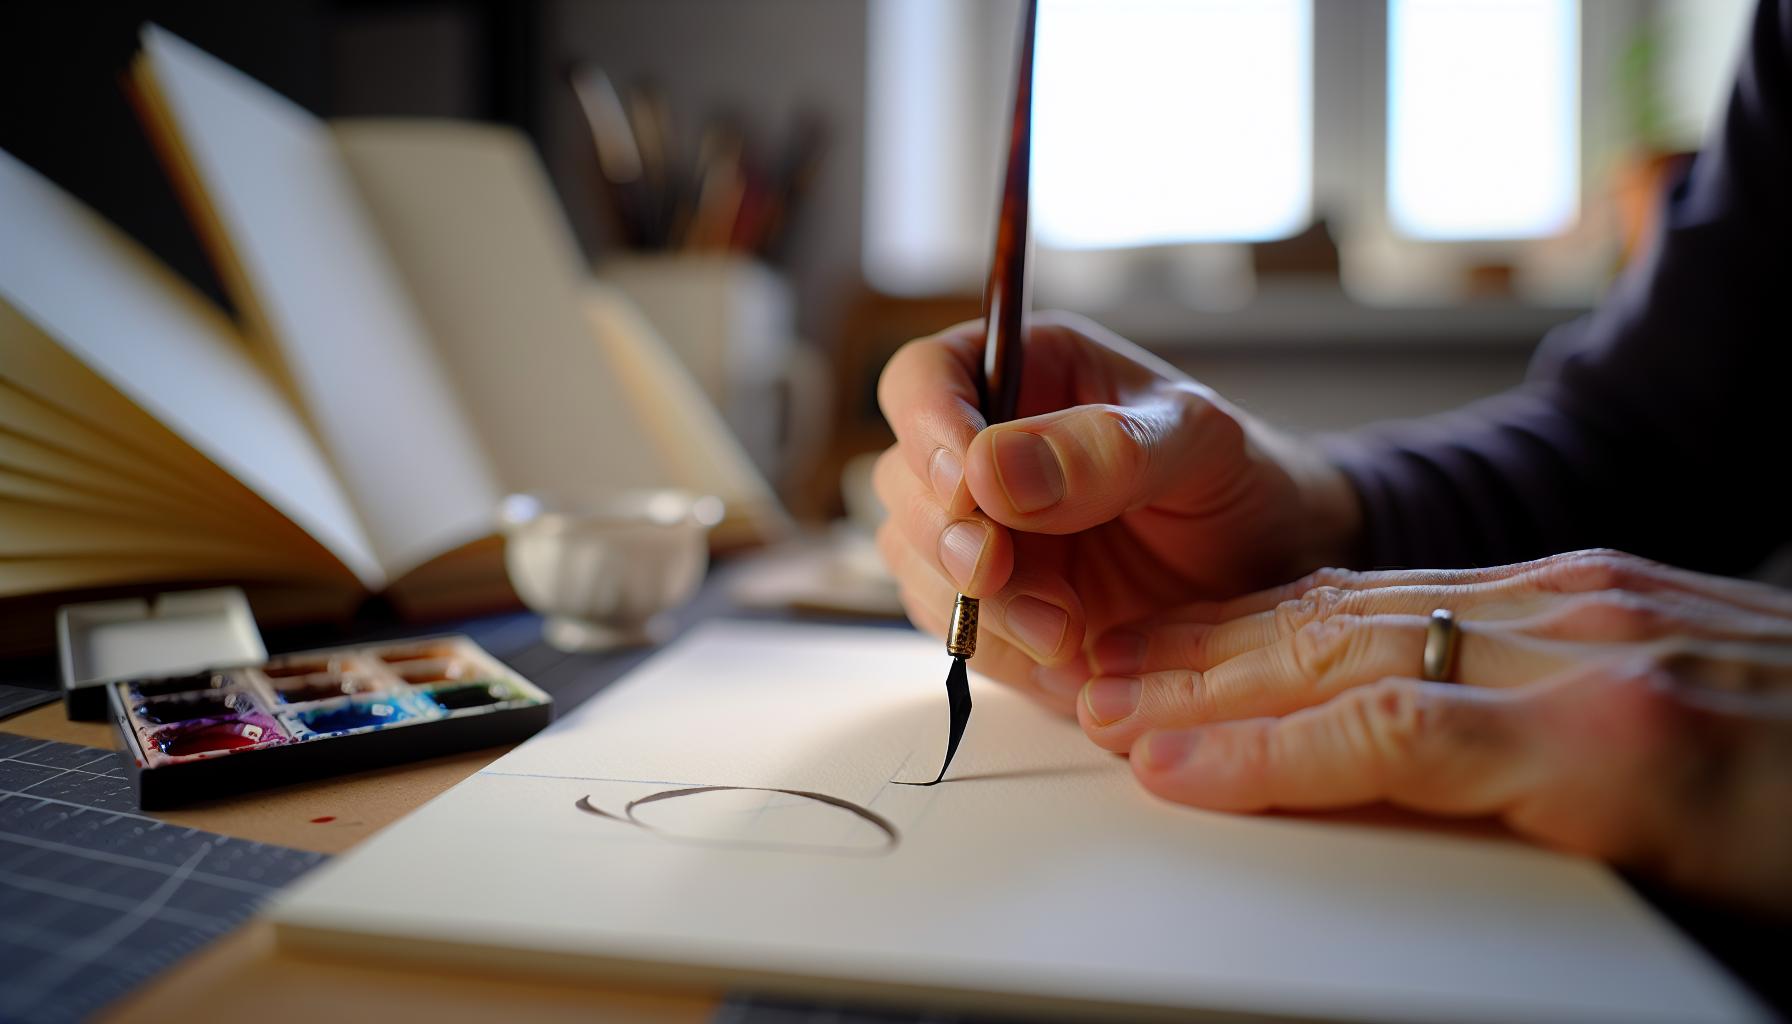
Practicing Stroke Techniques for Beginners
When you’re starting with brush pen calligraphy, practicing stroke techniques is crucial for building the muscle memory that will underlie your lettering skills. The right strokes can make the difference between a novice’s scrawl and a beginner’s gracefully formed letters. Here’s how to dive into those essential practice techniques to get your pen dancing smoothly across the paper.
First, focus on fundamental strokes. Whether it’s a thick downstroke or a thin upstroke, each movement serves as the building block for letters. I recommend starting with simple shapes like circles, loops, and straight lines. Fill a page with variations of these strokes, ensuring you pay close attention to pressure. By pressing hard for downstrokes and lighter for upstrokes, you’ll start to see the beautiful contrast that defines brush calligraphy. This practice not only helps you understand how pressure affects line weight but also aids in developing a consistent style.
Next, incorporate drills that mimic the shapes of letters. For example, work on the letter “o” by first practicing the circular stroke. Make it larger, then smaller. Move on to other letters that feature similar strokes-like “c” or “e.” This targeted practice can make learning new letters feel less daunting since you’re essentially repeating the same motions. Remember, slow and steady wins the race! Rushing through strokes can create a jerky appearance in your writing, so take your time to focus on smooth, even movements.
Lastly, keep a practice journal. Document your progress with dates and reflective notes about what worked and what didn’t. This not only tracks your improvement but also helps you identify which strokes need more work. The next time you pick up your pen, you’ll be more mindful and intentional in your practice. With consistent effort and dedication, you’ll find that your strokes become more fluid, your letters more recognizable, and your enjoyment of the art will blossom.
Common Mistakes to Avoid While Writing
Many beginners dive into brush pen calligraphy with enthusiasm but often overlook common pitfalls that can hinder their progress. Recognizing and avoiding these mistakes can significantly enhance your writing experience and final results.
One major mistake is neglecting the importance of grip. Holding your brush pen too tightly can hinder fluidity and create unnecessary tension in your hand, leading to fatigue and shaky strokes. Aim for a relaxed grip, as if you’re gently cradling a small bird. This allows for better control and fluid motion. Start by practicing with different grips. Experiment until you find one that feels natural but still offers stability.
Another key area to watch is angle consistency. Beginners often angle the brush pen differently with each stroke, which can lead to uneven results. Keeping a consistent angle helps maintain uniform line thickness, contributing to a more polished look. A good rule of thumb is to maintain a 45-degree angle to the paper during your strokes. Use guidelines to help you visualize this angle while practicing.
Additionally, rushing through your practice can be detrimental. It’s tempting to zoom through drills to see quick results, but this mindset can lead to sloppy work. Instead, focus on slow, deliberate movements. This not only helps you master the techniques better but also promotes a sense of calm and enjoyment in your practice. Plan your practice sessions to include time for slow, concentrated efforts, allowing yourself the grace to improve over time.
Lastly, don’t underestimate the value of feedback. Ignoring the need for constructive criticism can stifle your growth. Share your work with other calligraphy enthusiasts or seek input from online communities. They can provide insights you might not notice, helping you refine your style further.
By staying mindful of these common missteps, you’ll be on a focused path toward mastering brush pen calligraphy and achieving beautifully crafted strokes in no time.
Advanced Techniques for Mastering Brush Pen Calligraphy
When you feel comfortable with the basics of brush pen calligraphy, it’s time to dive into advanced techniques that will elevate your work from good to exceptional. Mastering these techniques involves a combination of skillful control, creativity, and a bit of fearless exploration. Let’s explore some game-changing strategies to help you refine your artistry and develop a unique style.
One advanced technique to incorporate is pressure variation. Understanding how to apply different amounts of pressure on the brush allows you to create dynamic strokes. When you push down harder, the tip spreads wider, giving you thicker lines; relaxing your grip allows the bristles to come back together for finer, delicate lines. Spend time experimenting with pressure while writing individual letters and strokes. You can create stunning contrasts and add depth to your work by alternating between thin and thick strokes.
Don’t shy away from experimenting with blending colors. This technique can transform your calligraphy piece into a masterpiece. Use two or more colors in your strokes, gradually blending them to create gradients. This doesn’t just add visual interest; it also gives a sense of movement to your work. Practicing this with either water-based brush pens or markers designed for blending can yield beautiful results.
Another powerful method is practicing flourishes and embellishments. Once you’re comfortable with your strokes and control, try integrating swirls, loops, and decorative elements into your letters. Flourishes can be used to highlight specific letters or to connect letters elegantly. Watch video tutorials or engage in advanced workshops to see how calligraphers integrate these into their work. Soon, you’ll be able to add your personal touch to each piece.
Finally, focus on letter spacing and alignment. Once you’ve mastered individual letters, pay attention to how they interact as a whole. Utilizing guides or pencil sketches can help maintain consistent spacing and alignment. Remember, it’s not just about how each letter looks but how they come together as a cohesive unit. When each element is thoughtfully placed, your calligraphy will exhibit a polished professional finish.
Embrace these advanced techniques with an open mind. Remember, practice is key, and allowing yourself the freedom to experiment will lead to breakthroughs in your calligraphy journey. By immersing yourself in these strategies, you’re not just improving your skills; you’re nurturing your creative expression.
Choosing the Right Brush Pen for Your Style
Choosing the right brush pen can define your calligraphy journey as much as mastering your grip or techniques. The variety of brush pens available can be overwhelming, but selecting the right one for your style can truly enhance your experience and results. For beginners and seasoned calligraphers alike, understanding the differences between brush pen types and tips is crucial for achieving the desired artistic effects.
Brush pens come in various shapes and materials, each offering unique qualities. For instance, Tombow Fudenosuke Brush Pens are highly recommended for beginners due to their fine tips, which provide greater control and precision-perfect for practicing delicate strokes and consistent line thickness. On the other hand, if you’re feeling adventurous and want to experiment with bolder styles, consider larger-tipped pens that allow for dramatic flourishes and expressive lettering. It’s all about what you want to create.
Consider your intended project, too. Are you focusing on graceful lettering for wedding invitations or vibrant strokes for modern art pieces? For intricate work, finer tips are more manageable; for larger, eye-catching projects, broader tips can deliver that bold flair. The pen’s ink type matters as well. Water-based inks are great for blending and layering, providing a more dynamic range of colors, while pigment-based inks offer richer color and durability, ensuring your work stands the test of time.
Lastly, don’t hesitate to try out different pen brands and types to discover what feels best in your hands. Experimenting is part of the fun, and you might find that a pen you initially overlooked becomes your favorite tool. So, go ahead-grab a few options, and let your style guide you in this exciting artistic pursuit!
Enhancing Your Calligraphy with Pressure Control
To elevate your brush pen calligraphy, mastering pressure control is essential. This technique involves varying the amount of pressure you apply to the brush tip, influencing the thickness and style of your strokes. When you press harder, the bristles splay out, producing a wider line; when you ease off, the line narrows. This dynamic can add life and character to your lettering, transforming simple strokes into beautiful, fluid designs.
Start by practicing fundamental strokes. Grab a sheet of practice paper, a reliable brush pen, and let’s explore some exercises. With a light touch, create thin, upward strokes, then gradually apply more pressure on downward strokes to create a contrast. This method mimics the natural rhythm found in handwriting and calligraphy, where thick downstrokes and thin upstrokes are a hallmark. Keep a steady hand and focus on the movement; the goal is to build muscle memory.
As you become more comfortable with pressure application, try incorporating it into actual letters. Experiment with letters that naturally lend themselves to pressure variations, such as ‘m’ and ‘w’. Notice how these letters can appear more elegant with thick downstrokes and delicate upstrokes. Use this technique to create flourishes: slight pressure changes can turn a simple letter into a stunning accent.
Remember, practice is key to effective pressure control. Don’t rush. Allow yourself time to find the right balance of pressure that feels natural for you. Your personal touch will evolve over time, reflecting your unique style in calligraphy. Trust that with consistent practice, your letters will not only improve technically but also gain character and personality, making your hand lettering truly your own.
Incorporating Different Styles and Flourishes
To truly make your brush pen calligraphy stand out, is key. This not only adds a unique flair but also personalizes your work. Think of every letter as a canvas-each stroke a chance to express creativity. By experimenting with various styles, you can transform standard letterforms into works of art.
Start by exploring basic flourishing techniques. Simple loops and swirls attached to letters can elevate their appearance. For instance, adding a delicate flourish at the end of a tail on letters like “g” or “y” can create a visually engaging element. Practice these additions separately: use your wrist rather than just your fingers for smoother movements. This will help ensure your flourishes are consistent and expressive.
Another exciting technique involves mixing styles. Combine serif and sans serif elements within a single piece. For example, write a word predominantly in a modern sans serif style but include one or two letters in a more traditional serif format. This contrast not only captures attention but also showcases your versatility as a calligrapher.
As you get comfortable, experiment with pressure control to make these flourishes come to life. Light upstrokes followed by bold downstrokes can create dynamic flourishes that catch the eye. Remember, the key is to practice regularly. Experimenting without fear of failure amps up your creative game.
Incorporating diverse styles and flourishes doesn’t just make your work more appealing; it helps you discover your unique voice in calligraphy. The journey of refinement and personal expression is ongoing, and every practice session is a step toward mastering your craft. So grab your brush pen and start adding those unique touches that reflect who you are as an artist!
Resources for Further Calligraphy Mastery
To elevate your brush pen calligraphy skills, having the right resources is essential for continuous improvement and mastery. Here’s a curated selection of tools and materials that can enhance your learning, offering you a well-rounded route to skill development.
Books and Guides
Explore comprehensive guides that delve into the nuances of brush pen calligraphy. For instance, “Brush Pen Lettering” by Grace Song provides clear techniques and beautiful examples to inspire your practice. Additionally, online resources like Loveleigh Loops offer beginner’s guides loaded with tips to help you understand the foundations of brush pen calling.
Online Tutorials and Courses
Consider enrolling in online courses that focus on brush pen techniques. Websites like Skillshare and Udemy feature instructors with a wealth of experience in the craft. These courses often provide step-by-step instructions and videos, allowing you to learn at your own pace while receiving personalized feedback.
Practice Sheets
Invest in printable practice sheets designed specifically for brush pen lettering. Many artists offer free or affordable downloadable sheets that help you refine your strokes and letterforms. Repeating these exercises cements your skills and builds muscle memory, which is crucial for smooth and controlled writing.
Community Engagement
Engage with online communities or local workshops to share your progress and seek advice. Platforms like Instagram and Facebook have dedicated groups for calligraphy enthusiasts where you can showcase your work, receive critiques, and learn from others’ experiences. This interaction not only motivates you but also opens up new perspectives on style and technique.
With these resources at your disposal, you’ll find the support and guidance needed to refine your brush pen calligraphy. The journey is as rewarding as the final outcome, so stay curious, keep practicing, and watch your skills flourish!
Showcasing Your Calligraphy: Tips and Ideas
If you’ve spent any time practicing brush pen calligraphy, you know how rewarding it is to see your progress. At some point, you’ll want to share your beautiful creations with the world. Showcasing your calligraphy isn’t just about displaying your work; it’s also an opportunity to connect with others who appreciate the art form.
First off, consider the presentation of your work. Whether it’s a simple greeting card or a detailed quotation on a premium paper, presentation matters. Use high-quality paper and ensure that your lettering is crisp and clean. For digital sharing, take good photos or scan your pieces in high resolution. Natural light works wonders for capturing the details of your strokes! You want your audience to see the quality of your brushwork clearly.
Another effective way to showcase your skills is by creating themed collections. Think about what messages resonate with you-quotes, affirmations, or names-and create a series around a specific theme. This not only demonstrates your versatility but also invites viewers on a journey through your artistic expression. Posting these collections on social media platforms, along with your creative process, can draw in followers and fellow enthusiasts. Engaging captions can also enhance your posts. Share the story behind each piece or discuss the techniques you used, providing insight that others can appreciate.
Lastly, don’t shy away from community involvement. Joining local art shows or participating in craft fairs can provide a fantastic platform for sharing your work. You can also consider creating an online portfolio to showcase not just finished pieces but also progress shots. This gives your audience a view of your growth and inspires those who are just starting their own journey. Utilize platforms like Instagram or Pinterest to share and connect with other calligraphy lovers. The more you share, the more you’ll inspire-and who knows? You might even spark a future collaboration.
By actively presenting your calligraphy and engaging with the community, you’ll not only gain appreciation for your art but also deepen your connection to this rewarding craft. Start showcasing today!
Q&A
Q: How should I position my fingers when holding a brush pen for calligraphy?
A: Position your fingers comfortably on the barrel of the brush pen. Use a tripod grip: hold it between your thumb and index finger while resting it on your middle finger. This grip allows better control and stability for achieving smooth strokes.
Q: What is the best angle to hold a brush pen for effective calligraphy?
A: Maintain a 45-degree angle between the pen and the paper. This angle promotes optimal ink flow and helps create those beautiful thick and thin strokes characteristic of brush calligraphy.
Q: How can I improve my brush pen control when writing?
A: Regular practice is key. Focus on slow, deliberate movements while practicing your strokes. Use exercises from the “Practicing Stroke Techniques for Beginners” section in your guide to enhance your precision and control.
Q: Why is pressure control important in brush pen calligraphy?
A: Pressure control is crucial because it affects stroke thickness. Applying more pressure creates thicker lines, while lighter pressure yields thinner lines. Experiment with this technique to master your brush strokes effectively.
Q: What common mistakes should I avoid while holding a brush pen?
A: Avoid gripping the pen too tightly, which can lead to fatigue and inconsistent strokes. Also, ensure that your wrist is relaxed and not too rigid to allow for fluid movements in your writing.
Q: Can I use different styles with the same grip technique?
A: Absolutely! While the grip provides a solid foundation, you can adapt your angles and pressure to explore various styles and flourishes. Experiment with the techniques described in sections about “Incorporating Different Styles and Flourishes.”
Q: How do I choose the right brush pen that complements my grip style?
A: Select a brush pen that feels comfortable in your grip and allows for flexibility in stroke variation. Test different brands and styles to see what feels natural for your finger positioning.
Q: When should I practice my brush pen calligraphy for best results?
A: Consistency is key. Practice daily, even for just 10-15 minutes, to develop muscle memory. Try to write during quiet times when you can focus entirely on your technique.
Key Takeaways
You’ve learned how to hold a brush pen effectively for stunning calligraphy strokes! Remember, mastering your grip is vital for both control and fluidity. Now, take action-grab your brush pen, practice those strokes, and watch your skills blossom! If you’re eager to dive deeper, check out our tutorials on “Calligraphy Techniques for Beginners” and “Choosing the Right Paper and Ink for Calligraphy” to enhance your craft even further.
Still have questions? Don’t hesitate to drop a comment below-we love hearing from you! For more tips and exclusive resources, subscribe to our newsletter and join our community of passionate calligraphers. Let’s keep your creative journey flowing! Your path to calligraphic greatness starts now-keep writing, and let your style shine!