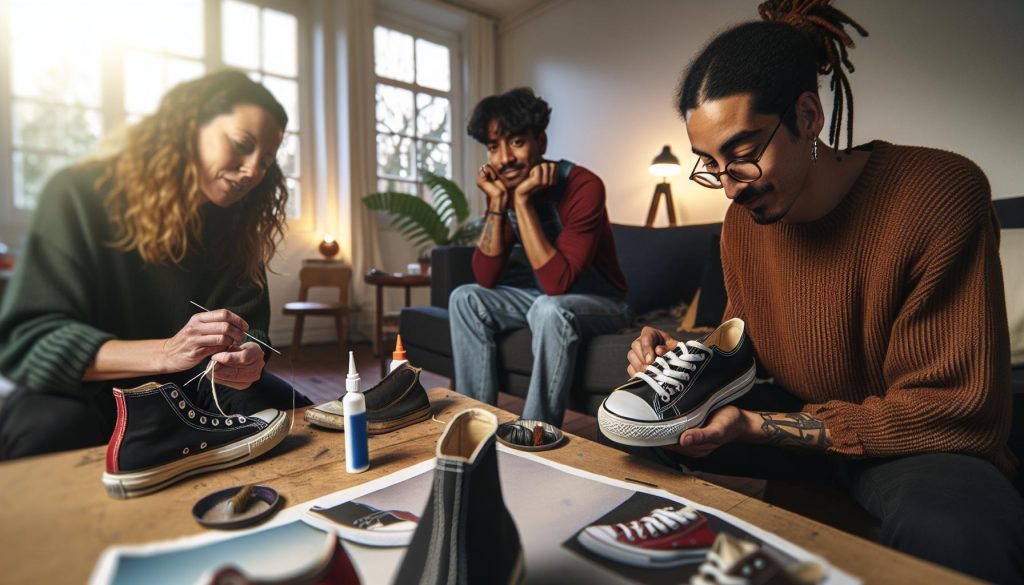
Did you know that a well-loved pair of Chuck Taylors can last years with the right care? These iconic sneakers often wear down over time, and that’s where DIY repairs come in handy. Whether it’s a stubborn stain, loose seams, or a worn-out sole, learning how to fix common issues can save you money and preserve your favorite footwear. Not only does this knowledge extend the life of your Chucks, but it also enhances your skills and confidence in tackling everyday problems. So grab that trusty pair of sneakers-let’s dive into practical, easy methods to restore them to pristine condition! Your feet (and wallet) will thank you.
Common Chuck Taylor Issues and Simple Fixes
Common issues with Chuck Taylors can feel like a sneaker owner’s nightmare, but the good news is that most of these problems have simple fixes. Whether it’s scuff marks, a loose sole, or worn-out laces, addressing these common dilemmas can extend the life of your beloved kicks and keep them looking fresh.
One of the most frequent issues is dirty, stained canvas, especially for classic white Chuck Taylors. A solution as simple as a mixture of baking soda and white vinegar can restore them. Mix equal parts, apply with a soft brush, and let it sit for about 30 minutes before rinsing. For scuffs, using a Magic Eraser or an old toothbrush with mild soap can do wonders.
Loose soles are another concern; one quick fix involves using a strong adhesive like super glue or shoe repair glue. You can apply it to the gap, press securely, and allow it to dry completely. If your eyelets are getting worn or torn, consider replacing them with a sturdy eyelet kit available at craft stores. Just a few quick repairs can make a huge difference in both the look and functionality of your shoes.
Lastly, creases can be tackled with a little heat. Put a damp cloth over the crease and use an iron on a low setting. This method helps reshape the canvas without damaging it. Simple steps like these not only fix common problems but can make you feel more connected to your trusty Chuck Taylors.
Step-by-Step Guide to Resole Your Chuck Taylors
Resoling your Chuck Taylors can breathe new life into your favorite sneakers and save you some cash in the process. If you’re seeing wear on the soles but the uppers are still holding up, don’t toss them just yet. Here’s a straightforward guide to get that spring back into your step.
Start by gathering your materials. You’ll need:
- Strong shoe adhesive: Brands like Shoe Goo or Barge All-Purpose Cement work wonders.
- Utility knife or scissors: For trimming any loose material.
- Clamps or heavy books: To hold the sole in place while it sets.
- Old cloth: For cleaning the sole area.
First, thoroughly clean the sole and the area where it meets the upper. Use a damp cloth to remove dirt, debris, or old glue. If the sole is detaching, carefully trim any excess rubber with your utility knife to create a neat surface for adhesion.
Next, apply the adhesive to both the sole and the shoe’s bottom. Make sure to spread it evenly but don’t overdo it. Press the sole back into place and ensure proper alignment with the shoe. This is where the clamps come in handy. Secure the sole with them or place heavy books on top to keep constant pressure while the adhesive cures. Follow the manufacturer’s instructions for drying times, usually around 24 hours.
Finally, after the adhesive has fully cured, check for any gaps or loose areas while gently tugging at the sole. If everything looks good, your Chuck Taylors are ready to rock! A little time and effort can make all the difference in extending the life of your sneakers and keeping them comfortable for many more adventures.
How to Clean White Canvas Sneakers Effectively
Cleaning white canvas sneakers, like Chuck Taylors, can feel daunting, but with the right approach, you can restore their original shine. As a fan of these timeless shoes, I’ve learned a few effective methods that make the task easy and rewarding. No one likes scuff marks or dirt stains ruining their favorite kicks, so let’s get those canvases looking fresh again.
Start by gathering your supplies. You’ll need a soft brush or an old toothbrush, mild laundry detergent or dish soap, and a cloth or sponge. If you’re dealing with tougher stains, consider having baking soda and white vinegar on hand as well. These household items work wonders on canvas without damaging the fabric. Mix a small amount of detergent with warm water in a bowl to create a gentle cleaning solution.
Now, take your brush or sponge and dip it into the soapy water. Gently scrub the canvas in circular motions, focusing on any stained areas. For stubborn spots, sprinkle a bit of baking soda directly on the stain, then add a few drops of vinegar. This creates a bubbling reaction that helps lift the grime. Let it sit for a few minutes before scrubbing again. Rinse your brush frequently to avoid redistributing dirt back onto your shoes.
Once you’ve cleaned the entire sneaker, wipe it down with a damp cloth to remove any soap residue. For best results, let your Chuck Taylors air dry away from direct sunlight to prevent any discoloration. If you want to maintain that crisp white look, consider applying a canvas protector after cleaning.
Remember, regular maintenance can keep your Chuck Taylors looking fresh for much longer; a quick clean now and then can prevent buildup that may require heavier scrubbing later. For those of us who love our sneakers, it’s all about keeping them in the best shape possible.
Repairing Worn-Out Eyelets: A Quick Fix
When it comes to your Chuck Taylors, worn-out eyelets can be an unexpected annoyance, compromising both style and functionality. If you’ve ever experienced the frustration of your laces slipping or tearing through the fabric, you know how important it is to address this issue quickly. The good news? Repairing eyelets at home is often simpler than you think, and it can greatly extend the life of your beloved sneakers.
One effective temporary solution is using a clear nail polish or a fabric glue to reinforce damaged eyelets. Start by cleaning the area around the eyelet, making sure it’s free of dust and dirt. Apply a small amount of glue or polish to the eyelet’s borders; this not only strengthens the area but also prevents further fraying. Allow it to dry completely before lacing up again. For those eyelets that have completely ripped through the canvas, you can patch the area with a small piece of fabric or a leather eyelet patch. Simply cut a piece slightly larger than the hole, secure it from behind with fabric glue, and let it set. This method not only fixes the eyelet but also adds a unique touch to your shoes.
Replacement Eyelets are another option if the damage is beyond a simple fix. You can purchase eyelet kits from craft or shoe repair stores, which come with a variety of sizes. After removing the old eyelet, place the new one through the hole and use a setter tool (often included in the kit) to secure it in place. This can provide a more durable solution and restore the integrity of your sneakers.
Finally, regular maintenance is key to prolonging the life of your eyelets. Treat your Chuck Taylors gently, avoiding pulling your laces too tightly, which can stress the eyelets. With these quick fixes and preventative measures, you can keep your Chuck Taylors in prime condition, ensuring they stay stylish and functional for years to come.
Dealing with Creases: Tips to Refresh Your Sneakers
There’s nothing quite like the comfort of your favorite Chuck Taylors, but those annoying creases can make them look worn-out and tired. Thankfully, you don’t have to live with them. With a little effort and the right techniques, you can refresh your sneakers and restore their original look.
One popular method to tackle creases involves using a steam treatment. All you need is a steam iron. First, set the iron on a low steam setting. Hold the iron a few inches away from the affected area, allowing the steam to penetrate the canvas without making direct contact. This moisture helps relax the material. Meanwhile, use your fingers to gently smooth out the creases while the fabric is warm and pliable. Be cautious not to overheat the canvas; too much heat can cause damage.
For a slightly more intensive treatment, try using a damp cloth. Place it over the creased area and apply an iron on a low heat setting-again, keeping it a safe distance from the material. The cloth acts as a buffer, preventing direct heat while allowing steam to escape and help reshape the fabric underneath. After this, let your sneakers cool down with shoe trees or crumpled newspaper stuffed inside to maintain their shape.
Additionally, if you’re facing stubborn creases, consider using sneaker care products specifically designed to refresh and protect canvas. These often come in the form of sprays or protective creams that can provide moisture and flexibility to the fabric, reducing the visibility of creases over time. Regular application can not only help in maintaining the appearance of your shoes but also offer water resistance.
Lastly, keep your Chuck Taylors clean and dry, as dirt and moisture can worsen the creasing. Regular cleaning with a soft brush and a gentle detergent can prevent the buildup of grime that contributes to wear and tear. By taking these steps, you can keep your Chuck Taylors looking fresh and stylish, no matter how often you wear them.
How to Patch Holes in Your Chuck Taylors
When your beloved Chuck Taylors develop holes, it can be disheartening, especially if they hold sentimental value or have been your go-to pair. Fortunately, patching them up is easier than you might think and can restore their stylish appeal in no time. Here’s how to tackle that repair with some straightforward steps and tools you probably already have at home.
Start by gathering your materials. You’ll need a sturdy fabric patch, fabric glue or a sewing kit, scissors, and optionally, a canvas shoe protector. Choose a patch that closely matches the color of your Chucks for a seamless look. If you’re going the sewing route, make sure your thread matches as well.
Step-by-Step Guide
- Clean the Area: Begin by cleaning the area around the hole with mild soap and water to remove any dirt or grime. Let it dry completely to ensure proper adhesion or sewing.
- Cut the Patch: Trim your fabric patch so it’s slightly larger than the hole, allowing for enough coverage. Round the edges to prevent peeling.
- Adhere or Sew the Patch:
– If using glue, apply a generous amount to the back of the patch and press it firmly over the hole. Make sure to hold it in place for a few minutes until it sticks. For extra security, place something heavy on top as it dries.
– If sewing, use a needle and thread to secure the patch around the edges. Use small, tight stitches to ensure durability.
- Seal the Edges: If you used fabric glue, once dry, you can enhance the patch’s longevity by applying a seam sealant around the edges to prevent fraying.
- Care and Maintenance: Once repaired, consider using a canvas protector spray to provide extra durability against future wear and protect against water and stains.
This simple DIY method not only saves your favorite shoes but also gives them a unique character. Plus, you’ll feel a sense of accomplishment every time you slip them on, knowing you gave them a second life!
Fixing Loose Soles: DIY Methods that Work
When your Chuck Taylors start to show signs of a loose sole, it can feel like the end of the world for your favorite sneakers. But don’t worry! Fixing loose soles is well within your DIY capabilities and can bring your beloved shoes back to life with just a few materials and some dedicated time. Here’s how to tackle that repair like a pro.
First off, you’ll want to gather some essential supplies. These include a strong shoe adhesive, a clean cloth, and clamps or weights to hold the sole in place while it cures. It’s crucial to use a good quality adhesive that’s specifically designed for shoes-look for products that are waterproof and flexible, ensuring they can withstand the pressure of wear and tear.
Once you have your materials, start by cleaning the area around the sole to remove dirt and old glue. This allows for better adhesion. Apply a generous amount of the adhesive to both the sole and the shoe upper where they meet. Then, press them together firmly. Here’s the trick: use clamps or weights to hold them tightly together while the glue dries. This can take anywhere from a few hours to a full day, so patience is key.
To reinforce your repair and extend the life of your Chucks, consider applying an additional layer of adhesive along the edge after the initial bond has cured. You can also use fabric patches on the inside of the shoe if there are any signs of damage from the loose sole. This way, you’re not just fixing what’s broken; you’re making your sneakers more durable for future adventures.
So, next time your Chucks feel wobbly, grab your supplies and get to work. With these simple steps, you’ll have your trusted sneakers back in action before you know it!
Substituting Laces: Choosing the Right Type
When your Chuck Taylors’ laces start to fray or break, it can feel like the end of an era. But the good news? Replacing those worn-out laces is one of the easiest fixes you can tackle, and it’s a great way to give your favorite kicks a fresh new look. Choosing the right type of laces is crucial-not just for aesthetic appeal but also for functionality.
First, consider the material. Cotton laces are the classic choice, offering a soft feel and durability, while polyester laces are more resistant to wear, making them perfect for those who wear their Chucks daily. For a sportier vibe, you might opt for synthetic materials that offer extra strength and flexibility. If you really want to make a statement, reflective or glitter-infused laces can add a pop of personality, especially for evening outings.
Next up is length. The original laces for Chuck Taylors generally range from 45 to 54 inches, depending on the style. To determine what length might work best for you, a quick rule of thumb is to count the number of eyelets your shoes have. Laces that are too short can make lacing a hassle, while excessively long laces might look messy. Here’s a simple guide to get you started:
- 2-4 eyelets: 27-30 inches
- 4-5 eyelets: 36-45 inches
- 6-7 eyelets: 54-63 inches
Finally, think about the style of the lace. Flat laces can give a vintage vibe, while round laces often offer a more modern look. Mixing and matching different colors or types with your Chuck Taylors can completely change your outfit’s attitude. Opt for bold colors that contrast with your shoes for an eye-catching look, or choose subtle shades that harmonize with the canvas for a more understated appeal.
Remember, laces may seem like a minor detail, but they have the power to refresh your Chuck Taylors in a big way. So, the next time you notice those fraying ends, don’t hesitate to change them out-your sneakers will thank you!
Preventive Maintenance for Longevity
It’s often said that an ounce of prevention is worth a pound of cure. This couldn’t be truer when it comes to maintaining your Chuck Taylors. These iconic sneakers can last for years if you give them a bit of TLC. Start by being mindful of how you wear them. Avoid muddy areas or deeply wet environments, as water can compromise the integrity of the canvas and soles. When you do get them dirty, a quick wipe with a damp cloth can prevent grime from building up.
Store your Chucks properly. Keep them in a cool, dry place away from direct sunlight, which can fade the colors and weaken the materials. Use shoe trees or stuff them with newspaper when you’re not wearing them-they help maintain their shape and combat creasing. If you notice your soles beginning to separate, don’t wait until they’re completely detached. Applying a bit of shoe glue can avert a bigger problem later on.
Regular cleaning goes a long way. For canvas, a mixture of mild soap and water works wonders. Use a soft-bristled brush to clean off dirt without damaging the material. For stubborn stains, a solution of baking soda and water can lift them out without harsh chemicals. Likewise, wipe down your rubber soles after outings; a simple scrub can remove scuffs and prolong their lifespan.
Lastly, keep an eye on your laces and eyelets. Frayed laces can lead to bigger issues, such as difficulty in keeping your shoes snug. And, if eyelets are showing signs of wear, consider reinforcing them to avoid tearing. With a little effort and attention, your Chuck Taylors will continue to be your go-to kicks for many adventures to come.
When to Seek Professional Help
When your Chuck Taylors start showing signs of serious wear and tear, it can be tempting to tackle every issue on your own. However, some problems require the expertise of a professional. Knowing when to step back is key to preserving the life of your sneakers. If you’re faced with issues that seem beyond your skill level or the DIY fixes just aren’t cutting it, here are some instances when a pro can save the day.
For starters, if your soles have completely detached, attempting to reattach them yourself might lead to a messy finish or an unsafe shoe. A cobbler has the right tools and adhesives to ensure a strong, secure bond that won’t falter in the future. Additionally, if you’re noticing structural damage, like severe creasing that compromises the shoe’s shape or support, a professional can often restore them with techniques that preserve the canvas and padding better than home methods.
Also consider seeking help for serious staining or discoloration that household cleaning solutions didn’t remedy. Professionals often have access to industrial-grade cleaning supplies that can lift stains without damaging the fabric. If eyelets are torn beyond easy repair, a cobbler can often replace them with new ones and reinforce the area, preventing further issues down the line.
In short, if you’re ever unsure whether your DIY attempts are doing more harm than good, don’t hesitate to consult with a professional. Repairing your beloved Chuck Taylors can be a simple fix or a complex challenge; knowing when to call in the experts can save you both time and money. Remember, it’s often cheaper to fix them early on than to let the problems escalate.
Repurposing Old Chuck Taylors: Creative Ideas
Old Chuck Taylors can hold a wealth of memories, and there’s no need to toss them aside just because they’re a bit beaten up. Repurposing these beloved sneakers can be both a creative outlet and a sustainable way to breathe new life into footwear that’s seen better days. Here are some inventive ideas to consider.
First off, think about transforming your old Chuck Taylors into quirky planters. Just cut the sneakers open at the top or strategically drill holes in the sole for drainage, then fill them with soil and your favorite succulents or small flowers. The vibrant colors and styles of your Chucks will add a unique flair to your garden or home décor. It’s a fun conversation piece and a perfect way to showcase your personality in your space.
Another fantastic idea is to turn them into art. If you’re feeling crafty, you can use fabric paint or markers to create custom designs on your Chucks. Alternatively, attach them to a canvas or wooden board to make a sculpture or wall art piece. This adds a personal touch to your home and celebrates your love for these iconic shoes.
You can also repurpose the laces! If they’ve frayed or lost their flair, consider using them for various DIY crafts. They can become charming bookmarks, cute dog leashes, or even be woven into friendship bracelets. This not only gives the laces a second life, but it also reminds you of the fun times you had wearing them.
Lastly, consider donating them to local charities or schools that can put them to good use. Many art programs or community initiatives are looking for materials for creative projects, and your old Chucks could inspire a new generation of artists.
Embracing these creative repurposing ideas not only extends the life of your sneakers but also helps reduce waste while allowing your style and personality to shine. Whether you’re planting, crafting, or sharing, there’s a world of possibilities waiting for your old Chuck Taylors.
Frequently asked questions
Q: How can I fix a ripped canvas on my Chuck Taylors?
A: To fix a ripped canvas, start by cleaning the area around the tear. Apply a strong fabric adhesive or a patch specifically designed for canvas. Press the fabric together and let it dry completely. If needed, you can paint over the area to match the sneaker color.
Q: What are the best materials for patching Chuck Taylor holes?
A: The best materials for patching holes in Chuck Taylors include cotton fabric, canvas patches, or iron-on fabric patches. Choose a color that matches your sneakers for a seamless look. Use fabric glue or an iron-on adhesive for a sturdy fix.
Q: How can I prevent my Chuck Taylors from getting creased?
A: To prevent creasing, store your Chuck Taylors with shoe trees to maintain their shape. Additionally, avoid bending them excessively when walking. If creases form, try steaming the area lightly and using a shoe creasing solution for best results.
Q: What should I do if my Chuck Taylors lose their shape?
A: If your Chuck Taylors lose their shape, use shoe trees when storing them to regain structure. You can also stuff them with newspaper or tissue when not in use. For excessive wear, consider re-soling or reinforcing the structure.
Q: Can I use vinegar to clean my Chuck Taylors?
A: Yes, vinegar can be used to clean Chuck Taylors. Mix equal parts of white vinegar and water, apply it to a cloth, and gently scrub the canvas. Rinse with water and let them air dry to remove stains and odors effectively.
Q: How do I fix the rubber sole of my Chuck Taylors?
A: To fix a rubber sole, apply a strong adhesive designed for rubber. Ensure both surfaces are clean and dry. Press the sole back into place and secure it with clamps or weights until the glue sets. For more extensive damage, consider using a rubber patch.
Q: What is the best way to clean the white rubber on Chuck Taylors?
A: The best way to clean the white rubber is by using a mixture of baking soda and water. Apply it with a toothbrush, scrubbing gently, and rinse with a damp cloth. This method effectively removes dirt and scuffs.
Q: How can I make Chuck Taylors waterproof?
A: To make Chuck Taylors waterproof, apply a fabric waterproofing spray specifically designed for canvas shoes. Follow the instructions on the spray for best results, usually requiring a few thin coats. Reapply every few months for continued protection.
For further tips on keeping your Chuck Taylors in top shape, check out our sections on preventive maintenance and cleaning techniques!
Closing Remarks
Now that you’re equipped with the know-how to fix common issues with your Chuck Taylors, don’t let those worn-out shoes gather dust in your closet! Whether it’s a stubborn scuff or a pesky sole separation, you can revive your favorite kicks right at home-saving time and money. Why not give it a try today?
If you’re hungry for more insights, check out our detailed guide on Shoe Care Essentials and discover the best methods for maintaining your footwear. Got questions or tips to share? Drop a comment below! We love hearing from you and your experiences. Also, consider subscribing to our newsletter for exclusive content and upcoming DIY projects to keep your shoe game strong.
Remember, well-maintained shoes not only look good but also last longer. So don’t wait-grab those supplies and give your Chuck Taylors the love they deserve. You’ll be stepping out in style in no time!