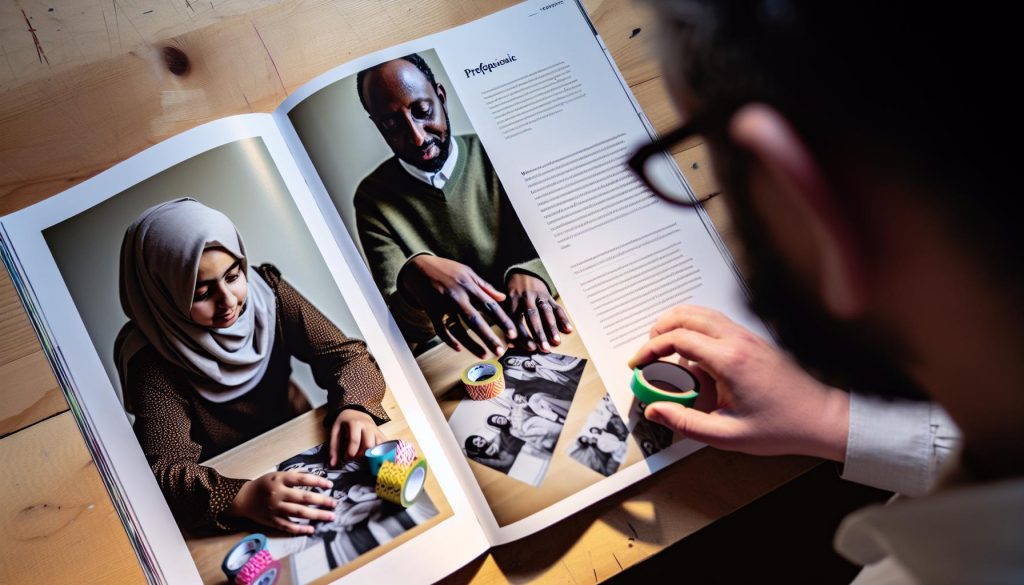
Did you know that washi tape originated from traditional Japanese papermaking? Its unique beauty and versatility make it perfect for creative projects, like crafting your own picture frame without any tools. This DIY project not only allows you to showcase your favorite photos but also adds a personal touch to your décor. It’s an easy, satisfying way to transform simple materials into something meaningful. Whether you’re an experienced crafter or just looking for a fun activity, making a washi tape picture frame is a fantastic way to express your style. So, let’s dive in and discover how easy it is to create a stunning frame that will brighten up your space!
Choosing the Right Washi Tape for Your Frame
can make all the difference in its overall look and feel. With so many options available, selecting the perfect tape might seem daunting, but it can actually be a fun part of the creative process. Start by considering the style of your frame and what aesthetic you want to achieve – are you leaning towards something vibrant and eye-catching, or do you prefer a subtle, elegant finish?
When browsing washi tape, pay attention to the colors, patterns, and widths. Bold designs can add a playful touch, while more minimalistic options might suit a modern décor. Here are some key factors to keep in mind:
- Color Scheme: Ensure the tape complements the colors of the photo or artwork you’ll be framing. For instance, if your picture has warm tones, consider tapes with similar shades to create harmony.
- Pattern Selection: Stripes, florals, or geometric designs can dramatically change the vibe of your frame. For a classic look, solid colors or simple patterns work best. For a whimsical feel, choose something ornate or fun.
- Width Matters: The width of the tape influences the overall appearance. Wider tapes can cover more surface area quickly and make a bolder statement, while narrower ones allow for more precision in detail.
Finally, don’t overlook the texture of the washi tape. Some tapes have a matte finish that gives a soft look, while glossy options can add a pop of vibrancy. Mixing different textures can also create a unique, layered effect. By selecting your washi tape thoughtfully, you’ll set the stage for creating a stunning picture frame that enhances your artwork perfectly.
Essential Materials for Your DIY Project
To kick off your no-tools DIY picture frame project with washi tape, having the right materials is crucial. A satisfying crafting experience starts with the essentials that make the process smooth and enjoyable. You don’t need to break the bank or overthink it-keeping it simple is often the best approach.
First and foremost, the star of your project is, of course, washi tape. Choose a few rolls in colors and patterns that resonate with your personal style or match the art you’ll be framing. Look for tapes that are thick enough to adhere well but still flexible for easy application. It’s great to have a mix of widths; wider tapes work beautifully to cover larger areas, while narrower ones can add fine detailing.
Here’s a quick checklist of what you’ll need:
- Washi Tape: Various colors and patterns
- Cardboard or Thick Paper: To serve as the base for your frame
- Scissors: For cutting tape and trimming your base
- Photo or Artwork: The piece you want to display; choose according to size and style
- Ruler: To guide straight lines and even borders
- Pencil: For marking measurements lightly
When selecting your base material, upcycled cardboard from cereal boxes or shipping boxes works perfectly and adds a touch of sustainability to your project. If you’re aiming for something sturdier, consider using foam board that can be found at many craft stores; it’s light but durable and provides a more polished finish.
With these materials on hand, you’re setting yourself up for a successful DIY experience. The process not only sparks creativity but also gives you the chance to personalize your home decor in a meaningful way. Happy crafting!
Step-by-Step Guide to Creating Your Frame
Start by measuring your artwork or photo. Knowing the exact dimensions is key, so grab that ruler and pencil. I recommend making your base about an inch larger on each side than the piece you’re framing. This gives the artwork a nice border and allows for error if you’re a bit wonky in your measurements.
Once you have your cardboard or foam board cut to size, it’s time for the fun part: applying the washi tape. Begin by laying down the tape along the edges of your base. Pull out a length of tape, align it with the edge, and press it down. Let’s be real here-perfection isn’t the goal. It’s all about creativity, and washi tape’s forgiving nature means you can easily reposition it. For a more dimensional effect, layer different tapes over one another or create patterns. This is where your individual style shines.
Continue taping around the perimeter until the entire edge is covered. If you’re up for it, you can create a unique design by mixing colors and patterns. Just remember to trim the ends neatly and adhere them down well to ensure they don’t peel off later.
Finally, insert your artwork into the center of your frame. You can secure it with a bit of tape on the back or leave it loose if you want to switch things up later. For a final touch, consider adding embellishments like stickers or personal notes to make the frame even more special. And there you have it-a custom washi tape frame that reflects your personality and makes your space feel even more like home. Happy crafting!
Creative Designs: Unique Frame Ideas
There’s no limit to the creativity you can express when crafting your washi tape frame. With a bit of imagination, you can transform a simple piece of art or a cherished photo into a stunning centerpiece that draws attention and complements your decor. Here are some unique design ideas to inspire you:
Mix and Match Patterns
Utilize the diverse range of washi tape designs available. Combine bold geometric patterns with softer floral motifs to create a striking contrast. This juxtaposition can elevate your frame from ordinary to extraordinary. For example, consider using a vibrant washi tape for the outer edge and a subtler, patterned tape for the inner border. This layered effect not only adds visual interest but also invites the eye to explore different elements of your frame.
Add Dimension with 3D Elements
Take your design to the next level by incorporating three-dimensional elements. Attach small embellishments like paper flowers, buttons, or sequins along the edges adorned with washi tape. This approach enhances tactile interaction and visual depth. Just make sure that these elements are lightweight, so they don’t throw off the balance of your frame.
Seasonal Themes for Year-Round Decor
Creating seasonal frames is a fun way to keep your decor fresh. In the spring, opt for pastel or floral tapes; in autumn, choose warm colors and leaf patterns. By making different frames for each season, you can easily swap out the art displayed, keeping your space dynamic and engaging.
Personalized Touches
Nothing says unique like personalization. Write short quotes, dates, or memories directly onto your frame using a permanent marker or a fine-point pen. You might also consider creating small labels with your favorite phrases using washi tape itself to give an extra layer of personality.
Remember, the most important part of this DIY project is to have fun and let your style shine. Whether you stick to one technique or combine several, each frame becomes a reflection of your tastes and creativity, making your home even more inviting. Happy crafting!
Tips for Perfectly Applying Washi Tape
Applying washi tape correctly can make all the difference in your DIY picture frame project, elevating it from basic to beautifully crafted in no time. One of the keys is to start with a clean, flat surface. Dust and dirt can prevent the tape from sticking properly, leading to peeling or bubbling. Make sure the frame you’re working with is free of any adhesives or oily residues that could interfere with the tape’s grip.
When you start applying the tape, measure first! Cut your pieces slightly longer than needed-this way, you can fold the edges over to secure them nicely and create a seamless look. If you’re layering different tapes, use a light hand to press down, allowing for easy repositioning. It’s also helpful to stick one end down and then gently stretch the tape as you lay it flat, avoiding creases.
As you apply the tape, keep your designs in mind. Use a gentle back-and-forth motion to smooth out bubbles and ensure it adheres evenly. If you do encounter bubbles, don’t panic! Just prick them with a sharp pin to release the air, then smooth the tape back down. For neat corners, a little trim goes a long way: cut the tape at a 45-degree angle as you wrap around the edges for a professional finish.
Lastly, after you’ve finished applying all your washi tape, place a heavy book or something flat on top of your frame for about an hour. This extra step helps secure the tape, especially in those areas that might want to lift. By following these simple tips, you’ll be well on your way to creating stunning, personalized washi tape frames that truly reflect your style. Happy crafting!
Enhancing Your Frame with Personal Touches
When it comes to personalizing your washi tape frame, think beyond the basics. Adding unique touches not only enhances the visual appeal but also makes the frame uniquely yours. Start with the washi tape itself-choose a mix of patterns and colors that reflect your personality or the theme of the picture you’re framing. For instance, if you’re displaying a photo from a beach vacation, opt for bright blues and sandy beige tones. Don’t shy away from using multiple patterns; layering different tapes can create a beautiful collage effect that draws the eye.
Incorporate small embellishments like dried flowers, pressed leaves, or even decorative buttons. These can be strategically placed at the corners or along the edges of the frame to provide dimension and texture. Remember, less can be more, so choose a few standout pieces that complement the overall design without overwhelming it. You can also use a fine-tipped permanent marker to add personalized notes or doodles directly on the frame, making it a mini canvas for your creativity.
Another great way to enhance your frame is by creating themed sections. If you’re framing several small pictures, consider grouping them and using different tapes for each section based on color schemes or motifs that align with the images. For instance, have a floral-themed section for nature photos and a geometric-shaped area for modern art pieces. This not only organizes your display but also adds a dynamic visual interest.
Finally, don’t forget about the hanging or standing options for your frame. Using decorative twine or ribbons instead of plain hooks can add to the frame’s charm. You might also consider assembling a mini gallery wall by pairing your washi tape frame with other art pieces that share the same spirit or color palette. The goal is to create a cohesive look that showcases your creativity and personal style while adding character to your living space. Happy crafting!
How to Hang Your Washi Tape Frame
Hanging your washi tape frame can transform your space in an instant, making your DIY effort truly shine. Whether you’re showcasing a beloved photo or a piece of your own art, placement is everything. Here are some practical tips to ensure your frame is displayed beautifully.
First, consider where the frame will hang. Is it a high-traffic area like a hallway, or a cozy spot in your living room? This affects both visibility and how you choose to hang it. For lightweight frames, washi tape itself can be surprisingly effective. Use a sturdy piece at the back of the frame, folding it over the edge to create a secure hold. This method not only maintains the aesthetic but also adds a playful touch.
If you’re looking for a more traditional approach, opt for decorative twine or ribbon. These can be attached to nails or hooks, allowing your frame to hang like a piece of art. Make sure to measure carefully. A frame that’s hung too high or too low can throw off the entire visual balance of your wall.
Tips for Curated Displays
For a more dynamic look, consider creating a gallery wall with multiple frames. You can arrange them in a grid, or go for a more organic layout by mixing different sizes and orientations. Use washi tape to connect themes-perhaps a series of nature photos accented with floral-patterned tape-forming cohesive storytelling that catches the eye.
Lastly, don’t forget about lighting. Natural light can enhance colors in your washi tape frame, while strategically placed lamps or fairy lights can create a cozy ambiance in the evening.
With these tips, you’ll ensure that your washi tape frame is not just hanging on the wall, but truly elevating your space. Happy decorating!
Common Mistakes to Avoid in DIY Framing
Creating a picture frame out of washi tape is a delightful and personalized project, but it’s easy to stumble into some common pitfalls along the way. One mistake to avoid is not prepping the surface properly. If your photo or artwork isn’t securely attached to a solid backing, the frame may sag or twist over time. Always use a sturdy mat board or cardboard behind your picture. This support keeps everything aligned and looking professional.
Another frequent error is choosing the wrong width of washi tape. Some tapes are too narrow, making it hard to achieve a bold visual impact. Opt for wider tapes when framing larger pieces, as they’ll create a more pronounced border that enhances the overall look. Conversely, using overly thick tape for smaller frames can overwhelm the design. Finding that sweet spot is key to a balanced aesthetic.
It’s also crucial to pay attention to alignment. Sloppy edges can ruin the sleek appearance you’re aiming for. When applying washi tape, start from one corner and work your way around, ensuring each side is even. A little slow and steady goes a long way; taking your time will save you from having to peel it all off and redo it later.
Finally, don’t overlook color coordination. Washi tape comes in countless designs, and while it’s tempting to mix and match, too many competing patterns can clash. Choose complementary colors that highlight your artwork instead of distracting from it. A cohesive color palette not only elevates your final piece but also ensures it fits seamlessly into your chosen display area.
Keeping these tips in mind can turn a simple project into a stunning showcase. Happy framing!
Showcasing Your Frame: Display Ideas
Displaying your washi tape frames can turn a simple piece of art into a stunning focal point in your home. There are so many creative ways to showcase your handiwork-they can elevate your decor and personalize your space.
One of the easiest methods to display your frames is through a gallery wall. Group your washi tape frames with other art pieces, photos, and mementos. Mix sizes and shapes for an eclectic look, but be sure to maintain some common theme-like color or style-to keep it cohesive. Lay your frames on the floor first to find an arrangement you love before committing to the wall. This is particularly effective for larger spaces, as it draws the eye and creates an artistic atmosphere.
Another approach is to use decorative shelves. Lean your frames against the wall on a shelf, mixing them with plants, books, or other decorative items. This allows for easy swapping and rearranging whenever you feel like refreshing your decor. You can stack smaller frames on top of larger ones, creating height variety and added visual interest.
For a more whimsical display, consider hanging your frames with clips or string. Create a ‘photo line’ using twine or wire, and attach your frames with clothespins or hooks. This kind of display not only allows for easy updates but adds a playful touch to any room. It’s perfect for a casual space like a kid’s room or a family area.
Finally, don’t forget about seasonal displays. Rotate your artwork with the changing seasons or holidays! Use themed washi tape or art to reflect the time of year. This keeps your decor fresh and exciting, and it’s a fantastic way to involve your family in the decorating process.
Explore these methods to find which display resonates with you. Your washi tape frames deserve to be seen, so get creative and let your personality shine through your art!
Recycling and Upcycling: Frame with Purpose
Transforming everyday materials into stunning decor isn’t just fun; it’s a great practice for sustainability. When you make frames with washi tape, you naturally create an opportunity to incorporate recycling and upcycling into your DIY projects. Upcycling allows you to give a second life to items you might otherwise discard, reducing waste while adding character to your home.
Look around your space for potential frame materials. Old cardboard, leftover wood pieces, or even thin plastic containers can all serve as the base for your washi tape design. For instance, cut a piece of cardboard into your desired frame shape. Then, simply cover it with your favorite washi tape, layering and mixing patterns to create a unique look. This approach not only personalizes your frame but also keeps non-biodegradable items out of landfills.
You can take this a step further by using upcycled materials to enhance the frame’s overall aesthetic. Think about incorporating elements such as twine from old packages, buttons from clothes you no longer wear, or even small trinkets that evoke memories. These additions can tell a story about the items, making your frame more meaningful. After all, every piece has a history, and weaving these narratives into your decor gives it depth and warmth.
Remember, the key to successful upcycling is creativity. There’s no right or wrong way to approach it. Feel free to experiment with different items and designs. Before you know it, you’ll have several frames that not only look great but also reflect your commitment to thoughtful living. Plus, sharing these creative ways to reduce waste can inspire others to think outside the box, turning trash into treasured art.
Frequently Asked Questions about Washi Tape Frames
Creating a picture frame out of washi tape is a fun and creative way to display your favorite memories. If you’ve got questions about this trendy DIY project, you’re not alone. Here are some common inquiries and helpful insights to inspire your crafting journey.
One frequent question is whether washi tape is strong enough to hold the frame together. The good news? Yes! While it’s designed to be easily removable and repositionable, quality washi tape has a surprisingly strong adhesive that can keep your frame intact when applied correctly. Be sure to choose wider tapes for the edges and smaller designs for details to maintain both functionality and aesthetic appeal.
Another concern is about the types of materials you can use as a base for your frame. Almost anything goes! Cardboard, wood, and even thick plastic containers work great as long as they’re sturdy enough to support the weight of your glass or photo. In fact, upcycled materials can add a unique touch and keep your project eco-friendly. Just remember to cut your base to the desired size before starting to wrap it with your chosen washi.
A common tip is to ensure you layer your tape properly to avoid any bubbles. Start by laying down a strip, smoothing it out from the center toward the edges. If you notice any air bubbles, gently lift the tape and realign it. This not only gives a polished look but also ensures the design stays intact.
Lastly, many people wonder how to seamlessly incorporate patterns. The trick is to mix and match different prints that complement each other-think about color relationships and designs that contrast yet harmonize. It’s all about experimenting until you find a mix that speaks to your style.
Whether you’re creating a thoughtful gift or personalizing your space, these tips and insights should help you navigate your washi tape framing project with confidence. Enjoy the process, and don’t hesitate to make it uniquely yours!
Frequently asked questions
Q: What materials do I need to make a picture frame with washi tape?
A: To create a picture frame with washi tape, you’ll need washi tape, cardboard or a sturdy backing, a craft knife, scissors, and your chosen photos or artwork. Optionally, have a ruler or straightedge for measuring and cutting accurately, and a pencil for marking.
Q: How do I choose the best washi tape for my picture frame project?
A: When selecting washi tape, consider its color, pattern, and thickness. Bold patterns work great for a statement frame, while subtle designs can complement your artwork. Ensure the tape is at least 1 inch wide for better coverage and durability.
Q: Can I frame multiple pictures together using washi tape?
A: Yes, you can create a collage-style frame by arranging multiple pictures on a larger piece of cardboard. Use washi tape to secure each photo and embellish the borders. This allows for a creative and personalized display.
Q: How long does it take to make a washi tape picture frame?
A: The process of making a washi tape picture frame typically takes about 30 minutes to an hour, depending on the complexity of your design. Simple designs may take less time, while detailed patterns or collage frames may require more careful application.
Q: How do I ensure my washi tape frame looks polished and professional?
A: To achieve a polished look, take your time when applying the washi tape. Start from one edge and work your way across, smoothing out air bubbles. Trim excess tape carefully, and use scissors for clean edges. Consider layering different tapes for added dimension.
Q: What other decorative items can I use with my washi tape frames?
A: Besides washi tape, you can enhance your frames with stickers, stencils, or paint. Adding embellishments like rhinestones or ribbons can create a unique look. Feel free to mix and match materials to personalize your design further.
Q: How do I hang my washi tape picture frame?
A: To hang your washi tape frame, you can use adhesive picture hanging strips for easy application without damage, or small nails if you prefer a more secure method. Ensure the backing is sturdy enough to hold the weight, and check for level alignment before securing.
Q: What are common mistakes to avoid when making a washi tape picture frame?
A: Common mistakes include not measuring the backing correctly, rushing the tape application, and choosing washi tape that’s too thin or weak. Always take your time to ensure clean edges and smooth application for the best results. Check the Common Mistakes to Avoid section in our article for more tips!
Wrapping Up
Now that you know how to make a beautiful picture frame out of washi tape without any tools, it’s time to get creative! Don’t wait-gather your favorite tapes, snap a photo of your completed frame, and share it with us in the comments below! If you enjoyed this project, check out our guides on other DIY decor projects, like how to create your own wall art and tips for personalizing your space.
Feeling inspired? Subscribe to our newsletter for more incredible DIY ideas delivered straight to your inbox! Whether you’re looking for ways to spruce up your home or simply need a fun weekend project, we’ve got you covered. Remember, every little detail can make a big difference in your space-so dive into more DIY adventures today!


