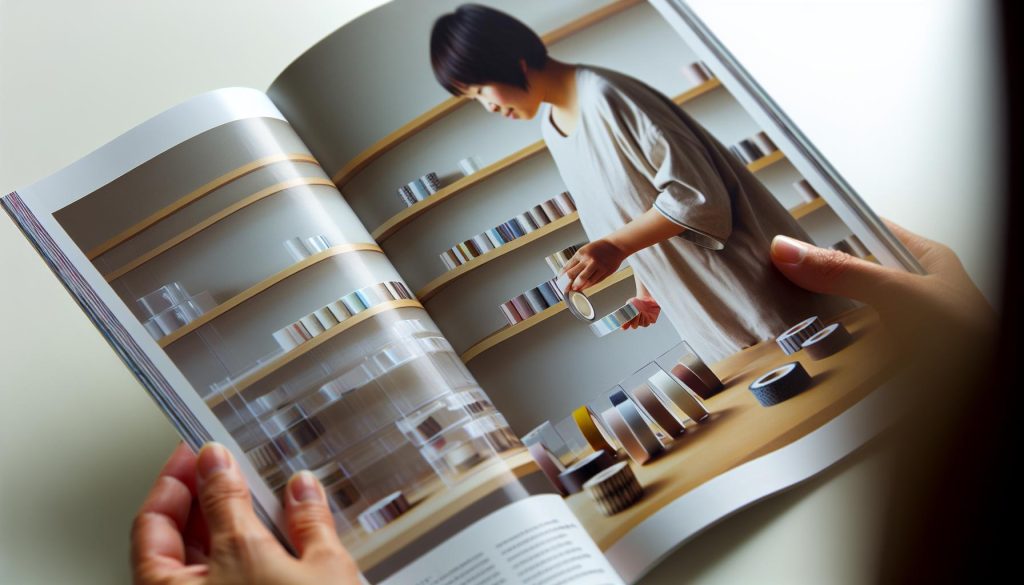
If you’re a washi tape aficionado, you know the struggle of keeping all those vibrant rolls organized. It’s easy for them to become a tangled mess, turning your crafting area into a chaotic space. But don’t worry-there are smart and stylish organization solutions that can help you store your washi tape effectively, making it easy to find exactly what you need when inspiration strikes. In this guide, we’ll explore practical tips and creative ideas that not only keep your washi tape neatly arranged but also enhance your crafting workspace. With the right storage strategies, you’ll spend less time searching and more time creating. So, let’s dive in and transform your washi tape collection into an organized haven that sparks joy!
Smart Ways to Organize Your Washi Tape Collection
When it comes to organizing your washi tape collection, a little creativity goes a long way. Start by grouping your tapes by color, theme, or pattern. This not only enhances your aesthetic but also simplifies your crafting process by making it easier to find the perfect tape for your project. Consider using clear storage containers or open-sided boxes that allow you to see at a glance what you have. This way, you eliminate the hassle of rummaging through a drawer every time you need a specific tape.
Another smart idea is to repurpose everyday items for storage. For instance, a spice rack can be transformed into a stylish washi tape holder, giving you both visibility and easy access. If you’re tight on space, think vertical-use a pegboard to hang your washi tapes. This adds a decorative touch to your craft area while keeping your favorites front and center.
Labeling is also crucial for maintaining order. Use small labels on your containers or directly on the washi tape rolls when it comes to seasonal themes or special patterns. Not only does this save time, but it also prevents the frustration of sorting through multiple rolls looking for a specific design.
Lastly, consider creating a display area for your most-loved washi tapes. This not only inspires your creative flow but also gives you a chance to showcase your collection. A simple frame with a wire across the back can serve as an art piece while keeping your washi tape prominently featured. By integrating these strategies, you’ll not only organize your collection effectively but also elevate your crafting space in the process.
Creative Storage Ideas That Save Space
To maximize your washi tape storage while minimizing clutter, think creatively about how you use your space. A simple yet effective technique is to use tension rods-install them in a drawer or on a shelf to hold rolls of washi tape vertically. This not only saves space but also keeps your tapes visible for quick access. You can add small bins or baskets underneath to store other crafting supplies, ensuring everything you need for your projects is within arm’s reach.
Another ingenious idea is to utilize magnetic strips. Mount a magnetic strip on the wall or the side of your craft cabinet and attach metal containers to hold your washi tape. This not only organizes your collection but also turns it into a decorative element of your crafting space. If you have a smaller collection, consider a mug or pen holder specifically for your washi tapes. Just grab a favorite cup and fill it with your most-used tapes for an effortless storage solution.
For those limited on counter space, drawer dividers or small clear acrylic boxes can do wonders. These solutions help keep each roll neatly separated, allowing you to maximize the vertical space in your drawers. You can even categorize your washi tapes by themes or colors, which adds a fun flair to your crafting area.
Combining these ideas can transform your storage approach from functional to fabulous. Customize these recommendations based on your available space and personal aesthetic to curate a washi tape collection that not only meets your crafting needs but also enhances the overall look of your creative workspace.
The Best Containers for Washi Tape
When it comes to organizing your washi tape collection, choosing the right containers can make all the difference. Not only do they help keep your tapes tidy, but they also enhance your craft space’s aesthetic. A great container should allow easy access and visibility while maximizing your storage options.
Start with clear plastic containers or acrylic boxes. These allow you to see your entire selection at a glance, which is perfect for choosing the right tape for your projects. Look for containers that come with adjustable dividers. This way, you can customize the size of each compartment based on the size and number of rolls you have. Having a variety of sizes within the same container can make your collection more manageable.
Another fantastic option is rolling carts. These multi-tiered carts provide ample storage and mobility, letting you wheel your crafting supplies wherever you need them most. Use one or two tiers specifically for washi tape. Group tapes by color, theme, or usage frequency for faster access during your projects. Additionally, you can decorate the cart to match your crafting style, making it both functional and visually appealing.
If you enjoy DIY projects, consider repurposing items around your home. For example, small glass jars or spice containers can be perfect for storing individual washi rolls. Just decorate them with labels for a personalized touch. For those with limited table space, a pegboard setup can creatively store your washi tape on the wall. Hang rolls from clips for an artistic display that’s also highly functional.
In sum, select containers that make your washi tape collection accessible and visually appealing. From clear organizers to charming DIY solutions, coupling functionality with style will not only streamline your crafting process but also transform your workspace into a creative haven.
Labeling Techniques for Easy Access
The right labeling techniques can transform a chaotic washi tape collection into an organized masterpiece. You’ve likely experienced the frustration of sifting through a pile of rolls to find that perfect tape, and a well-thought-out labeling system can save you time and sanity. Start by categorizing your washi tapes. Think along the lines of color, theme, or even occasion. This way, you’re not just labeling for the sake of labeling; you’re creating a system that enhances functionality.
One effective method is using clear labels that allow you to see the design of the tape while still providing essential information. Consider a labeling machine or even printable labels you can design yourself. Label each container or section with descriptive tags, such as “Floral,” “Seasonal,” or “Geometric.” This visual cue helps you locate what you need at a glance, especially when inspiration strikes.
If you’re working with drawers or boxes, a simple solution is to attach labels directly to the front. Use washi tape itself as a crafty touch for labeling-just cut a strip, write the category on it, and stick it on! You can also use small color-coded dots or stickers: assign a color to categories like use frequency (e.g., red for “most used,” green for “special occasions”). This method not only keeps things neat but adds a pop of color to your organization.
Finally, for even greater efficiency, consider a digital inventory. Use an app or a simple spreadsheet where you document each roll. Include fields for its name, color, and any notes about its use. This way, you can easily search through your collection without even opening a drawer. By combining these techniques, you’ll create an easy-to-navigate and visually appealing system that’s tailor-made for your crafting adventures.
Displaying Washi Tape as Art
Showcasing washi tape as an art form not only adds a personal touch to your space but also transforms your collection into a vibrant display. With their wide range of colors and patterns, washi tapes are like miniature canvases waiting to be highlighted. Instead of hiding your collection away, consider creative methods to incorporate it into your decor.
One popular approach is to use a simple clear acrylic shelf or a series of floating shelves. This way, you can mount them on the wall and gently arrange your washi tapes by color or theme. The transparency of the acrylic keeps the focus on the tapes themselves, allowing their beauty and variety to shine through. Consider mixing in miniature plants or framed photos on the shelves to create a more dynamic display that reflects your personality.
You can also transform a simple corkboard or magnetic board into a washi tape gallery. This allows for easy swapping of designs as your collection grows or as seasons change. Just wrap pieces of washi tape across the board in a grid or a pattern, securing both ends with clear tape. Not only does this create a colorful backdrop, but it also inspires creativity whenever you glance at it. For those who love DIY projects, try creating a washi tape collage on a canvas or a wooden board. Layer different tapes in an abstract design, then hang it up as a unique piece of art.
Keep in mind, though, that while displaying your washi tape is great for aesthetics, it’s also practical. By arranging them visibly, you make it easy to access and get inspired for your next project. Remember, the goal is to celebrate the artistry and versatility of washi tape, so let your collection reflect your creativity and style.
Seasonal and Thematic Organization Tips
The beauty of washi tape lies not only in its versatility but also in the creative ways you can organize it around seasonal themes or specific occasions. By grouping your washi tapes according to seasons, holidays, or projects, you can easily infuse your crafting with a dash of inspiration tailored to the time of year. Think of it as seasonal decorating for your craft space-simple yet effective.
Start with a system that encourages you to rotate your collection. For instance, use a multi-tiered storage cart where you can dedicate individual shelves to different seasons. Perhaps you place fall colors-rich oranges, deep browns, and warm yellows-on one shelf, while vibrant pastels for spring can occupy another. This simple separation helps you quickly grab what you need, all while keeping your workspace tidy.
Additionally, get creative with labeling. Use removable labels on your containers to specify themes for each collection. Consider categories like “Birthday,” “Autumn,” or “Holiday Cheer.” When a holiday nears, you can easily find and access specific washi tapes, maximizing your crafting efficiency. For a playful touch, you can even decorate the labels with small doodles or patterns that match the theme!
Moreover, don’t overlook the power of visual displays. Use clear jars or a decorative bowl to showcase seasonal washi tape. A few seasonal decorations, like fake pumpkins for fall or flowers for spring, can make your tape display part of your décor, enticing you to use them instead of shoving them into a drawer. Remember, crafting should be fun and inspiring, so make your washi organization a part of that creative journey!
DIY Storage Solutions for Craft Lovers
When it comes to organizing your washi tape collection, DIY storage solutions can elevate not just the functionality of your craft space but also its aesthetic. Let’s face it-there’s something incredibly satisfying about crafting your own storage systems that cater specifically to your needs. Plus, these solutions can be budget-friendly and tailored to fit your personal style.
Consider using a simple wooden spice rack or a tiered plant stand. These options allow you to display your washi tape in a visually appealing way while keeping it accessible. Just attach small hooks or dowels to the shelves where you can hang rolls of tape. This method not only saves space but transforms your collection into an art piece on display. For a quirky twist, paint the racks in pastel colors or decorate them with washi tape itself to make them blend seamlessly with your craft supplies.
If you prefer something more compact, repurpose a tackle box or small storage bin. These boxes often come with multiple compartments, perfect for separating tapes by color, theme, or usage. You can even use clear plastic dividers to keep everything organized. Just remember to label each section-this will save you time and frustration when you’re in the crafting zone.
For those who love a challenge, consider making a washi tape dispenser. An old paper towel holder or a wooden dowel can easily be transformed into a dispenser by securing it to your craft table or wall. Simply slide your washi rolls onto the holder for easy access and a stylish visual. Plus, this keeps your tape from rolling around and getting tangled with other supplies.
Lastly, think about multi-functional solutions. A vintage suitcase or a decorative basket can serve as both storage and display. Fill it with neatly rolled washi tapes, positioned upright to show off their gorgeous designs. Not only does this keep your workspace tidy, but it also adds a charming touch to your room-creating an inviting atmosphere that sparks creativity every time you enter.
Embrace these DIY storage ideas and tailor them to your unique needs, and you’ll find that organizing your washi tape becomes not just a task but a delightful part of your crafting journey.
Maximizing Vertical Space for Washi Tape
Making the most of vertical space in your craft area can transform how you store your washi tape, turning clutter into chic organization. Think about all the unused wall space and vertical surfaces that often get neglected. Vertical storage solutions not only save precious table or desk space but also keep your collection visible and easily accessible, turning your washi tape into a decorative feature rather than just a storage problem.
A great starting point is to use wall-mounted shelves. Install a few simple shelves at different heights, and then arrange your washi tape rolls in clear jars or cute containers. This method allows you to see every color and pattern at a glance, making it easy to grab what you need while adding a touch of artistry to your wall. For a more dynamic display, consider using an old wooden ladder-prop it against the wall and hang washi tape rolls from the rungs. This gives you a rustic, playful showcase for your collection while maximizing every inch of vertical space.
You might also want to explore pegboards. They’re incredibly versatile and can be customized easily. Hang your washi tapes on pegs or hooks, and use the surrounding space to store additional supplies. This setup not only keeps everything organized but also encourages creativity, as you can rearrange the layout whenever inspiration strikes. Adding small baskets to the board can help tidy up smaller items, further enhancing your organizational capabilities.
If you’re feeling crafty, think about creating your own vertical tape dispenser using a dowel rod attached to the wall. Slide washi tape rolls onto the rod, letting them hang down for easy access. This simple yet effective design allows you to free up drawer space and keeps your favorite rolls within arm’s reach. Plus, you can paint or decorate the dowel to match your craft room’s aesthetic, making it both practical and personalized.
By leveraging vertical space, you’ll not only keep your washi tape collection organized but turn it into a vibrant display that celebrates your creativity. Embrace these tips and watch how a few strategic adjustments can make your crafting space both functional and inviting.
Travel-Friendly Washi Tape Storage Options
When you’re on the go, you don’t want to compromise on your creative supplies, and that includes your beloved washi tape. Keeping your washi tape organized while traveling is key to ensuring you can easily access it and use it whenever inspiration strikes. There are savvy strategies to make your washi tape portable yet protected, so you can take your crafting wherever life leads you.
One of the simplest solutions is to use a small, multi-compartment organizer box. Look for one that’s lightweight and has a secure closing mechanism. You can separate different rolls by color or theme, making it easy to find the right tape quickly. This type of box fits nicely into a tote bag and keeps your washi tape rolls from rolling around or getting damaged. If you’re okay with a more DIY approach, you can use a small tackle box or even a pencil case with multiple pockets to achieve a similar result.
For a more artistic twist, consider wrapping your washi tape around a flat piece of cardboard or a sturdy paper towel roll. This method not only keeps your tape from tangling but also takes up minimal space. Simply secure the ends with a bit of washi tape or rubber bands. This way, you can grab your portable roll holder, toss it in your bag, and hit the road without worrying about smushing your tapes.
Lastly, if you find yourself frequently sketching or journaling away from home, a travel craft apron can be a brilliant solution. Look for one with deep pockets that can hold rolls of washi tape, scissors, and other small tools. With everything secured and within reach, you’ll be ready to create anywhere, whether you’re at a café, a park, or on a long flight.
No matter how you choose to travel with your washi tape, remember to keep it organized and easily accessible. With these travel-friendly storage options, you can ensure that your creativity flows freely wherever you go.
Maintaining Your Washi Tape: Care Tips
When it comes to preserving the beauty and functionality of your washi tape, maintenance is key. With just a few simple strategies, you can ensure your tapes remain vibrant and ready for all your creative projects. First off, always store your washi tape in a cool, dry place. Heat and humidity can ruin the adhesive and dull the colors. Avoid leaving them in direct sunlight, as prolonged exposure can fade those gorgeous patterns you love so much.
Another tip is to check the edges of the tape regularly. If you notice any fraying or the ends curling up, gently press them down or trim them neatly with scissors. This helps maintain a clean edge, making it easier to use your tape later. If you ever find the adhesive losing its stick, a quick solution is to press it against a clean, dry surface to reactivate some of the tackiness.
Organizing and Handling
To prevent your tapes from tangling or getting damaged, group them by color or theme in your storage containers. Using dividers in boxes or dispensers not only keeps them neatly organized but also makes selecting the right tape easier. If you’re stacking rolls, do so vertically to avoid squashing any tapes that might be more delicate.
Carrying your favorite washi tapes on the go? Use a protective case that keeps them secure and prevents them from bending or getting crushed in your bag. For long-term storage, consider using a sealed container to protect against dust and moisture. Regularly inspect your stocks, and use them before they become too old or dried out.
Taking good care of your washi tape ensures it’s always ready to enhance your projects. With these tips, you’ll be able to maintain your collection beautifully, ready for every craft session. Keep these practices in mind, and your creative supplies will last much longer!
Common Mistakes to Avoid in Tape Storage
Avoiding common pitfalls in washi tape storage can save you frustration and preserve the beauty of your collection. One of the biggest mistakes is improper storage conditions. Never underestimate the impact of temperature and humidity. If your washi tapes are stored in a damp area, the adhesive can deteriorate, and colors may bleed. Similarly, direct sunlight can fade the vibrant patterns you cherish. Always aim for a cool, dry place. A closet or drawer is often a better choice than an exposed shelf.
Another mistake is neglecting to regularly check your tapes. It’s easy to lose track of time and let rolls sit untouched for months. This can lead to curling edges or even adhesive failure. Make it a habit to inspect your collection. If you notice peeling or fraying, take a moment to fix them before they become unusable. A little maintenance goes a long way in extending the life of your tapes.
Storing your washi tapes in disarray is also a common issue. Tossing them into a box without organization makes it difficult to find what you need, and it can lead to tangling and damage. Instead, consider using containers that allow for easy visibility, such as clear plastic bins or tiered organizers. Group tapes by color or theme for easy access-this not only saves time but also keeps your craft space looking tidy.
Lastly, don’t forget about proper labeling. Failing to label your storage can lead to confusion, especially if you have a large collection. Use simple tags to indicate each roll’s color, pattern, or purpose. This small step can significantly enhance your crafting experience and save you from endless searching. With these insights in mind, you can keep your washi tape collection organized, accessible, and ready for your next creative project.
Transform Your Craft Room with Effective Organization
Creating an inspiring craft room starts with effective organization. You want a space where creativity flows effortlessly and your washi tape collection isn’t just clutter-it’s a beautifully curated display. If you’re serious about transforming how you organize your supplies, implementing a few strategic changes can make all the difference.
One of the most impactful steps is to designate a dedicated area for your washi tape. This could be a small drawer, a clear cart, or even a dedicated shelf. The goal is to keep your tapes visible yet tidy, making it easier to find exactly what you need when inspiration strikes. Utilize small containers or bins to group tapes by color or style. That could mean one bin for florals, another for holiday themes, and yet another for solids. Not only does this save you time digging through a jungle of rolls, but it also adds an aesthetic touch to your space.
Incorporate Vertical Storage
Don’t overlook the walls! Vertical storage solutions can save valuable table space while keeping your washi tapes accessible. Consider using a pegboard where you can hang rolls on hooks. This not only showcases your collection but allows for easy grabbing. If you’re crafty, you might even create a custom display using repurposed materials, like a hanging shoe organizer, to keep your favorites right at eye level.
Make It Interactive
Another idea is to make your organization interactive. Use clipboards to display your current favorite rolls, which can be changed out as your tastes evolve. Attach small strips of tape to a designated wall area for quick access while you work on projects. You’ll appreciate the convenience, and it keeps the space looking fresh and inspired.
By incorporating these effective organizational methods, you’re not just transforming your craft room; you’re enhancing your crafting experience. An organized space sparks creativity and ensures that every roll of washi tape can easily be put to use. So go ahead, sprinkle some creativity into your organization, and watch how it elevates your craft!
FAQ
Q: What are some creative ways to store washi tape?
A: For creative storage, use decorative jars, spice racks, or even a pegboard. These solutions not only save space but also allow your washi tape to double as decor. Check out the section on creative storage ideas in our article for more visual inspiration.
Q: How can I make DIY storage for washi tape?
A: To create DIY storage, repurpose a hanging shoe organizer or use a small tackle box. You can also use a simple cardboard box, cutting holes for tape rolls to stick out. Explore more DIY options in the article for inspiration and detailed instructions.
Q: How do I keep my washi tape from losing its stickiness?
A: To maintain washi tape’s stickiness, store rolls in a cool, dry place away from direct sunlight. Avoid stacking them too tightly, which can cause deformation. Find additional maintenance tips in our article to ensure your collection stays usable.
Q: What materials are best for organizing washi tape?
A: The best materials for organizing washi tape include plastic bins, drawer organizers, and even magnetic containers. These keep rolls visible and easily accessible. See our section on the best containers for specific product recommendations.
Q: Where should I display my washi tape collection?
A: A great way to display your washi tape is on a wall-mounted rack or in a shadow box. These displays make your collection aesthetic while keeping it organized. Check out the displaying washi tape as art section for more ideas on showcasing your favorites.
Q: How often should I clean my washi tape storage?
A: Regularly cleaning your washi tape storage every few months helps prevent dust and residue build-up. A simple wipe with a damp cloth is enough to keep things tidy. For more extensive cleaning tips, refer to our common mistakes to avoid section.
Q: What are the advantages of vertical storage for washi tape?
A: Vertical storage maximizes space and makes it easier to see all your washi tape at a glance. Using wall-mounted racks or tiered organizers allows quick access and a neat appearance. Discover more about maximizing vertical space in the article for effective strategies.
Q: Can I travel with my washi tape easily?
A: Yes, you can travel with washi tape by using small, secure containers like pencil cases or travel cases. Ensure they’re small enough to fit in your bag without taking up too much space. Learn about more travel-friendly options in our article.
Closing Remarks
Now that you’ve learned the smart solutions for storing your washi tape, it’s time to take action! Organizing your craft supplies doesn’t just create a tidy workspace; it sparks creativity and makes your projects more enjoyable. Don’t wait-implement these tips today, and watch how they enhance your crafting experience!
If you’re eager to dive deeper, check out our guides on “Creative Uses for Washi Tape” and “Essential Crafting Tools You Can’t Live Without.” And don’t forget to sign up for our newsletter for more handy tips and exclusive content! We love hearing from you, so share your organization success stories in the comments below. Let’s keep this crafting journey going together-every roll of washi can inspire your next masterpiece!


