Washi tape is more than just a colorful, decorative accessory; it’s a versatile tool that can elevate your crafting and organization skills. Yet, many people struggle with achieving the perfect adhesion, often facing frustration when their tape doesn’t stick as they imagined. Whether you’re personalizing your planner, wrapping a gift, or creating art, knowing how to properly stick washi tape can make all the difference. In this guide, we’ll explore practical tips and techniques to ensure your washi tape stays in place beautifully, enhancing both your projects and your satisfaction. Get ready to transform your sticky situations into creative successes!
Choosing the Right Washi Tape for Your Project
When it comes to washi tape, choosing the right type for your project is crucial to achieve not just a good look but also perfect adhesion. With so many colors, patterns, and widths available, it can feel overwhelming. Start by considering your project’s specific needs. For instance, if you’re decorating a journal or scrapbooking, opt for washi tapes that are vibrant and have decorative designs. On the other hand, if you’re wrapping a gift or creating a temporary display, a more subtle tape may work better.
Think about the surface you’ll be applying the tape to. Different surfaces can affect adhesion; while washi tape adheres well to paper and smooth surfaces, rough textures and porous materials might require a tape with a stronger adhesive. Check the product descriptions for adhesives labeled as “strong” or “superior,” especially if you’ll be applying the tape in areas where it will be subject to handling or moisture.
Another key factor is the width of the tape. Wider tapes provide greater coverage, which is perfect for larger areas or bold design statements. In contrast, narrow tapes allow for greater precision, making them ideal for intricate designs or smaller embellishments.
Lastly, don’t forget about the finish of your washi tape. Some tapes have a matte finish while others are glossy. The finish can affect how colors appear and how well they blend with your project. Experimenting with different finishes can lead to delightful discoveries in texture and style. Always keep in mind that the right washi tape is not just about aesthetics; it’s also about enhancing the overall adhesion and longevity of your project.
Preparing Your Surface for Perfect Adhesion
Preparing your surface effectively is the secret sauce for achieving perfect washi tape adhesion. Did you know that the right surface can make all the difference between a tape that sticks well and one that peels away at the slightest touch? Whether you’re decorating an art project, gift wrapping, or sprucing up your planner, understanding how to prepare the surface will elevate your work and ensure long-lasting results.
Start by cleaning the area where you’ll apply the washi tape. Dust, grease, and moisture can all compromise adhesion. Use a lint-free cloth to wipe down the surface. If it’s a porous material, consider using a primer spray first to create a smoother base. For paper surfaces, ensure they’re dry and free from any excess ink or residue, which could interfere with stickiness.
Surface Considerations
When choosing your materials, think about the texture and finish of the surface:
- Smooth Surfaces: Washi sticks beautifully to smooth paper, glass, and metal. Perfect for crafting and making decorative accents.
- Textured Surfaces: If you’re applying washi on walls or canvas, opt for high-quality tapes labeled for textured surfaces.
- Porous Materials: For wood or unfinished surfaces, applying a light sealant can improve adhesion.
Remember that not all washi tapes are made equal, so testing a small piece on your intended surface can save a lot of hassle later.
By laying the groundwork properly, you’ll ensure that your washi tape does what it’s meant to do-stick beautifully and stay put without the risk of peeling away prematurely. Don’t rush this step; a little preparation goes a long way in the crafting world!
Effective Techniques for Applying Washi Tape

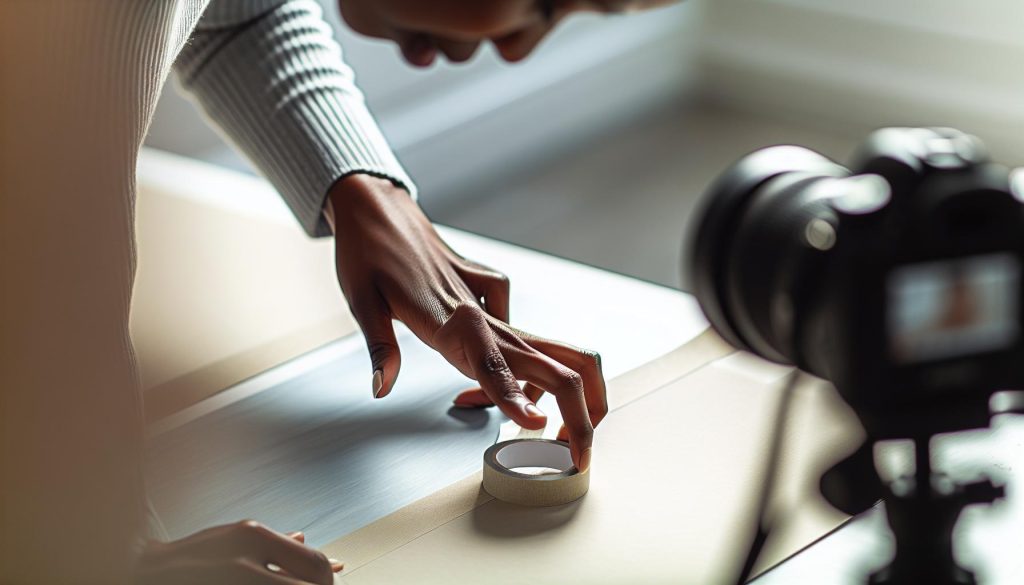
When it comes to applying washi tape, the technique you use can make or break your project. It’s not just about slapping the tape down and hoping for the best; the way you apply it can enhance its adhesion and create a polished look. Start by unrolling the tape slowly and carefully, allowing it to naturally conform to the surface’s texture. This prevents bubbles and creases, which are the sworn enemies of beautiful washi tape applications.
For long, straight lines, consider using a craft knife or a ruler to guide your tape. This will ensure a clean edge and help you maintain even pressure throughout the application. If you’re working on a larger surface, don’t hesitate to work in sections. Apply the tape a little at a time, ensuring that each segment is adhered properly before moving on. If you notice any bubbles forming, gently lift the tape and smooth it down again from the center outwards. This way, you’ll push air out and achieve a flawless finish.
Layering and Design Techniques
One of the joys of washi tape is its versatility. Try layering different patterns and colors for a unique design. Start with a base layer of a solid color to create a backdrop, then add patterned tape on top. For the best effect, make sure the patterns complement each other, creating a cohesive look. Using contrasting widths also adds interest-thicker strips as a base with thinner strips on top can create stunning visual dynamics.
Finally, it’s essential to keep the tape taut while applying. Too much slack can lead to misalignment or wrinkling. Keep your hands steady and maintain an even tension as you press the tape down on the surface. The goal is seamless application, which not only looks aesthetically pleasing but also ensures the tape sticks properly for the long haul. Remember, practice makes perfect, so don’t be afraid to experiment a little until you find techniques that work best for you!
Common Mistakes to Avoid When Using Washi Tape

Using washi tape can be a delightful way to enhance your projects, but common blunders can lead to frustration. One of the biggest mistakes is not preparing your surface properly. Washi tape adheres best to clean, smooth surfaces. If your surface has dust, grease, or moisture, you’ll find your tape peeling off earlier than expected. Always take a moment to wipe down your area before starting.
Another misstep is choosing the wrong type of washi tape for your project. Not all tapes have the same stickiness or durability; some might be more suitable for temporary use, while others are designed for a longer-lasting bond. Pay attention to the manufacturer’s guidelines, especially if you’re working on a high-impact area or an outdoor project.
Additionally, many people tend to rush through the application. Slapping the tape down without smoothing it out can lead to air bubbles and wrinkles. Take your time-slowly peel off the tape and position it carefully, using your fingers or a flat tool to smooth out any imperfections as you go. This will not only enhance the appearance of your work but will also improve the adhesion.
Lastly, don’t forget that washi tape can lose its stickiness over time, especially if it’s applied to porous surfaces or if it’s exposed to too much dust. If you realize your tape isn’t holding well, you can use a glue adhesive underneath it for more permanence. Remember, experimenting and correcting these common mistakes will lead to better results and more satisfying projects!
How to Remove and Reapply Washi Tape Safely
Removing and reapplying washi tape doesn’t have to be a headache. In fact, when done properly, it can become a seamless part of your crafting routine. First, if you’re looking to reposition your tape, gently peel it away from the surface starting from one end. Use a slow and steady motion to avoid tearing the tape, especially if it’s been on the surface for a while. If you find it sticking too firmly, a little heat from a hair dryer can help soften the adhesive, making it easier to lift off without damage.
Once you’ve lifted the tape, assess both the tape and the surface. If the washi tape is still intact, you can reapply it immediately if it’s still sticky. Just make sure the surface is clean and dry before sticking it back down. If you’re facing some sticky residue on your project surface, a gentle adhesive remover or rubbing alcohol on a cotton ball can clear that up without harming the surface underneath. Remember, washi tape is gentle; it won’t harm most surfaces, but it’s always good to check on a small area first.
If you’re dealing with a particularly delicate design or a special project, consider creating a template or marking its position with a pencil. This way, you can be more precise about where you want to lay the tape down again. Plus, using tools like a burnishing tool or credit card can help smooth the tape onto the surface, ensuring a bubble-free application.
Lastly, don’t forget to store your washi tape properly to maintain its adhesive quality. Keep it in a cool, dry place away from direct sunlight, as excessive heat can dry out the adhesive, making it less effective for future use. With these strategies, you can effortlessly remove, reapply, and maintain your washi tape for countless creative projects.
Creative Ways to Use Washi Tape in Crafts

Washi tape is a versatile crafting companion that can elevate your projects in surprising ways. It’s not just a decorative accent; it’s a tool that empowers creativity with its unique designs and gentle adhesion. The best part? You can use it in countless ways to enhance everything from home decor to personalized gifts.
One of the simplest yet most effective uses for washi tape is as a decorative border. Try adding colorful tape along the edges of journals, notebooks, or framed art to give your items a fresh look. It’s easy to reposition, allowing you to experiment until you achieve the desired effect. You can also create fun, temporary designs on walls or furniture, adding a pop of color or pattern without any long-term commitment. If you’re feeling particularly crafty, consider using washi tape to create geometric patterns or even simple artwork on canvas.
Gift Wrapping and Embellishments
Another fantastic application is in gift wrapping. Washi tape can serve as a unique sealing option or a stylish substitute for ribbon. Use it to fasten wrapping paper or to create bows and accents that add a personal touch. Additionally, you can enhance gift tags or cards by applying washi tape in layers or as borders, making your gifts stand out.
Organizational Solutions
Don’t overlook washi tape’s potential for organization. Label jars, cables, or office supplies with it for a chic and functional solution. Simply write directly onto the tape with a permanent marker or add it as a decorative label. It’s an easy way to keep things tidy while maintaining an aesthetic appeal in your workspace or home.
Art and Scrapbooking
For those into scrapbooking, the sky’s the limit. Incorporate washi tape into your layouts to create frames for photos or as accents that enhance the overall design. You can even cut the tape into shapes or strips to create unique embellishments or mixed-media elements without adding bulk, which is particularly useful for those looking to create flatter pages.
In sum, washi tape isn’t just a pretty face; it’s a crafty powerhouse. Embrace its versatility and let it inspire your next project-your imagination is the only limit!
Maintaining Adhesion: Tips for Long-Lasting Results

To keep washi tape holding strong throughout your crafting projects, learning how to maintain its adhesion is key. You don’t want to spend time applying it only to find it peeling away later. Here are some tried-and-true tips that I’ve found effective for ensuring that your washi tape sticks well and stays put.
First, always start with a clean and dry surface. Washi tape adheres best when it’s applied to smooth, non-textured materials. If your surface has dust, oil, or moisture, the tape might not bond properly, leading to premature lifting. A quick wipe with some rubbing alcohol can help remove any residue, allowing for better adhesion.
Another crucial aspect is the application technique itself. Go slow and press firmly as you lay down the tape. Use your fingers or a smoothing tool, like a credit card, to gently press the tape onto the surface. This helps eliminate any air bubbles that can compromise the bond. For particularly tricky areas or edges, consider applying a bit of pressure using a cloth or your fingertip across the entire length of the tape to secure it fully.
If you plan to use washi tape in places with high humidity or temperature fluctuations, you might want to think about sealing it with a clear acrylic spray or a light coat of mod podge. This adds an extra layer of protection, making it less likely to peel. However, always test a small area first to ensure the adhesive isn’t negatively affected.
Lastly, regular check-ins on your projects will go a long way. If you notice any lifting edges, gently re-press them back down, or consider adding a small dot of glue underneath if necessary. Embrace the impermanence of washi tape. If something needs a bit of touch-up later, it’s an easy fix that keeps your project looking its best.
With these tips, you’ll maximize the longevity of your washi tape, ensuring that your creative creations look fabulous from start to finish.
Troubleshooting Adhesion Issues with Washi Tape
Washi tape can be a delightful addition to any craft project, but it can also be frustrating when it doesn’t stick as expected. If you’ve ever faced lifting edges or tape that just won’t adhere, you’re not alone. Here’s how to troubleshoot those pesky adhesion issues and keep your projects looking sharp.
The first step in troubleshooting is to identify the root cause of the problem. Check the surface you’re applying the tape to. Is it textured, or does it have any dust or moisture? Washi tape adheres best to clean, smooth surfaces. If you’re working with a porous material, consider treating it first with a sealant to create a better bond. Wipe the surface with rubbing alcohol to remove oils or residues that could interfere with adhesion.
Next, take a closer look at your application methods. If you’re experiencing bubbles or peeling, it might be helpful to apply the tape more slowly, pressing down firmly as you go. A tool like a credit card or even your fingertips can smooth out any air pockets that form. This simple method can make a significant difference in how well the tape grips the surface.
Humidity and temperature also play crucial roles in adhesion. If your craft area is humid or you’re using washi tape in a humid environment, you might want to seal it with a clear acrylic spray. This extra layer not only protects your tape but also enhances its sticking power. Remember to always do a patch test to ensure that the sealant doesn’t affect the tape’s appearance.
Lastly, don’t hesitate to reapply. If you notice edges lifting over time, gently press them down again, or use a small amount of glue underneath the tape for a more permanent fix. By keeping an eye on your crafts and maintaining them regularly, you’ll ensure your washi tape projects remain beautiful and intact. Embrace these tips, and you’ll turn potential adhesive headaches into seamless crafting experiences.
Innovative Hacks for Double-Sided Washi Tape
Using double-sided washi tape can revolutionize your crafting game. It’s not just for adhering two things together; it can elevate your designs and provide unique solutions to otherwise tricky projects. Let’s explore some practical hacks that will let you wield this versatile tape like a pro.
First up, consider using double-sided washi tape as a template for stenciling. Instead of relying solely on traditional stencils, apply strips of the tape to create guides for painting or drawing. The adhesive will keep it securely in place, and once you’re done, you can easily lift it away, leaving you with sharp lines and no mess. This technique works brilliantly for creating decor projects, like accent walls or artistic pieces.
Another innovative use is enhancing your gift-wrapping game. Instead of using bulky tape dispensers, strategically place double-sided washi tape underneath your gift wrap. This way, you won’t have any visible tape showing, allowing the colorful patterns of washi to shine through. Plus, it gives your presents a professional finish that’s sure to impress.
Double-sided washi tape is also fantastic for creating custom bookmarks. Cut your favorite designs into desired shapes, apply the tape to sturdy paper or cardstock, and voilà! You have stylish, personalized bookmarks that won’t damage the pages of your books. They’re lightweight, easy to make, and don’t take much time at all.
And let’s not forget about organization. Use double-sided tape to attach labels or tags in clear view on bins and containers. This keeps everything tidy and lets you easily spot what you need without peeling off tape or pulling at paper labels. Crafting can be fun, but keeping things organized saves you the hassle later on.
With these innovative hacks, you’ll discover the full potential of double-sided washi tape. Embrace its versatility and start incorporating it into your projects for a fresh twist on crafting!
Eco-Friendly Practices When Using Washi Tape
When it comes to crafting with washi tape, being eco-friendly doesn’t have to mean compromising on creativity. In fact, your projects can be both beautiful and sustainable. Many washi tapes are made from natural fibers like rice paper or bamboo, which are biodegradable and less harmful to the environment compared to traditional plastic-based tapes. Here’s how you can enhance your eco-friendly practices while using washi tape.
Start by choosing high-quality washi tapes from companies that prioritize sustainable sourcing. Look for brands that openly share their manufacturing processes and use eco-friendly inks and adhesives. The more transparent a brand is about its materials, the easier it is to trust that your tape is truly sustainable. Whenever possible, opt for recycled or plant-based materials. This small change can make a big difference over time.
Storage matters, too. Instead of using plastic dispensers, consider repurposing containers you already have at home. Glass jars or wooden boxes can keep your washi tape tidy while adding a touch of decor to your crafting area. This not only reduces waste but also creates a unique personal touch to your crafting space. Plus, when it comes to applying washi tape, use it strategically. Instead of layering unnecessary tape, think creatively about how you can achieve the same effect with less.
When it’s time to clean up, avoid using single-use wipes or plastic trash bags for the leftover tape remnants. You can recycle cardboard cores from the tapes or compost any paper waste-this minimizes your overall footprint. Another fun idea is to collect scrap pieces of washi tape and use them in collages or mixed media art, giving them a new life and purpose.
By making these eco-conscious decisions, you can enjoy your crafting sessions guilt-free, knowing you’re doing your part to protect the planet. Every little step helps create a greener crafting community!
Exploring Washi Tape: A Guide for Beginners
Washi tape is your new best friend in crafting, and getting started doesn’t have to be a challenge. This decorative tape is versatile, easy to use, and perfect for beginners who want to add a personal touch to any project. The beauty of washi tape lies not just in its stunning patterns and colors but also in its unique ability to stick and peel without leaving a mess. If you’re new to washi tape and wondering how to get the best adhesion for your projects, you’ve come to the right place.
First, let’s talk about choosing the right washi tape. The quality can vary significantly, so look for tapes that feel substantial and sticky enough for your needs. Premium washi tapes have better adhesion, which means they won’t peel up easily after application. Also, consider the width of the tape; a thinner tape is great for more intricate designs, while wider tape works wonderfully for creating bold outlines or borders.
Preparing Your Workspace
Ensure that your surface is clean and dry; any dust or grease can hinder adhesion. If you’re planning to apply washi tape to something like a scrapbook page or a photo album, plan your layout first. Cut pieces of tape ahead of time so you can see how they fit together without making a rash decision that you might regret later.
Application Techniques
When you’re ready to stick, start by gently pressing one edge of your washi tape onto your surface. Slowly roll it out while maintaining even pressure to avoid bubbles. If you do get a bubble, don’t worry! Just lift the tape slightly and press it down again, smoothing as you go. Lastly, don’t be afraid to overlap strips or layer them for added visual effects; this can create a stunning collage look while also improving durability.
Washi tape is incredibly forgiving, so embrace the trial-and-error process. As you experiment, you’ll quickly learn what works best for you-creating a collage of different patterns or using a single design in various projects. So go ahead, dive into the wonderful world of washi tape crafting! With these tips, you’ll achieve the perfect adhesion with ease and make your projects stand out.
Q&A
Q: How can I ensure washi tape sticks well to different surfaces?
A: To ensure washi tape adheres well, prepare your surface by cleaning it to remove dust and oils. Test on a small area first, as some surfaces like textured walls might need a more robust adhesive method. For optimal sticking, consider using a light adhesive spray on the surface before applying the tape.
Q: What can I do if my washi tape starts to peel off?
A: If your washi tape is peeling, try pressing it down firmly with a plastic card or your finger to improve adhesion. You can also reapply a small amount of clear adhesive glue underneath if the tape needs extra sticking power, especially in areas with high humidity or temperature variations.
Q: How do I store washi tape to maintain its adhesive quality?
A: Store washi tape in a cool, dry place and keep it away from direct sunlight to maintain its adhesive quality. Use a tape dispenser or container that prevents the tape from unraveling, as constant exposure to air can degrade the adhesive over time.
Q: Can washi tape be used on textured surfaces?
A: Washi tape can be used on textured surfaces, but its adhesion may vary. For better results, smooth down the tape as much as possible to ensure contact with the surface. If it continues to lift, consider using an additional adhesive or choosing a thicker or stronger tape option.
Q: Is there a way to remove washi tape without damaging my walls?
A: Yes! To safely remove washi tape, pull it at a 45-degree angle slowly away from the surface. If it’s stubborn, use a heat gun or hairdryer on a low setting to warm the tape slightly, which can soften the adhesive and make removal easier without damage.
Q: Why is my washi tape not sticking like it used to?
A: If your washi tape isn’t sticking well, it may be due to age or dust accumulation on the adhesive side. To restore its sticky qualities, clean the back of the tape with a gentle adhesive spray or try pressing it firmly onto the surface. If it’s too old, consider replacing it.
Q: How can I enhance the stickiness of my washi tape projects?
A: To enhance the stickiness of washi tape in projects, use a double-sided tape as a base, or apply a light layer of liquid glue underneath the washi tape. This provides a strong hold, especially for crafts that will be moved or handled frequently.
Q: Is washi tape reusable after being applied?
A: Wasabi tape can be reused if it’s been applied without excessive pressure and not left for prolonged periods. To reuse it successfully, carefully peel it off and store it in a way that maintains its stickiness, such as back on its original roll or in a plastic sleeve. If the adhesive weakens, add a bit of tape glue for further use.
Concluding Remarks
Ready to take your washi tape game to the next level? Remember, proper adhesion is the key to stunning, long-lasting designs. Don’t let your creativity go to waste-get started now! If you’re curious about other fun crafting techniques, check out our guides on “Creative Ways to Use Washi Tape” and “Top Tips for Crafting with Tape.”
Need more inspiration? Join our newsletter for creative tips straight to your inbox and be part of our crafting community! Have questions or want to share your washi tape projects? Drop a comment below; we’d love to hear from you! Keep experimenting, and let your artistry shine-your perfect washi tape creations are just a roll away!


