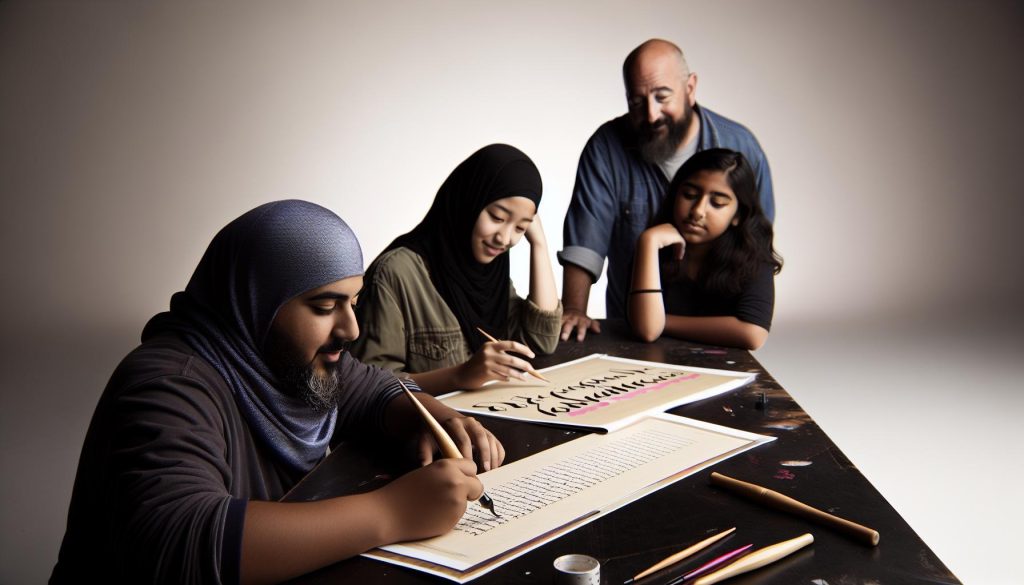
Did you know that calligraphy has been around for centuries, transforming the written word into art? Using an Art Maker calligraphy pen can empower you to tap into this rich tradition and express your creativity with confidence. Whether you’re looking to enhance your invitations, personalize gifts, or simply enjoy a new hobby, mastering calligraphy is easier than you might think. Many people struggle with their penmanship or feel intimidated by artistic endeavors, but this guide will simplify the process. You’ll discover essential techniques to create beautiful lettering that reflects your unique style. So, let’s dive in and unlock the secrets of the Art Maker calligraphy pen-your journey to stunningly crafted words starts here!
Mastering the Art Maker Calligraphy Pen
Mastering your Art Maker Calligraphy Pen can transform your writing into a work of art. The beauty of calligraphy lies not just in the strokes, but in the connection you forge with your tools. An Art Maker pen, with its smooth flow and comfortable grip, allows you to explore varied styles and express your creativity with confidence. Start each session by ensuring your pen is properly primed; this means checking the ink level and testing the flow on scrap paper. A good warm-up can make all the difference, helping you to adapt to the pen’s responsiveness.
To create beautiful lettering, focus on your grip and posture. Hold the pen lightly yet firmly, allowing it to glide across the page. Your hand should be relaxed, preventing fatigue and tremors that could disrupt your strokes. Use the broad nib for elegant curves and flourishes, but don’t shy away from experimenting with different angles and pressures. This gives each letter character and depth. For beginners, practicing basic strokes like upstrokes, downstrokes, and loops can develop muscle memory and enhance your control.
An essential part of mastering calligraphy is to embrace the learning process. Make it a habit to review your work regularly-discerning what flows well and what feels awkward. Don’t be afraid to try new techniques or styles, like connecting letters or adding embellishments. Watching tutorials or following fellow calligraphers on social media can provide inspiration and innovative ideas. Remember, each stroke is an opportunity to learn, so give yourself permission to experiment and grow. With patience and practice, you’ll find joy and satisfaction in each meticulously formed letter, turning your penmanship into a beautiful showcase of your creativity.
Essential Supplies for Calligraphy Success
To truly excel in calligraphy with your Art Maker pen, it’s vital to have the right tools at your disposal. Think of your supplies as the foundation of your artistic journey; without the essentials, your beautiful creations can quickly fizzle out. First and foremost, invest in a quality Art Maker calligraphy pen. Choose one that feels comfortable in your hand and suits your writing style. You’ll find that a pen with a flexible nib can produce varied line thickness, adding depth to your work.
Next up are inks. Selecting the right ink can make or break your calligraphy experience. Opt for archival ink, which not only delivers rich color but is also resistant to fading over time. If you’re experimenting with watercolors or other mediums, ensure your chosen inks are compatible to avoid clogging your pen. For those who love versatility, having a set of colored inks can expand your creative possibilities and enhance your artwork.
Don’t overlook the importance of high-quality paper. Heavyweight, smooth paper designed specifically for calligraphy will allow the ink to flow beautifully without bleeding through. Look for papers with a fine texture that can absorb ink well, providing a smooth surface for your strokes. Test a few sheets, as different papers can yield vastly different results.
Finally, consider supplementary tools such as a ruler for straight lines, a pencil for initial sketches, and guides or stencils to help with letter formation. A comfortable workspace free from distractions can further enhance your focus while you practice. With these essential supplies, you’ll feel empowered and ready to dive into the art of calligraphy with your Art Maker pen, paving the way for stunning creations that reflect your unique style.
Understanding Different Calligraphy Styles
Understanding different styles of calligraphy can open up a world of creative possibilities and personal expression. Each style has its own unique flair, and mastering them can elevate your art to new heights. Whether you’re looking to create elegant invitations, artistic greeting cards, or decorative wall art, familiarizing yourself with various calligraphy styles will help you choose the right approach for your projects.
One of the most popular styles is Modern Calligraphy, known for its freeform and whimsical nature. This style often combines various lettering techniques, allowing for personal flair. It’s perfect for casual settings and can be adapted for different uses, such as wedding invitations or personal journaling. When using your Art Maker pen, you can let your creativity shine through with varied line thickness and fluid strokes.
On the more traditional side, we have Copperplate Calligraphy. This style is characterized by its elegant curves and flourishes, often using a pointed nib for beautiful script. The precision required in Copperplate can be a bit challenging, but with practice, you’ll be able to achieve those classic, refined letterforms. Ensure you take your time to master the thin upstrokes and thick downstrokes to create a graceful, polished look.
Another striking style is Gothic Calligraphy, which features bold letters with dramatic edges that make a strong impact. This style is excellent for headings or standout pieces in your projects. When you write in this style with your Art Maker pen, experiment with darker inks to emphasize the Gothic aesthetic.
Lastly, there’s Brush Lettering, which allows for more spontaneous creativity compared to some of the structured styles. This is particularly compatible with the Art Maker pen, as its flexibility accommodates various brush strokes, resulting in a playful and dynamic approach to lettering.
No matter the style you choose to explore, don’t hesitate to mix and match elements from each to create something uniquely yours. Grab your Art Maker pen and start practicing these different styles; you’ll be amazed at how much your skill and confidence will grow in the art of calligraphy!
Getting Started: First Strokes with Confidence
Getting started with your Art Maker calligraphy pen can feel a bit daunting, but remember this: every expert was once a beginner. The beauty of calligraphy lies in its practice. Start by understanding that your first strokes will set the foundation for your journey into this elegant art form. Grab your pen, feel its weight, and let your hand get accustomed to its flow.
Start with simple shapes. Before diving into letters, practice drawing basic strokes like lines, curves, and loops. These motions are the building blocks of calligraphy. Focus on maintaining consistent pressure; a light hand creates thin lines, while applying more pressure produces thicker strokes. By mastering these basics, you’ll gain muscle memory that will benefit you throughout your calligraphy journey.
Practice Makes Perfect
Don’t be afraid to repeat the same strokes over and over. Consistency comes with time. Create a practice sheet where you can freely experiment, allowing your confidence to build. Write out the lowercase letters, then try uppercase, but don’t worry about perfection. Instead, focus on flowing from one letter to the next. You’ll find your rhythm as you get comfortable with transitions.
Remember, it’s about enjoying the process. Mistakes are part of learning, so embrace them! Consider keeping a journal of your calligraphy progress. Document your improvements, jot down what you enjoy or struggle with, and celebrate small victories. This not only tracks your journey but also serves as a great reference for future projects.
With consistent practice and a positive mindset, you’ll soon find that your first strokes lead not just to beautiful letters but to a fulfilling creative outlet. So, take a deep breath, and let your pen dance on the page. You’ve got this!
Tips for Achieving Consistent Lettering
To truly master your Art Maker calligraphy pen, achieving consistent lettering is a game changer. It’s not just about precision; it’s about developing a confident style that feels authentic. One of the simplest yet most effective tips is to focus on your grip. A relaxed grip allows for fluid movement; tension leads to shaky lines. Experiment with holding the pen in different positions-find the sweet spot where it feels comfortable and allows for smooth strokes.
When it comes to practicing, repetition is key. Don’t shy away from practicing specific letters multiple times. Create a dedicated practice sheet where you can tackle different letters or phrases. Here’s a smart approach: start with the letters that give you the most trouble. Is your “a” too round or your “s” too sharp? Lock in on those shapes until they match the look you’re aiming for. Pay attention to the spacing as well. Consistency in spacing can greatly influence the flow of your text. Use guiding lines to maintain uniformity across your lettering.
Mind Your Strokes
Understanding stroke direction is crucial. Each letter isn’t just a collection of lines; it’s built from purposeful strokes that combine to create a distinct letterform. Break letters down into their individual strokes. For instance, the letter “d” starts with a downward stroke followed by a curve. Practice each stroke separately before piecing them together. Visualizing the letter as a sequence of strokes helps in mastering its form.
Lastly, keep your tools in check. Regular maintenance of your calligraphy pen can greatly affect your lettering. Ensure the nib is clean and free from ink buildup, which can disrupt the flow and create irregularities in your letters. Additionally, practicing on quality paper will enhance the overall experience and outcome. Choose papers designed for ink, as they offer smoother surfaces that prevent bleeding and allow your creativity to shine.
By implementing these tips, you’ll find that consistent lettering isn’t just a goal but a natural outcome of your practice and attention to detail. So go ahead, let your pen glide, and watch your lettering transform into a confident, beautiful expression of your artistic voice!
Common Mistakes and How to Fix Them
Mistakes in calligraphy can be frustrating, but they’re also some of the best learning opportunities. Many beginners struggle with uneven lettering, drags, or inconsistent ink flow, which can discourage you. But here’s the good news: identifying and correcting these common pitfalls can help you grow as a calligrapher faster than you’d think.
One of the most frequent issues is poor grip. A tense grip can lead to shaky lines and uneven strokes. If you’re fighting against your pen, it’s time to reassess how you’re holding it. Experiment with a lighter grip and find a position that feels comfortable. You should be able to move your hand fluidly without forcing the pen. Consider taking regular breaks-this prevents fatigue and helps maintain a relaxed posture.
Another common mistake is not paying attention to stroke direction. It’s vital to approach each letter as a series of movements rather than a singular shape. For example, if your “e” feels off, break it down into components: start with the middle stroke and build from there. Practice leading into each stroke confidently; this means not lifting your pen unnecessarily, which can create breaks in your letters. Use practice pages with stroke guides until the motions feel natural.
Lastly, let’s talk about ink flow. If you notice inconsistencies, check your pen’s nib. It may need cleaning if there’s dried ink or debris obstructing the flow. If you’re still experiencing issues, consider the paper you’re using. Not all papers are created equal; some absorb too much ink, while others bleed. Invest in high-quality calligraphy paper to ensure smooth application of your inks.
In conclusion, embrace your mistakes as stepping stones. Each error teaches you something new-whether it’s adjusting your grip, refining your strokes, or choosing the right materials. Trust that with practice, patience, and attention to these details, your confidence and skill with the Art Maker calligraphy pen will flourish.
Advanced Techniques to Elevate Your Art
To truly elevate your calligraphy art, mastering advanced techniques is essential. One powerful approach is to experiment with different flourishes and embellishments. These elements can transform basic letters into stunning works of art. Start by practicing simple swirls and loops at the ends of your strokes. This not only adds elegance but also personal flair. Consider using a light touch when applying these flourishes. The goal is to enhance your lettering without overwhelming the viewer.
Another valuable technique involves understanding the use of space and layout. Calligraphy isn’t just about how the letters look; it’s about how they interact with each other and the surrounding space. Try creating asymmetrical designs or playing with varying sizes and angles of your letters. This creates dynamic compositions that draw the eye in. You might consider sketching a few rough drafts of your layout before committing with ink. This will help in visualizing how all elements interact, allowing for a more cohesive piece.
Let’s not overlook color. Introducing different ink colors can add depth and interest to your work. You can create gradients, or even overlay colors to achieve a watercolor effect. Use the Art Maker calligraphy pen to practice blending colors, experimenting with different techniques like wet-on-wet or dry brush to achieve your desired look. Just remember to test your colors on separate sheets to see how they blend together before applying them to your main piece.
Lastly, don’t shy away from mixed media. Incorporating elements like gold leaf, watercolor, or textured papers can distinguish your work and add a luxurious touch. This not only enhances visual appeal but also invites tactile experiences. When combining materials, be mindful of drying times and compatibility to ensure a seamless integration.
By embracing these advanced techniques, you’ll not only improve your skills but also discover your unique artistic voice. Dive in, explore, and let your creativity flow-the world of calligraphy is limited only by your imagination.
Creative Projects to Try with Calligraphy
Engaging in calligraphy isn’t just about perfecting letters; it’s a gateway to countless creative projects that can showcase your unique style and skills. Whether you’re a novice or a seasoned artist, the versatility of the Art Maker calligraphy pen opens up a world of possibilities. Here are some inspiring projects you can embark on to elevate your calligraphy artistry.
Start by creating personalized greeting cards. Use your pen to elegantly script heartfelt messages for holidays, birthdays, or thank you notes. Experiment with different paper types and weights, from textured finishes to smooth cards. You can incorporate watercolor backgrounds or metallic accents to make each card pop. This project not only hones your lettering skills but also results in beautiful, custom-made gifts that friends and family will treasure.
Another fantastic idea is to design unique wall art. Choose a favorite quote or an inspirational saying and create a stunning poster using your calligraphy. Consider playing with various layout styles-cursive, block letters, or a mix of both. Frame your finished piece to add a touch of elegance to any room. This allows you to practice consistency in your lettering while also experimenting with composition and color schemes.
If you’re looking for something a bit more challenging, try making a calligraphy journal. Use the Art Maker calligraphy pen to fill the pages with daily affirmations, poetry, or even snippets of your thoughts. Incorporate different styles and flourishes for each entry, showcasing your evolving skills over time. Not only does this project serve as a creative outlet, but it also becomes a personal keepsake that you can look back on and appreciate.
Lastly, think outside the box with mixed media projects. Combine your calligraphy with other art forms like watercolor paintings, ink sketches, or collage. Create greeting cards that feature a calligraphic flourish next to painted imagery, or hand-letter personalized gift tags that accompany wrapped presents. The blend of textures and styles can lead to visually striking pieces that leave a lasting impression.
With the Art Maker pen in hand, you’re equipped to explore these projects and more. Don’t be afraid to experiment and let your creativity shine. Every piece you create is an opportunity to develop your skills and make art that reflects who you are.
Maintaining Your Art Maker Pen for Longevity
Taking care of your Art Maker calligraphy pen is vital for ensuring it lasts and performs beautifully for years to come. Just like any good tool, proper maintenance not only enhances its lifespan but also improves your overall calligraphy experience. Let’s dive into some straightforward strategies that will keep your pen in top shape.
First, always store your pen appropriately. When you’re done for the day, cap it securely to prevent the ink from drying out, which is one of the most common issues. Ideally, store it upright in a pen holder, with the nib facing upwards. This prevents ink from settling in areas where it can clog or dry, allowing for a consistently smooth flow whenever you pick it up again. Avoid drastic temperature changes; extreme heat can warp the plastic and cold can affect the ink’s consistency.
Regular cleaning is another crucial step. After extended use, especially if you’ve used multiple colors or types of ink, it’s smart to clean your pen to avoid cross-contamination of colors. You can do this easily by rinsing the nib under warm water. If you’re using bottled ink, make sure to flush out the pen with clean water until it runs clear. After cleaning, allow it to air dry completely before storing it.
Also, pay attention to the nib itself. If you notice any fraying or damage, replace it promptly. A damaged nib can lead to inconsistent lines and frustration during your lettering sessions. Most manufacturers provide replacement nibs so that you can keep your pen functional without having to purchase a whole new one.
Lastly, always be mindful of the ink you choose. Not all inks are created equal, and some can be more prone to clogging than others. Choose high-quality inks that are specifically formulated for calligraphy to mitigate issues. This not only ensures a cleaner pen but also better performance on the page.
With these simple maintenance tips, you’ll not only prolong the life of your Art Maker pen but also enhance your creative journey with every stroke. Treat it well, and it will reward you with the precision and beauty that your calligraphy deserves.
Exploring the World of Calligraphy Art
Exploring calligraphy is like embarking on a journey through time and culture, each stroke of your Art Maker pen weaving together history, artistry, and personal expression. Calligraphy isn’t just about writing; it’s about creating art that speaks. Whether you’re drawn to the elegance of traditional scripts or the freedom of modern styles, each choice informs not just how you write, but how you share your voice with the world.
To immerse yourself fully in this art form, start by familiarizing yourself with various styles. Italic, Gothic, Copperplate, and Brush lettering are just a few of the traditions you’ll encounter. Each has its own flair and rules, giving you a rich palette from which to draw inspiration. You might find yourself gravitating towards the fluidity of Copperplate for its graceful curves or the bold, striking lines of Gothic that command attention. Experiment with each style using your Art Maker calligraphy pen-notice how different nibs and ink flows can transform your results.
Taking your skills further means understanding the lineage of the art. Look at the works of masters like Edward Johnston, who is celebrated for his influence on modern calligraphy, or William Morris, known for merging design with craftsmanship. Their works can ignite your creativity and provide a sense of direction as you develop your unique style. You might even find a local calligraphy workshop or online classes-plenty of resources are available that connect you to this vibrant community.
Don’t just keep your creations to yourself; share them! Calligraphy can beautify invitations, personal stationery, or your own artwork, embellishing everyday moments with handwritten elegance. Platforms like Instagram and Pinterest are filled with calligraphy inspiration and allow you to connect with others who share your passion. Document your progress, showcase your best pieces, and don’t shy away from seeking feedback. Remember, the more you engage with the community, the more your skills will flourish.
Whether you’re a beginner or looking to refine your craft, exploring the vast world of calligraphy can reignite your artistic spirit and offer endless possibilities. Embrace this journey, and let your Art Maker calligraphy pen become a tool not just for writing, but for creating beautiful art that resonates with your inner voice.
Inspiration: Famous Calligraphers to Follow
Dive into the world of calligraphy with inspiration from some of the most influential calligraphers who have shaped this beautiful art form. Their styles, techniques, and dedication can fuel your creativity and help you find your voice as you explore how to use your Art Maker calligraphy pen.
Start by checking out Edward Johnston, often heralded as the father of modern calligraphy. His passion for typography brought us the beloved Johnston Sans typeface used in the London Underground. By studying his works, you can learn about the importance of form and structure, which are essential for achieving elegant lettering.
Next, look into Irene O’Connor, known for her refreshing take on contemporary calligraphy. She blends traditional techniques with modern design, making her work highly relevant today. Following her social media accounts can provide you with insights into daily practices and creative processes, which can be incredibly motivating as you practice.
Don’t miss Paul Antonio, a leading figure in the world of Italic scripts and a master of Copperplate. His tutorials and workshops are packed with valuable tips on technique and letterforms. Engaging with his content can help you refine your skill set, especially if you aim to achieve consistent and fluid strokes.
Additionally, Veronica G., known for her expressive brush lettering, showcases the versatility of calligraphy. She emphasizes creativity over precision, encouraging you to explore your style without fear. Following her journey can inspire you to embrace imperfections as part of your artistic process.
Engaging with these artists not only enriches your practice but also connects you to a community that celebrates creativity and self-expression. Share what you learn, try out their techniques, and don’t hesitate to participate in discussions online. The more you immerse yourself in this vibrant culture, the more confident you’ll become in wielding your Art Maker pen.
How to Showcase Your Calligraphy Creations
There’s something exhilarating about sharing your calligraphy creations with the world. It’s not just about showing off your skills; it’s about connecting with others and inspiring them through your art. Whether it’s handwritten quotes, custom invitations, or beautiful place cards, showcasing your pieces can be just as rewarding as creating them.
Begin by choosing the right platform for sharing your work. Social media platforms like Instagram and Pinterest are fantastic for visual artists. Create a dedicated art account or use relevant hashtags to reach a wider audience. Don’t underestimate the power of storytelling; share the process behind your creation, the tools you used (like your Art Maker pen), and what inspired you to choose those designs. Engaging captions can draw followers into your creative journey.
Consider creating an online portfolio or blog. This gives you a space to curate your work systematically. Use high-quality images to showcase your pieces, and organize them by themes or styles. Including behind-the-scenes content or tutorials can attract viewers interested in learning calligraphy themselves. Platforms like WordPress or Behance are excellent for hosting such content.
Participate in Community Events
Another effective way to get your work out there is to participate in local art fairs, calligraphy workshops, or even community classes. These events not only allow you to display your work but also help you connect with other artists and potential clients. Additionally, you can turn your showcases into opportunities to teach others. Offering workshops allows you to share your expertise while promoting your art.
Ultimately, the key is to remain authentic. Share what you love about your creations and invite others to do the same. This authenticity will resonate far more than a perfectly polished presentation. Whether it’s through social media, an online portfolio, or community events, your calligraphy deserves to shine and inspire.
Q&A
Q: How can I practice calligraphy effectively with the Art Maker pen?
A: To practice calligraphy effectively, use the Art Maker pen on smooth paper to prevent ink blobbing. Start with basic strokes before progressing to letters. Consistency is key, so consider using guides or worksheets. Frequent practice will help build muscle memory and improve your control.
Q: What type of paper is best for using the Art Maker calligraphy pen?
A: The best paper for the Art Maker calligraphy pen is a smooth, bleed-proof paper. Look for paper labeled as suitable for fountain pens or calligraphy. This type of paper allows for clean lines and minimizes smudging, which is especially important when layering ink or using vibrant colors.
Q: Can I use the Art Maker calligraphy pen for other art projects?
A: Absolutely! The Art Maker calligraphy pen is versatile and can be used for various projects, including greeting cards, scrapbook designs, and art journaling. Experiment with different styles and techniques to incorporate calligraphy into your creative projects, as discussed in the “Creative Projects to Try with Calligraphy” section.
Q: How do I maintain my Art Maker calligraphy pen?
A: To maintain your Art Maker calligraphy pen, always cap it when not in use to prevent drying. Clean the nib regularly with water and a soft cloth to remove leftover ink. Proper care ensures longevity and consistent performance, enhancing your calligraphy experience over time.
Q: What are some common beginner mistakes with the Art Maker calligraphy pen?
A: Common beginner mistakes include applying too much pressure and using inconsistent speed. To avoid these, focus on light, controlled strokes and maintain an even pace. Referring to the “Common Mistakes and How to Fix Them” section can provide additional insights.
Q: What techniques can elevate my calligraphy with the Art Maker pen?
A: To elevate your calligraphy, experiment with varying stroke thickness, add embellishments, or use color blending. Advanced techniques, like faux calligraphy or flourishes, can add personal flair. Explore the “Advanced Techniques to Elevate Your Art” section for detailed methods.
Q: Where can I find inspiration for calligraphy projects using the Art Maker pen?
A: Inspiration can be found in various places, such as social media platforms like Instagram and Pinterest, where calligraphers showcase their work. The “Inspiration: Famous Calligraphers to Follow” section offers specific examples to spark your creativity and motivate your projects.
Q: How do I troubleshoot problems with my Art Maker calligraphy pen?
A: If the ink is skipping, check the nib for clogs and clean it thoroughly. Ensure the ink is flowing by testing on scrap paper. Refer to our troubleshooting tips in the relevant article section if you experience ongoing issues.
Future Outlook
Now that you’re equipped with the skills to use the Art Maker Calligraphy Pen, it’s time to unleash your creativity! Remember, practice makes perfect-explore different strokes and styles to truly make your work shine. If you’re excited about customizing your designs further, check out our guides on font creation techniques and enhancing calligraphy skills to elevate your artistry.
Have questions or want to share your creations? We’d love to hear from you in the comments below! And don’t forget to subscribe to our newsletter for exclusive tips and updates. Your journey doesn’t end here-keep exploring and experimenting, and transform your passion into stunning art. Embrace the art of calligraphy today-your masterpiece is just a stroke away!


