Filling a calligraphy pen might seem daunting, but mastering this simple skill can transform your writing experience. Many enthusiasts struggle with messy ink loading or end up wasting precious materials. By understanding the right techniques and tips, you can ensure a smooth flow of ink, allowing your artistry to shine. In this guide, we’ll unravel the mystery of ink loading, making it not only easy but also enjoyable. Whether you’re a seasoned calligrapher or a curious beginner, discovering the secrets to perfect ink filling will elevate your work and keep your creativity flowing smoothly. Let’s dive in and unlock the full potential of your calligraphy pen!
Choosing the Right Calligraphy Ink for Your Pen
Choosing the right ink for your calligraphy pen can feel overwhelming given the array of options on the market. However, understanding a few key aspects about types of ink can simplify your decision. For example, if you love the richness of bold, expressive strokes, then pigmented inks might be your best bet. They provide excellent opacity and are resilient against fading, making them ideal for archival work. On the other hand, dye-based inks tend to flow more smoothly and are often more vibrant, making them suitable for everyday writing where color is paramount, but they may not hold up under sunlight as well as their pigmented counterparts.
When selecting ink, consider the type of pen you’re using. Fountain pens usually pair best with water-based inks that allow for smooth flow and easy maintenance. Conversely, if you’re working with a dip pen or brush pen, you can explore more viscous inks, like those used in traditional calligraphy. These inks can create stunning effects but may require careful handling to maintain a consistent flow. Experiencing different paper types is also crucial; some inks may bleed on thinner paper, while others might be too dry and skip if used on extremely textured surfaces.
It’s worth experimenting with different brands and formulations. Some reputable brands offer sample sizes, allowing you to test an ink’s performance without committing to a large bottle. Remember, the right ink can elevate your calligraphy beyond mere letters into a form of art, so take your time exploring your options.
Understanding Different Ink Types and Their Uses
Choosing the right ink for your calligraphy pen isn’t just a matter of personal preference- it can dramatically affect the quality of your writing. Different ink types have distinct characteristics that cater to various styles and techniques. Understanding these differences helps you select the ideal ink that aligns with your creative vision.
Dye-Based Inks
Dye-based inks are known for their vibrant colors and smooth flow, making them a favorite for daily writing and artistic projects. They’re typically water-soluble, which means they’re easier to clean when it comes to pen maintenance. However, keep in mind that these inks tend to fade over time, especially when exposed to sunlight. If you’re using a calligraphy pen for casual use-like journaling or decorative writing-dye-based inks can provide an exciting range of colors that pop on the page.
Pigmented Inks
On the other hand, pigmented inks offer a robustness that dye inks lack. They sit on the surface of the paper rather than soaking in, creating rich, opaque lines. Ideal for archival work, pigmented inks resist fading better, making them a go-to for artists looking to create lasting pieces. However, be prepared to deal with a bit more of a challenge in terms of pen maintenance; these inks can require more frequent cleaning to prevent clogging.
Iron Gall Inks
For those interested in historical calligraphy, iron gall ink presents a fascinating option. Made from tannins extracted from oak galls, this ink was used in ancient manuscripts. It darkens over time and provides a unique texture to the writing. However, it is essential to note that iron gall ink can be corrosive and may harm some pen nibs, so always check compatibility before loading your pen.
Specialty Inks
If you’re feeling adventurous, why not try specialty inks like shimmering, metallic, or even scented inks? These fun options can add a unique flair to your calligraphy projects. Just be cautious; they often have different flow properties and might require specific pens designed to handle their unique viscosity.
By understanding the nuances of different ink types-dye-based for vibrant letters, pigmented for lasting impressions, and specialty inks for creative flair-you can take control of your calligraphy experience. Remember, the right ink can transform a simple piece of writing into a remarkable work of art, so don’t rush your decision. Test a few, see how they interact with your chosen paper, and enjoy the process of discovering your favorite!
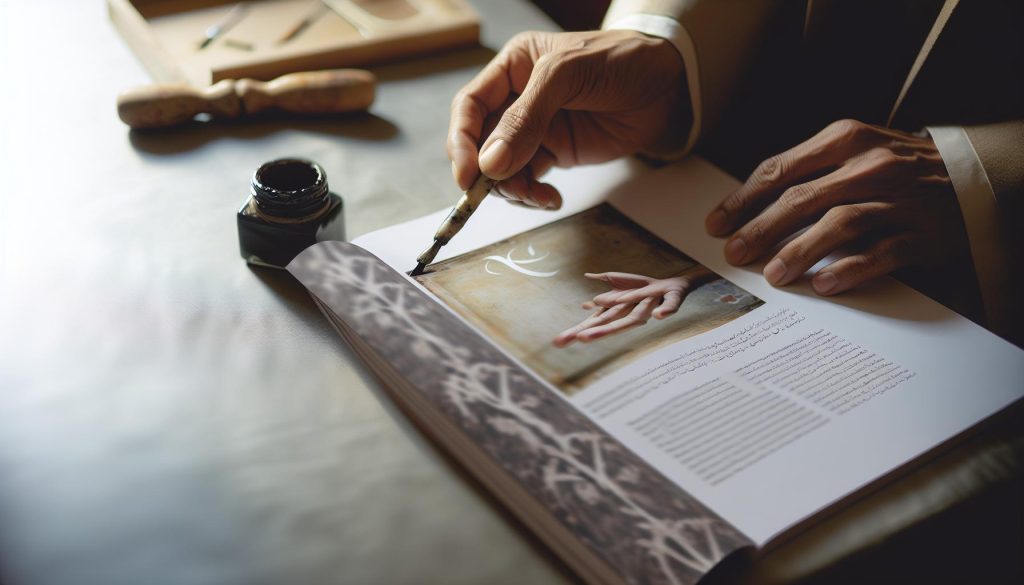
Step-by-Step Guide to Filling Your Manuscript Pen
Filling your manuscript pen doesn’t have to be a hassle-when done right, it sets you up for a smooth writing experience. Here’s how you can get it done easily and effectively.
Start by gathering your supplies: your manuscript pen, the ink of your choice, and a clean paper towel. Having everything handy will make the process much smoother. First, unscrew or remove the pen barrel to access the ink reservoir. If you’re using a converter, make sure it’s attached properly. If your pen uses cartridges, ensure you have the right size.
Next, if you’re using a converter, dip the nib into your ink bottle. Slowly pull the converter plunger upwards to draw ink into the reservoir. You should see the ink filling up. Remember to do this gently to avoid air bubbles. If you’re using a cartridge, simply insert it into the back of the pen, pushing until you feel it click into place.
After loading the ink, reassemble your pen and give it a gentle shake upside down. This helps the ink flow into the nib, ensuring it’s primed and ready to go. It’s smart to test it on a scrap piece of paper by making a few strokes; this way, you can verify that the ink flows smoothly and there are no clogs.
If you find that the ink isn’t flowing well, it might be due to air bubbles. Just give the pen a slight tap on your palm or gently squeeze the barrel (if flexible) to encourage the ink to flow. Always clean any excess ink from the nib to prevent smudging when you start writing. With these steps, you’re all set to unleash your creativity on the page!
Common Mistakes When Loading Ink and How to Avoid Them
Loading ink into your manuscript pen may seem straightforward, but many calligraphers encounter avoidable pitfalls that can lead to frustration. One common mistake is not checking the pen’s components before starting the loading process. Failing to ensure that the converter is properly fitted or that cartridges are compatible can lead to messy situations or ineffective inking. Always double-check that your pen is assembled correctly; a simple twist or push can make all the difference.
Another frequent error is drawing ink too quickly into the reservoir. If you yank the converter plunger too fast, you’re inviting air bubbles into the ink, which can disrupt the smooth flow you aim for when writing. Instead, pull the plunger slowly and steadily. This not only helps to avoid air pockets but also ensures the ink fills the chamber evenly, setting you up for a seamless writing experience. If you notice bubbles forming after loading, don’t panic. Tapping the pen lightly against your palm can encourage trapped air to escape.
Additionally, many beginners overlook the importance of cleaning the nib before writing. Residual ink can cause smudging or poor flow, which can be particularly frustrating right when you sit down to create. Make it a habit to wipe any excess ink from the nib with a clean paper towel before putting pen to paper. This small step can greatly enhance your overall experience and ensure that your artwork looks as pristine as possible.
Lastly, don’t underestimate the power of practice and patience. If the ink doesn’t flow immediately after loading, resist the urge to write aggressively. Instead, give the ink a moment to settle and flow down to the nib. A gentle shake can assist in priming the pen. Remember, understanding these nuances not only elevates your skills but also leads to a far more enjoyable calligraphy journey.
Best Practices for Maintaining Your Calligraphy Pen
Maintaining your calligraphy pen is essential for ensuring a smooth writing experience and extending the life of your tool. Did you know that a well-cared-for pen can last for years, even decades? That’s right! Taking just a few extra steps can drastically improve the performance of your manuscript pen and keep your creative flow uninterrupted.
Start by regularly cleaning your pen. After each use, it’s good practice to flush the nib and feed with clean water. If you’ve used a particularly stubborn ink, consider soaking the nib in water for a few hours to loosen any residue. When reloading ink, always avoid mixing different ink types, as this can lead to clogging and inconsistent flow. After you’ve cleaned, always dry the nib with a soft cloth to prevent any rust or corrosion, especially if you’re using a metal nib.
Storage also plays a crucial role in maintenance. When you’re not using your pen, store it horizontally or with the nib pointed up. This prevents ink from clogging the nib and feed. If you’re using a converter, you might want to empty it completely before storing it for an extended period. Pen cases with individual slots can also help protect your pens from bumps and spills.
Lastly, make sure to periodically check for wear and tear. Inspect the nib regularly for any bends or damage; a damaged nib can ruin your writing experience. If you notice any issues, consider replacing the nib instead of risking subpar results. With these straightforward practices, your calligraphy pen will remain in top shape, ready for all your creative endeavors whenever inspiration strikes.
Tips for Ensuring a Smooth Ink Flow
When you’re diving into the world of calligraphy, there’s nothing more frustrating than a pen that refuses to flow smoothly. Did you know that a significant part of getting your ink flow just right is in the prep? Below are some essential tips that will help ensure your ink flows like a river instead of a trickle.
First, always ensure your pen is thoroughly cleaned before loading it with new ink. Residual ink from previous uses can severely affect flow, leading to clogs and inconsistent writing. After cleaning, perform a quick check on the nib and feed for any dried ink or debris. A soft brush or a cloth can do wonders here, keeping your writing tools in prime condition.
Next, consider the type of ink you’re using. Not all inks are created equal; some are thicker or require different techniques to keep them flowing smoothly. If you’re using thicker inks, like those with more pigment or shimmer, you’ll often find they need more frequent cleaning or mixing to maintain optimal flow. Make sure to follow the manufacturer’s recommendations regarding the ink’s viscosity and ideal uses.
Properly filling the pen is another critical aspect. When loading your pen, submerge the nib deep into the ink to allow the feed to soak up enough liquid. If you see bubbles or feel resistance during filling, that means air is trapped inside, which will interfere with the flow once you start writing. A gentle flick of the pen can help clear those bubbles before sealing it up.
Finally, don’t forget about how you store your pen. Horizontal storage keeps ink from pooling in one area, which can either dry out or clog your nib. Make it a habit to store your pens upright when they’re not being used. Ensuring a smooth ink flow isn’t just about cleaning or filling; it’s also about how you treat your tools. Use these tips consistently, and you’ll find your calligraphy experience much more enjoyable and fluid.
How to Clean Your Manuscript Calligraphy Pen
You might not realize this, but the longevity and performance of your manuscript calligraphy pen hinge on one crucial yet often overlooked aspect: cleaning. A clean pen ensures a richer writing experience, vastly improves ink flow, and prevents those pesky clogs that can spoil your beautiful lettering. The cleaning process isn’t just a chore; it’s a key part of your calligraphy ritual that can make or break your artistry.
Start with the basics. After every session, rinse the nib and feed under lukewarm water. For stubborn inks, consider soaking the nib in warm, soapy water (use a mild dish soap). Just be careful not to submerge the entire pen, especially if it has non-waterproof components. Once the ink dissolves, gently scrub any residue with a soft brush-an old toothbrush works wonders-then rinse thoroughly. Drying is just as important; lay the nib side down on a soft cloth to prevent any water from sneaking up into the pen body.
If you’ve used particularly thick inks or metals, the cleaning process may need to be more rigorous. An ultrasonic cleaner, if you have access to one, can be a game changer, especially for detailed nibs that trap ink particles. Just remember, always follow the manufacturer’s guidelines.
One more tip that may save you headaches down the road: consider using a dedicated ink cleaner. They are designed to break down ink residues more effectively than plain water. After using an ink cleaner, always rinse well to ensure no cleaner remains in the pen, which could affect your next writing session. With these steps, you’ll not only keep your manuscript pen in top shape but also elevate your calligraphy game. Happy writing!
Troubleshooting Common Ink Loading Issues
Filling a manuscript calligraphy pen can feel like a daunting task, especially when things don’t go as planned. One common issue you might encounter is inconsistent ink flow, which can stem from a few different problems. For instance, if you notice your pen is skipping or not writing smoothly, the first thing to check is whether the nib is seated properly. A misaligned nib can create gaps that disrupt ink flow, so make sure it’s snugly in place.
Another frequent challenge is loading the ink too quickly. When filling your pen, it’s tempting to hurry through the process, but taking your time can make all the difference. Insert the nib into the ink and pull back gently on the filling mechanism, allowing the ink to fully absorb. If the nib isn’t submerged deep enough, you may end up with inadequate ink uptake. Likewise, don’t rush the reloading process; give the ink a moment to settle in the reservoir before you start writing.
If you’re using a new ink or switching brands, be aware that some inks require a bit of extra finesse. Certain inks can be thicker or contain particulates, which might clog the nib. If you encounter this, consider thinning the ink slightly with distilled water or using a dedicated ink conditioner. This small adjustment can often clear out any blockages and get your pen flowing smoothly again.
Lastly, always remember to account for temperature and humidity. In colder or drier conditions, inks can behave differently. If your usual ink is acting up, it might be worth checking these environmental factors. Keeping your workspace at a consistent temperature can help maintain optimal ink performance, keeping your calligraphy sessions enjoyable and frustration-free.
Innovative Techniques for Custom Ink Blending
Creating custom ink blends can elevate your calligraphy game and give your work a unique flair. Whether you’re looking to match a specific color or want to experiment with new textures, blending inks can unleash your creativity. Start by understanding that different ink bases-like dye-based, pigment-based, and iron-gall-react differently when mixed. This means that experimentation is key, but don’t worry; it can be a fun and rewarding process!
One effective technique for blending inks is to use a small mixing palette or a well-cleaned container. Begin with your base ink, then add drops of your secondary ink while slowly mixing. A good rule of thumb is to start with a lower concentration of the second ink and gradually adjust. You can also thin your blended ink with a few drops of distilled water if you find it’s too thick. Always test your blend on scrap paper before filling your pen. This way, you can avoid wasting ink and ensure that the final color meets your expectations.
Pay attention to the characteristics of your inks as well. Some inks may have shimmer or gloss that can affect the final look of your blend. Combining a shimmering ink with a matte one can produce interesting results, appearing different under various lighting conditions. Not only does this add depth to your work, but it can also make standard calligraphy stand out. Don’t forget to label your mixtures. It’s easy to forget what you’ve created, so keeping a small journal of your blends can help you recreate or refine your favorites in the future.
Lastly, consider the environmental impact of your inks. Many calligraphers today are leaning towards eco-friendly inks made from natural ingredients. These can provide unique pigments and textures while contributing to sustainability. Blending such inks can offer you a whole new palette to work with, aligning your artistic practice with your values. With a bit of experimentation and creativity, custom ink blending can transform your calligraphy endeavors into a personal and expressive art form.
Exploring Eco-Friendly Ink Options for Calligraphy
Using eco-friendly inks in your calligraphy not only beautifies your work but also supports environmental sustainability. Many contemporary calligraphers are shifting towards inks made from natural ingredients, avoiding harsh chemicals that can irritate both the skin and the planet. These inks are often derived from plant extracts, minerals, or earth-based pigments and provide vibrant colors with a unique texture that can elevate your calligraphy projects.
When choosing eco-friendly ink, you’ll find options that meet a variety of needs. For example, water-based inks are typically easy to clean and non-toxic, making them ideal for artists who are conscious about their health and that of the environment. Brands like Eco Fountain Pen Inks offer a range of colors derived from natural sources, providing a beautiful palette without compromising on safety or performance. Additionally, some companies are dedicated to sustainable practices, using recycled materials in their packaging, which adds another layer of eco-friendliness to your choice of ink.
If you’re considering blending your own eco-friendly inks for a personalized touch, start with base inks that have a natural composition. Add mineral-based colors for depth or herbs like turmeric for a golden hue. Just remember to test your blends on scrap paper first; eco-friendly inks can behave differently than standard inks, especially in terms of flow and drying times. As a bonus, documenting your blends in a journal not only captures your creative journey but also helps you replicate your favorite shades later.
In a world increasingly aware of environmental issues, using eco-friendly inks can be a much more mindful choice. Keep an eye out for brands that not only boast of natural ingredients but also embrace sustainable manufacturing practices. With a slight shift in your approach to ink, you can indulge your creativity while being gentle on the Earth-making your calligraphy a true reflection of your values.
Faq
Q: How do I know when my manuscript calligraphy pen needs to be refilled?
A: You’ll know it’s time to refill your calligraphy pen when the ink flow becomes inconsistent or begins to skip. To prevent issues, regularly check the ink level by removing the nib section. Maintaining consistent ink flow ensures a better writing experience.
Q: What type of ink is best for manuscript calligraphy pens?
A: The best ink for manuscript calligraphy pens is liquid ink that is specifically formulated for calligraphy. Look for inks that flow smoothly and are suitable for your pen type. Using the right ink helps achieve beautiful, consistent lines in your calligraphy work.
Q: Can I use any type of ink to fill my manuscript calligraphy pen?
A: No, it’s crucial to use ink designed for calligraphy pens. Avoid using thick or pigmented inks, such as acrylic or paint, as they can clog the nib and damage your pen. Always refer to your pen’s guidelines for compatible inks to ensure optimal performance.
Q: What should I do if my manuscript calligraphy pen is leaking ink?
A: If your calligraphy pen is leaking, first check for a loose nib or cap. Ensure the ink reservoir is properly sealed. Clean the nib and feed with water to remove any obstructing particles. If the problem persists, consider replacing the cartridge or checking for damage.
Q: How can I prevent my manuscript calligraphy pen from drying out?
A: To prevent drying out, store your calligraphy pen horizontally with the nib facing up. Regular usage also helps keep the ink flowing. If you need to leave it unused for an extended period, ensure the nib is cleaned to avoid clogs when you return to use it.
Q: What’s the best way to clean my manuscript calligraphy pen?
A: Clean your calligraphy pen by removing the nib and rinsing it under warm water until the ink is gone. Be gentle to avoid damaging the nib. For thorough cleaning, soak the nib in water for several hours and use a soft brush to remove any residue.
Q: How often should I clean my manuscript calligraphy pen?
A: You should clean your manuscript calligraphy pen after every session, or at least once a week if used regularly. Proper maintenance ensures a smooth ink flow and prolongs the life of your pen. Refer to the best practices section of your guide for detailed instructions.
Q: Can I mix different inks in my manuscript calligraphy pen?
A: Mixing inks is generally not recommended, as it can cause clogging and inconsistent flow. If you want to try custom colors, test the mix in a separate container first. Ensure all mixed inks are compatible with your pen to avoid damaging it.
In Retrospect
Now that you’ve mastered how to fill your Manuscript calligraphy pen, you’re ready to enhance your writing experience. Remember, a well-loaded pen is the key to smooth, beautiful strokes-and it can transform your calligraphy game! Don’t hesitate to put what you’ve learned into practice immediately. Your masterpiece awaits!
If you’re looking to improve your technique further, check out our guide on the best inks for calligraphy and tips for maintaining your pens. Plus, joining our newsletter will keep you updated on new techniques and upcoming workshops. Have any questions or tips of your own? Drop them in the comments-let’s build a community of passionate calligraphers together!
Ready to explore more? From creating your own custom fonts with tools like Calligraphr to mastering different styles, we’ve got plenty of resources to fuel your creative journey. Furthermore, incorporating new skills will not only boost your confidence but also elevate your calligraphy to the next level. Keep practicing, and you’ll see your skills flourish!


