Did you know that you don’t need a brush pen to create stunning calligraphy? Many aspiring calligraphers often feel limited by the tools they own, but there are plenty of alternative methods that can unleash your creativity. Whether you’re crafting invitations, cards, or personal projects, exploring different techniques can elevate your writing style without breaking the bank.
If you’re frustrated by traditional tools or just looking for fresh approaches, you’re in the right place. We’ll dive into accessible methods that utilize common supplies, helping you achieve that elegant look with ease. From using markers and gel pens to innovative DIY tools, you’ll discover ways to make beautiful lettering that captivates. Keep reading to unlock your calligraphy potential and impress others with your unique creations!
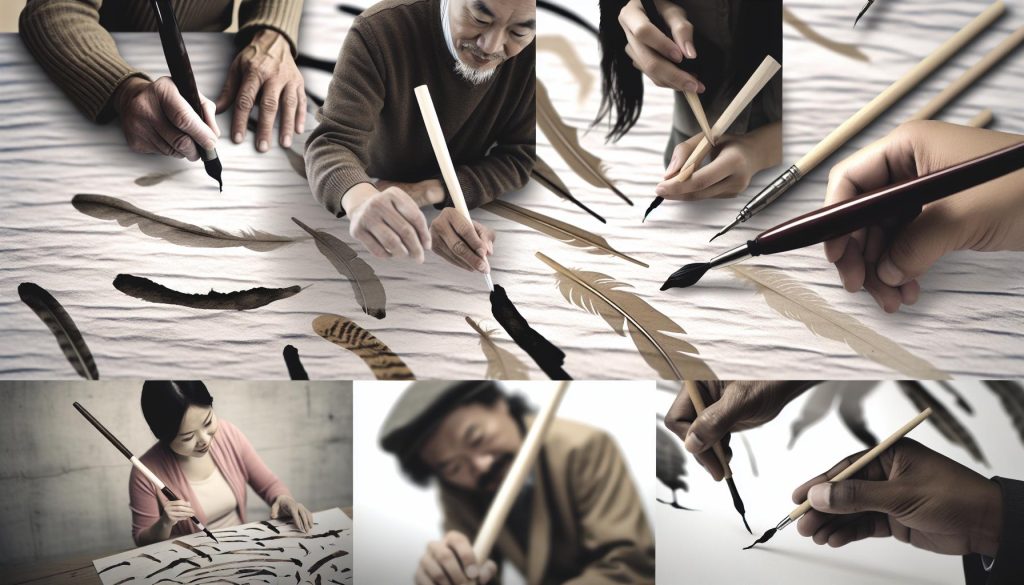
Choosing the Right Tools for Calligraphy Alternatives
When diving into the world of calligraphy without a brush pen, the right tools can make all the difference in achieving stunning results. You might think you need a vast arsenal of expensive supplies, but sometimes, simplicity is key. Start with a few essentials: a quality set of fineliners or gel pens can provide you the precision needed for intricate designs. Look for pens with varying nib sizes; they’ll help you create different line weights, adding depth and personality to your work.
For those looking to experiment further, consider trying gel pens in metallic or glitter finishes to give your letters a pop of flair. Another fantastic alternative is using pointed pens with nibs designed for traditional calligraphy. These can be dipped in various inks, allowing for beautiful flourishes and swirls that evoke the elegance of classic calligraphy styles-but without needing fancy brush pens!
Don’t overlook everyday items that can double as creative tools. For instance, a simple pencil can be used for initial sketches, allowing you to plan your layout and design without any permanent marks. Once you’re happy with your design, you can go over it with a pen or marker to finalize your artwork. Similarly, markers or highlighters can serve as fun tools to create bold letter styles, especially when you use different colors to outline or highlight sections of your work.
Ultimately, the best strategy for choosing tools is to experiment and find what feels right for you. Consider your specific needs-are you looking for intricate detail, or are you more focused on bolder designs? Your choice of tools can dramatically affect your calligraphy journey, so don’t shy away from trying something unconventional that speaks to your artistic style.
Exploring Everyday Items for Calligraphy
Embracing everyday items for your calligraphy practices can unleash your creativity and make the art form more accessible. You don’t need to invest heavily in specialized tools to produce beautiful writing. In fact, some of the most surprisingly effective items can be found around your home or office. For example, start with standard ballpoint pens or multicolored fineliners; these can create clean lines and offer a surprising degree of dexterity, especially with simple, fluid lettering styles. The different colors can also add a vibrant touch to your projects without any extra cost.
Using highlighters or markers can also yield stunning results. You can leverage their thickness for bold lettering or create striking effects by layering colors. Try using a light color to sketch out your letters roughly, then go over them with a darker one for definition. This can provide a fun, playful quality to your work while allowing for corrections before making permanent changes. Another versatile tool is the sharp pencil. Not only does it allow for sketches without the worry of mistakes, but the light shading can create a lovely, soft effect when finished.
Moreover, DIY tools, like the classic paintbrush used with water-based markers, can also produce captivating lettering. Just dip the brush in water, load it with color, and practice creating strokes from different angles. With patience and practice, you’ll find ways to manipulate these common tools to achieve various styles that mimic traditional calligraphy.
Ultimately, the goal is to experiment. By trying out different household items, you might discover unique techniques that reflect your personal style. Don’t shy away from innovation; these everyday items can help shape your distinctive lettering journey. So gather those neglected pens, pencils, and markers, and let your creativity flow!
Step-by-Step Techniques for Non-Pen Calligraphy
When you want to create beautiful calligraphy without a brush pen, the key lies in mastering simple techniques and tools you likely already have at home. Many assume that elegant lettering requires expensive supplies, but you’ll be surprised at how effective everyday items can be when you employ the right methods. Here’s how to get started, focusing on step-by-step techniques that can transform ordinary writing into art.
Begin with basic tools like fineliner pens, colored pencils, or gel pens. Each provides unique qualities for creating distinct styles. For instance, fineliners offer precision and consistent ink flow, making them perfect for detailed lettering. Start by practicing the basic strokes: upstrokes, downstrokes, and curves. This is essential, as the foundation of calligraphy relies on your ability to control line thickness and direction.
Next, experiment with layering and blending. Take a colored pencil and sketch your letters in light, gentle strokes. Once your outline is complete, use a darker shade to enhance the edges or play with gradients by blending different colors together. This method can create a soft, flowing effect reminiscent of traditional calligraphy.
Don’t overlook the impact of highlighters. They can give bold highlights and unique textures to your lettering. Start by sketching your words lightly in pencil, then trace over them with a highlighter. You can even add a second layer with a different color to create a shadow effect, which adds depth to your work.
Lastly, practice is vital. Dedicate a few minutes each day to writing various letters, words, or phrases using your chosen tools. Over time, you’ll develop a personal style that reflects your creativity. Remember, the magic of calligraphy lies not just in the tools but in the journey of exploring new techniques and finding joy in the process. Embrace the imperfections; they often lead to the most artistic outcomes!
Mastering Alternative Mediums: Ink, Pencils, and More
Creating beautiful lettering without a brush pen opens up a world of creative possibilities. You might be surprised to find that some of the most effective tools are things you already have at home. Mastering alternative mediums like ink, pencils, and more can elevate your calligraphy game significantly.
Begin with ink as a versatile medium. While traditional calligraphy often uses dip pens, you can achieve stunning results with felt-tip pens or fountain pens. Their varying nib sizes provide different thicknesses and line qualities. For a unique spin, try using colored inks; they can dramatically change the feel of your work. Don’t be afraid to play with water-diluting ink can create softer shades, perfect for creating gradients and unique textures in your lettering.
Pencils are another fantastic tool for alternative calligraphy. They might not be the first medium that comes to mind, but they offer extraordinary flexibility. Use standard graphite pencils to sketch your designs lightly before committing with a more permanent medium. This way, you can perfect your layout and composition without the fear of making mistakes. Once you’re satisfied with your pencil draft, layer it with colored pencils or even markers to add depth. Mixing different colors can lead to stunning visual effects that mimic the elegance of traditional calligraphy.
Don’t underestimate the power of markers-especially brush markers, which offer a range of hues and line weights. They can mimic the flow of brush pens without the need for specialized skills. Practice the basic strokes by varying pressure as you write; this helps to create the characteristic thick and thin lines of traditional calligraphy. When using markers, consider highlighter markers for vibrant designs; their bold colors can highlight and add pizzazz to your lettering.
Incorporating these alternative tools not only makes calligraphy more accessible but also invites a playful approach to art. Start small, practice consistently, and enjoy experimenting with different combinations of techniques and tools. Over time, you’ll discover a style that resonates with you, allowing your creativity to shine through in every piece you create.
Creating Beautiful Lettering with DIY Tools
Creating beautiful lettering without traditional brush pens is not just possible; it can be a joyful journey of exploration and creativity. You’d be surprised at how many DIY tools you can leverage to craft stunning calligraphy. Everyday items in your home can easily transform into effective calligraphy tools, making this art form accessible for everyone, regardless of budget or skill level.
Start with materials like bamboo skewers, cotton swabs, or even old toothbrushes. These tools can be used to create unique textures and effects. For instance, dip a bamboo skewer in ink and draw your letters, applying different pressures for varied thicknesses. Similarly, a wet cotton swab can help create soft edges or blend colors. If you want to explore a bit more, using a toothbrush to splatter ink can add an artistic flair to your pieces, perfect for background effects.
Markers are your best friends when it comes to crafting beautiful letterings. While brush markers emulate the versatile strokes of traditional calligraphy, regular felt-tip or gel pens can also work wonders. Focus on mastering pressure control; apply more pressure for thick downstrokes and lighten up for thin upstrokes. This technique can create a lovely contrast and the elegant flow characteristic of calligraphy. Take it a step further by layering colors; use a lighter shade for your base and darker tones for depth, which adds richness to your lettering.
Finally, don’t overlook the value of simple paper types. Experiment with textured papers, such as watercolor or handmade papers, as they can affect how your ink flows and dries. Mixing up your tools and surfaces keeps your practice enjoyable and allows you to find the best combinations that suit your style. Whether you’re crafting invitations, creating art pieces, or journaling, tapping into DIY tools encourages innovative thinking and instills a sense of accomplishment as you watch your skills develop. Embrace the process, play around with your materials, and let your creativity flourish!
Tips for Practicing Calligraphy without a Brush Pen
Practicing calligraphy without a brush pen opens up a world of creativity. You don’t need to be limited by traditional tools; instead, embrace everyday items that can yield stunning results. Start by exploring materials that you already have at home. For example, pencils offer flexibility; by altering the pressure, you can create varying line widths that mimic calligraphy. Try using a sharpened pencil for fine details and an unsharpened one for broader strokes. This simple switch can add depth to your lettering.
Another effective method involves the use of markers. While brush markers are popular, don’t underestimate regular gel pens or even highlighters. These can produce beautiful effects with practice. The key is to master pressure control-apply harder on downstrokes and ease up on upstrokes to create contrast, which is essential for great calligraphy. Consider using a mix of pen types to explore how they can layer colors and enhance your artwork. For instance, using a light-colored pen for the base and a darker pen for outlines can add visual interest to your pieces.
Don’t forget about the variety of paper types. The surface you work on significantly affects your ink flow and the final look of your calligraphy. Experiment with textured papers like watercolor sheets or even cardstock to find what best suits your style. Incorporating different papers can help you understand how each material interacts with your chosen medium, providing unique finishes.
Lastly, repetition is your friend in perfecting calligraphy. Set aside time each day to practice with these alternative tools. Start with simple alphabet drills, focusing on consistency and form. As you develop your skills, you’ll not only gain confidence but also discover your unique style, showing that beautiful lettering doesn’t require a brush pen-it thrives in creativity and experimentation.
Innovative Styles: Embracing Unique Calligraphy Approaches
Creating beautiful lettering without relying on brush pens opens up a world of innovative styles that can breathe new life into your calligraphy practice. Think beyond the traditional and experiment with unexpected tools and techniques. For instance, using a fine-tipped marker or gel pen can allow for fluid strokes, while experimenting with pressure gives your letters dimension and character. It’s exciting to explore how varying your tools-like felt-tip pens, markers, or even digital screens-can lead to unique outcomes that might just surprise you.
Customizing Your Approach
Why not add a personal touch by customizing your writing instruments? You can create your own calligraphy pens by modifying everyday items like chopsticks or calligraphy quills. Wrap the tips with soft materials or felt, or even make split nibs: these tweaks can result in distinctive line work. Using these customized tools encourages a playful learning experience and allows you to develop a style that truly represents you. Besides, each unique tool brings with it different quirks that can inspire new lettering styles.
Incorporating Mixed Mediums
Mixing mediums is another effective way to forge innovative styles. Combine traditional ink with a pop of color using watercolors or colored pencils. Layering can help create a multi-dimensional effect that’s visually striking. It’s all about finding that balance-perhaps you lay down a base of light watercolor and then outline it with a darker ink, enhancing depth and detail. Experimenting in this way not only expands your technical skills but also enhances your creativity, leading to truly eye-catching results.
The Power of Texture
Texture also plays a significant role in innovative calligraphy. Incorporate different surfaces like textured papers, burlap, or even wood for a rustic touch. Each substrate interacts with ink differently, allowing your letters to take on new forms. It’s worth the exploration! Adding unexpected textural elements can elevate your calligraphy from simple to stunning and give each piece a unique flair.
By embracing these innovative styles, you’re not just practicing calligraphy; you’re crafting an art form that’s personal and vibrant. Remember to have fun with the process. Every new style you try enriches your experience and sets you on a path to discover your signature look in the world of lettering.
Enhancing Your Skills: Resources and Inspiration
The beauty of calligraphy lies in its versatility, and you don’t need a brush pen to create stunning designs. Expanding your skills requires exploring various resources and getting inspiration from different sources. Here are some practical avenues to enhance your craft.
First off, tap into the wealth of online tutorials and courses. Websites like Skillshare and Udemy offer classes on alternative calligraphy techniques, allowing you to learn at your own pace. YouTube is another goldmine for free content-just search for specific styles or tools, and you’ll find countless demonstrations and tips from experienced calligraphers. You can also join forums and communities such as Reddit’s r/calligraphy, where enthusiasts share their journeys and offer feedback.
Books and Guides
Consider investing in instructional books focused on tools other than brush pens. Titles like *”The Art of Hand Lettering”* provide insights into using markers, gel pens, and even pencils effectively. Look for books that emphasize technique over specific tools; you’ll find that the foundational principles of calligraphy apply regardless of the medium.
Social Media Inspiration
Don’t underestimate the power of social media platforms. Instagram and Pinterest are brimming with visual inspiration. Follow calligraphers who specialize in alternative methods, and engage with their content to spark your creativity. Use hashtags like #CalligraphyWithoutBrushPens or #AlternateCalligraphy to discover a broader range of styles and techniques.
But resources aren’t just about learning; they’re about community too. Participating in local workshops or online webinars can connect you with other calligraphy lovers. Sharing your progress, asking for critiques, and collaborating on projects can significantly enhance your skills.
Ultimately, don’t hesitate to combine these resources in a way that fits your learning style. Experimentation is key-try out different techniques, make mistakes, and learn from them. Each new resource or method you explore brings you closer to developing a signature style that truly reflects your creative voice.
Common Mistakes to Avoid in Alternative Calligraphy
Diving into alternative calligraphy methods without a brush pen can be exhilarating, but it’s easy to trip over common pitfalls. One major mistake is not experimenting with various tools. Many newcomers stick to what they know, often missing out on the unique effects different writing instruments can create. For instance, using a gel pen or a classic fountain pen can yield stunning results that a brush pen simply can’t replicate. Don’t be afraid to experiment! Try out fine liners, markers, or even ordinary pencils to discover what works best for your style.
Another frequent error is neglecting the importance of practice sheets. Many calligraphers underestimate their value, believing that freehand technique will suffice. However, practicing on templates designed for specific styles helps establish muscle memory and control. Instead of just doodling, invest time in structured practice-it can drastically enhance your consistency and confidence. You can create your own practice sheets or find some online that cater to the style you’re exploring.
Also, pay attention to your pressure and angle. With brush pens, varying pressure creates dynamic thickness, but this rules out with alternatives like ballpoint pens or markers. Some novices tend to press too hard, resulting in uneven lines or even damaging the nib. Always be mindful of your grip and pressure; experimenting with different angles can help create the flourish you seek without risking tool damage.
Lastly, avoid rushing through projects. It’s tempting to finish quickly, especially when you’re excited about the outcome. However, taking your time not only improves the quality of your work but also enhances the joy of the process. Allow yourself to appreciate each step of creating your pieces. By sidestepping these common mistakes, you’ll elevate your alternative calligraphy techniques and perhaps even spark a new passion within this art form.
Showcasing Your Calligraphy: Display Ideas and Projects
Showcasing your calligraphy projects can be just as rewarding as creating them. You’ve spent time honing your skills, so why not display that art in a way that resonates with others? Think about the impact of your lettering on everyday items. Transform mundane objects into stunning displays of creativity. Imagine a beautifully hand-lettered quote framed in your living room, or a personalized place setting at your dinner table. These unique touches not only elevate your environment but also showcase your talent in a personal and meaningful way.
Consider crafting greeting cards or invitations using your calligraphy skills. This is a fantastic way to share your work while providing a personal touch to special occasions. Whether it’s a wedding invitation or a birthday card, hand-lettered designs are often cherished keepsakes. You can even use digital tools to create a template, allowing you to replicate your designs for multiple cards without losing that handcrafted feel. Don’t shy away from using various materials-think stylish envelopes, colored paper, or even wood surfaces for a rustic vibe.
For those seeking to integrate calligraphy into their decor, try creating a gallery wall with your lettering art. Frame various pieces that highlight different styles you’ve experimented with, or use a cohesive theme like inspirational quotes or song lyrics. This not only serves as an interesting focal point but also invites conversation. Additionally, showcase seasonal projects like handwritten holiday signs or festive banners that can be changed throughout the year, keeping your display fresh and engaging.
Lastly, don’t forget the power of social media. Sharing photographs of your work on platforms like Instagram or Pinterest allows you to connect with a wider community of calligraphy enthusiasts. Use relevant hashtags, share behind-the-scenes processes, or even create time-lapse videos of your lettering journey. With every piece you showcase, you inspire others and validate the time and effort you’ve invested in mastering the art of calligraphy without a brush pen. Remember, your creations deserve to be seen, and you have the power to display them beautifully.
Adapting Calligraphy for Various Projects and Purposes
Adapting your calligraphy style for various projects can turn your skills into stunning, personalized pieces. It’s all about understanding the materials at hand and the message you want to convey. Consider the purpose of your lettering first: is it for a wedding invitation, a home decor piece, or a simple greeting card? Each context requires a different approach and can guide your choice of technique and style.
Start by embracing everyday items. You don’t need expensive tools to create beautiful lettering. A simple gel pen or even a pencil can produce lovely results. For example, use a black gel pen for elegant, sleek designs on white cardstock, ideal for formal invitations. In contrast, employing colored pencils can add a casual, whimsical touch, perfect for birthday cards. Try incorporating unconventional surfaces like canvas, wood, or fabric for a fresh twist. These materials not only make your projects unique but also challenge your creativity.
Next, play with style variations. Script fonts are often associated with elegance, making them excellent for formal events, while bold, block letters are great for signs and personal messages. If you’re crafting decorations, experiment with a fun, doodle-like style to resonate with a playful theme. To help guide this process, think about color schemes and themes; cohesive visuals from your projects can tie an event together beautifully. Consistency in your calligraphy style, whether it’s refined or quirky, strengthens your message.
Don’t underestimate the power of technology either. Digital tools allow for experimenting with layouts and designs before applying them to paper. Software like Canva can help you visualize how your letters will look in different settings. You can even print out templates to trace or display layout options on your social media platforms, gaining feedback before the final execution.
Ultimately, the key to adapting calligraphy for various purposes lies in flexing your creative muscles and being willing to explore. Take each project as an opportunity to learn and grow, honing your skills with each unique lettering masterpiece you create.
Achieving Consistent Results: Techniques for Success
When you’re diving into calligraphy without a brush pen, finding ways to achieve consistency can feel challenging, but it’s totally doable with the right techniques. The key is to practice and experiment with various approaches that suit your style. Start by choosing stable surfaces and quality tools that allow for fluid motions-this will significantly impact your results. For instance, using a smooth cardstock will help your pen glide easily, producing cleaner strokes whether you’re using gel pens, markers, or even pencils.
To build consistency in your letters, it’s essential to focus on your form and spacing. Consider utilizing guides or stencils to maintain uniformity. These tools can help you stick to specific dimensions and give your lettering a more polished look. A good trick is to create a grid system on your paper-either lightly pencil in lines or print graph paper to guide your strokes. Practicing on these lined surfaces can help you standardize the height and width of your letters over time.
Another powerful technique involves breaking down your letters into basic shapes. Every character can typically be formed using simple lines and curves. By practicing these shapes repetitively, you’ll develop muscle memory and confidence, leading to more consistent results in your finished pieces. For example, practice making ovals for your rounded letters and straight lines for your angular ones. As your comfort level increases, try combining these elements to craft complete letters and eventually full words.
Don’t forget to document your progress. Keep a notebook of your work so you can easily track improvements and identify trends in your handwriting. This reflective practice not only builds your skills but also boosts your confidence as you see how far you’ve come. Embracing your unique style and patiently refining your technique will lead to a satisfying journey in mastering alternative calligraphy methods.
Faq
Q: What are some easy alternatives to brush pens for beginners in calligraphy?
A: For beginners, consider using gel pens, ballpoint pens, or felt-tip markers. These tools can produce elegant lettering without the skill required for brush pens. Try practice sheets available online to guide your strokes!
Q: Can I use regular pens for calligraphy styles?
A: Yes! Regular pens, especially those with fine tips, can create beautiful calligraphy. Opt for pens with varying line widths, like calligraphy markers or technical pens, to achieve different styles and effects.
Q: How can I practice calligraphy without investing in expensive tools?
A: Start practicing with pencils and notebooks you already own. Use printable calligraphy worksheets found online, and simply trace over the letters to develop your skills without spending a lot.
Q: What type of paper is best for practicing non-brush pen calligraphy?
A: Use smooth, bleed-proof paper designed for calligraphy. This helps your tools glide smoothly and prevents ink from feathering. Look for marker paper or Bristol board for the best results.
Q: Are there DIY methods to create calligraphy tools?
A: Absolutely! You can make your own calligraphy tools using toothpicks, old fountain pens, or even cutting the tip of a marker to create a flat edge. Experimenting with different materials can lead to unique lettering styles.
Q: What common mistakes should I avoid in alternative calligraphy?
A: Avoid applying excessive pressure and letting your hand cramp. Remember to focus on consistent strokes and practice slow, deliberate motions. Skipping practice can hinder your improvement, so regular practice is key!
Q: How can I find inspiration for my calligraphy projects?
A: For inspiration, follow calligraphy hashtags on social media or visit platforms like Pinterest and Instagram. You can also check out online forums and communities for ideas and tutorials on alternative methods.
Q: Is it possible to achieve a calligraphy look with digital tools?
A: Yes! There are many graphic design apps that simulate calligraphy styles. Programs like Procreate or Adobe Fresco offer brushes that mimic traditional calligraphy, allowing you to create beautiful designs digitally.
Wrapping Up
Now that you’ve explored the world of calligraphy without using a brush pen, it’s time to put your newfound skills to the test! Remember, experimenting with different techniques like using markers or fountain pens can yield stunning results and keep your creativity flowing. If you enjoyed this guide, check out our in-depth tutorials on calligraphy styles and basic lettering techniques to broaden your skills even further.
Don’t hesitate to share your creations or ask questions in the comments below – we love hearing from our community! If you’re ready to elevate your craft, consider signing up for our newsletter for exclusive tips and resources, or explore our curated collection of tools and materials to unlock your full potential. Embrace your journey in calligraphy; every stroke counts!


