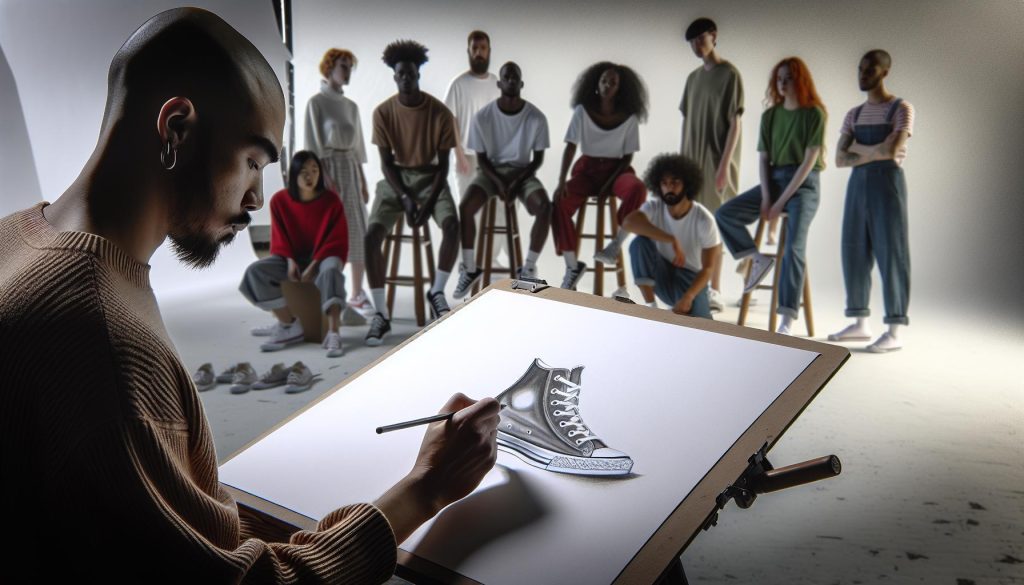
Have you ever wanted to capture the iconic style of Chuck Taylors on paper? These timeless sneakers not only embody comfort and flair but also offer a fantastic exercise in drawing skill. Whether you’re sketching for fun or honing your artistic portfolio, learning how to draw these shoes can enhance your understanding of shapes and perspective.
In this tutorial, I’ll guide you through the step-by-step process of illustrating Chuck Taylors, breaking it down into simple, manageable steps. You’ll discover helpful tips and techniques that can boost your confidence and creativity. So, grab your pencils and let’s dive into the world of retro footwear art-it’s time to put your unique spin on these beloved sneakers!
Understanding the Iconic Chuck Taylor Design
Chuck Taylors are more than just shoes; they’re a cultural icon. Originating as a basketball shoe in the early 20th century, their design has remained relatively unchanged, which speaks volumes about their timeless appeal. The classic silhouette, featuring a high-top cut, rubber toe cap, and distinctive canvas upper, is instantly recognizable. When sketching Chuck Taylors, it’s essential to grasp these fundamental design elements that contribute to their character.
One of the standout features is the star logo on the ankle patch. This logo isn’t just an aesthetic choice; it connects to the shoe’s athletic roots and gives it a unique identity. Pay attention to the proportions between the canvas upper and rubber sole, as this balance is crucial in achieving a realistic representation. The laces, while functional, also add an element of detail that can enhance your drawing, so make sure to observe how they weave through the eyelets.
To truly capture the essence of Chuck Taylors in your art, consider their versatility. They’re worn in various styles, from casual outfits to street fashion, often personalized with different colors and patterns. This adaptability can inspire creativity in your drawings, allowing you to play with variations that reflect current trends while staying true to the iconic design. Understanding the subtle nuances of Chuck Taylors not only improves your artistic skills but also deepens your appreciation for their role in sneaker culture.
Essential Tools Every Artist Needs

To effectively capture the essence of Chuck Taylors in your drawings, having the right tools makes all the difference. Using quality materials can elevate your work and help you achieve the desired effect. Here’s a rundown of what you should consider keeping in your artistic toolkit.
Start with a good set of pencils. Choose a range from hard (H) to soft (B). Hard pencils are great for fine details, while softer pencils allow for a darker shade and smoother lines. A mechanical pencil can also be handy for precision when sketching the finer elements of the shoes, like the eyelets and laces.
You’ll also need quality paper. Look for heavy-weight sketch paper that can handle erasing without tearing. If you plan to use markers or watercolors for coloring, opt for thicker paper designed for mixed media to prevent warping. It’s smart to do a little test on scrap paper first to see how your materials interact.
Consider including erasers of different types. A kneaded eraser is excellent for lifting graphite without ruining your paper, while a precision eraser can handle those small touch-ups.
To add depth and realism to your drawings, have a set of blending tools like tortillons or blending stumps. These can smooth out your pencil strokes and create soft shadows, which are crucial for giving your Chuck Taylors that three-dimensional look.
Finally, if you’re looking to incorporate color, invest in a quality set of colored pencils or markers. Prismacolor or Copic markers offer vibrant colors and good blending capabilities, which can really bring your Chuck Taylors to life.
With these essential tools, you’ll be well-equipped to tackle the challenge of drawing Chuck Taylors, so you can focus on bringing your artistic vision to the page. Happy drawing!
Step-by-Step Guide to Sketching Chuck Taylors

To get started on sketching those iconic Chuck Taylors, you’ll want to break down the process into manageable steps. Begin by establishing a good sense of the shoe’s proportions and unique features. Remember, these aren’t just any sneakers; Chuck Taylors have a distinctive shape and details that make them instantly recognizable, and capturing those elements will enhance your drawing significantly.
Start with lightly sketching the basic outline. Use a pencil to draw two overlapping rectangles that represent the shoe’s structure-the sole and the upper. This foundation doesn’t need to be perfect, so don’t stress about it. Next, use circles to indicate where the eyelets and laces will go. This method will help you maintain the correct proportions as you refine your drawing.
Once you have the basic shapes, flesh them out with more detail. Focus on the curves of the sole and the height of the tongue. Don’t forget to sketch the iconic logo on the side and add the lacing system. As you refine your outlines, erase any unnecessary lines and darken the ones that define the final shape of the shoe. This is where your earlier light sketching pays off; it allows for easy adjustments without compromising the overall appearance.
Finally, for a polished look, go over your sketch with a fine pen or a darker pencil to define the outlines. This step gives your Chuck Taylors character. From there, you can start adding shading to give depth and dimension. Pay close attention to where the light hits the shoes; the shading will give your drawing that realistic three-dimensional effect. Remember, practice makes perfect, so don’t hesitate to repeat the process until you feel comfortable with your results. Happy sketching!
Mastering Proportions: Getting it Right
To truly capture the essence of Chuck Taylors in your drawings, getting the proportions right is crucial. These iconic shoes have a unique silhouette with a distinctive mix of curves and straight lines, making them instantly recognizable. If you’re aiming for a lifelike representation, focus on key areas: the height of the toe box, the slope of the sole, and the length of the laces are all critical components that define the overall look. Understanding and mastering these proportions will significantly enhance your drawing’s authenticity.
Start by analyzing the shoe from different angles. When you sketch, use reference images to compare your proportions. Chuck Taylors have a relatively high-top design; take that into account when determining the height. Measure parts of the shoe against each other as you draw-this could mean using the sole’s length as a measurement benchmark for the height of the upper. Using basic shapes like rectangles for the sole and triangles for the upper can help break down the complexity and maintain balance.
Pro Tips for Proportions:
- Use a Grid System: For precision, consider employing a grid method. It helps align features accurately.
- Check Overlapping Areas: Pay close attention to where the sole meets the upper, and how the laces overlay the tongue.
- Adjust as You Go: Don’t hesitate to adjust what you’ve drawn as you compare it to your reference. Drawing is iterative.
Lastly, remember that the more you practice, the better you’ll become at judging these proportions intuitively. As you sketch, don’t just rely on your visual memory; keep your references close. This way, you can ensure that your Chuck Taylors aren’t just a good attempt but rather a dead ringer for the real deal. Happy sketching-getting proportions right is the first step toward creating stunning representations of these beloved sneakers!
Shading Techniques for Realistic Sneakers
To bring your Chuck Taylor sketches to life, mastering shading techniques is essential. Shading adds depth and dimension to your artwork, transforming flat shapes into three-dimensional objects. Start by understanding the light source in your composition. The direction and intensity of the light will dictate where the highlights and shadows fall, allowing you to create a more realistic representation of the sneakers.
One effective method is to observe how light interacts with the surfaces of the Chuck Taylors. The canvas upper offers a different sheen than the rubber sole, which means your shading techniques will vary. Use a softer pencil for the canvas areas, taking advantage of cross-hatching or smooth blending to depict the softer shadows. For the rubber sole, sharper contrasts can convey texture; opt for bolder strokes and less blending to emphasize its sturdiness.
You can enhance your shading by utilizing the following techniques:
- Gradation: Build up layers gradually. Start with light pressure for lighter areas, then increase pressure to create darker shadows.
- Stippling: For a textured look, use small dots instead of lines. This technique mimics the surface texture of the sneakers effectively.
- Blending: A blending stump can help smooth out transitions between light and dark areas, creating a more realistic effect.
Don’t forget about the importance of cast shadows, which ground the sneakers in your drawing. They can create a sense of realism and interaction with the surface below. By observing real-life Chuck Taylors, note how shadows form and mimic that in your drawings. Practice these techniques regularly, and you’ll find your ability to create striking, lifelike sneakers improves significantly. Happy sketching!
Adding Texture: Laces, Eyelets, and More
To truly capture the essence of Chuck Taylors in your drawings, you need to focus on the finer details that add character and realism. The laces and eyelets may seem like simple elements, but they play a crucial role in defining the sneaker’s iconic look. Making these elements pop can elevate your artwork from basic to stunning.
Delve into the texture of the laces first. They should have a slightly twisted appearance, showing the weave of the fabric. Use short, quick pencil strokes to suggest the fibers; this gives a more dynamic feel. For the shadows, observe how the laces lay on the shoe-some areas will naturally fold and cast shadows, while others might be taut, revealing highlights. Apply techniques like stippling to create the illusion of rough texture where the lace weaves overlap.
Next, the eyelets deserve particular attention. These metal reinforcements often come with a shine that reflects light in distinct ways. To depict them accurately, start with small circles to outline the eyelet openings and then add dimples where the eyelets pull through the fabric. For realism, use a light touch on one side to create a highlight and a darker tone on the opposite side for depth. This will not only enhance the eyelets but also anchor them within the context of the sneaker.
Lastly, consider the stitching along the seams. This detail can provide a sense of craftsmanship and authenticity. Use thin, dashed lines to represent the stitches, ensuring they follow the natural curves of the shoe. By paying attention to these details, you’ll showcase your ability to notice and replicate the subtle nuances that make Chuck Taylors so beloved. Remember, the goal is to create an impression that feels tangible and lifelike to the observer.
Coloring Your Chuck Taylors for Impact
Color isn’t just an afterthought in your artwork; it’s the element that can breathe life into your Chuck Taylor drawings. Whether you’re going for classic white, bold red, or even custom designs, understanding how to use color effectively can elevate your sketches from simple outlines to dynamic representations. Start by considering the mood and style you want to convey. A vibrant color palette can express energy and youthfulness, while muted tones might communicate nostalgia and simplicity.
Layering is one of the most powerful techniques you can employ when coloring. Rather than applying a single flat color, build layers of varying hues. Begin with a base color that captures the sneaker’s essence, then gradually add darker shades for depth and lighter shades for highlights. Keep an eye on how light interacts with the shoe; many Chuck Taylors have shiny surfaces that reflect light in unique ways. Use white or very light pastel tones sparingly on the toe and upper areas to simulate this shine.
When it comes to laces and eyelets, don’t overlook the importance of consistency in color. For example, if your Chuck Taylors are primarily white with red laces, make sure the reds pop against the white-this contrast will make your artwork more striking. You can use colored pencils, markers, or watercolors; each medium offers varying levels of opacity and blendability. Remember to let layers dry if you’re using watercolors to prevent colors from muddying.
Experimentation is key. Don’t shy away from trying bold combinations or unique styles. Look at how other artists interpret Chuck Taylors through different color schemes. Platforms like Instagram are great for inspiration. Engage with fellow artists on social media to share your progress, gather constructive feedback, and discover techniques that can enhance your work. Ultimately, your choices in color will communicate your personal style and artistic voice, so don’t hesitate to make your Chuck Taylors shine in your way.
Common Mistakes and How to Avoid Them
When you’re tackling a beloved design like Chuck Taylors, it’s easy to stumble into common pitfalls that can derail your artwork. Many artists, regardless of their experience, struggle with aspects like proportions, color application, and detail rendering. Recognizing these challenges is the first step to sidestepping them and enhancing your drawing skills.
One major mistake is neglecting the proportions of the shoe. Chuck Taylors have a unique silhouette, and misjudging their size or shape can throw off the entire artwork. To avoid this, always start with simple shapes. Break down the shoe into fundamental geometric forms before adding details. This way, you can ensure that the overall shape remains true to life. Use reference images or real shoes if you can. They’ll provide a clear benchmark as you sketch.
Another trap is overloading your drawing with detail too soon. It’s tempting to dive straight into the small features like eyelets or laces, but this can lead to frustration, especially if the underlying structure isn’t solid. Begin with a light outline and progressively build up layers of detail. As you add elements, step back and assess your work regularly. This will help maintain a balanced composition.
Coloring can be particularly tricky. A common error is using too much of one color, which flattens the drawing. Instead, apply layers of varied shades. Start with a base coat, then introduce darker tones for shadows and lighter ones for highlights. This layering technique will create depth and realism. Additionally, if you’re using water-based mediums like watercolors, ensure that layers dry before adding more to prevent muddiness.
Finally, don’t shy away from feedback. Share your work with peers or on social platforms. Engaging with the community can spark new ideas and techniques you might not have considered. Constructive criticism is invaluable-it can highlight blind spots in your work and help you grow as an artist. Embrace the learning process, and remember: every mistake is an opportunity to refine your craft.
Inspiration: Different Styles of Chuck Taylors
When thinking about Chuck Taylors, it’s not just about a single style or look; it’s a rich tapestry of designs that reflect different personalities and cultures. The iconic silhouette of Chuck Taylors has inspired countless variations, making them a versatile canvas for artists. Whether it’s the classic high tops or the low-cut versions, each style commands its own unique drawing techniques and flair.
Consider the classic Chuck Taylor All-Stars with their interplay of colors and patterns. You can capture their essence through simple outlines that highlight their iconic rubber toe cap and canvas upper. Or, take a cue from the modern interpretations that flaunt bold graphics or even artistic collaborations. Artists can explore how to represent these elements through creative sketching techniques. For example, layering characters or motifs on the shoes not only tells a story but also provides a striking visual impact.
It’s also worthwhile to look into how these shoes have been adapted across various subcultures-think punk, hip-hop, or street fashion. Each culture has not only embraced Chuck Taylors but added its own twist. With these influences in mind, you can create illustrations that reflect the shoes’ journey-from the basketball court to the punk stage. Experimentation is key; try incorporating textures and colors that speak to these rich histories.
Whether you’re inspired by the nostalgia of vintage designs or the boldness of contemporary styles, Chuck Taylors offer a myriad of possibilities for your artwork. By diving into different variations, you’ll find not just inspiration for your sketches but an opportunity to connect with the spirit of creativity that surrounds these celebrated sneakers.
Advanced Techniques for Dynamic Drawings
Drawing Chuck Taylors can go beyond mere representation; it’s about capturing their spirit and authenticity. To elevate your sketches into dynamic artwork, consider incorporating these advanced techniques. Experimentation is crucial, so don’t shy away from trying new methods or materials that could bring your unique vision to life.
Utilizing Perspective for Depth
One effective way to add drama to your drawings is through perspective. Use a simple vanishing point technique to create the illusion of depth. Sketch the shoe at an angle rather than a flat side view; this approach instantly adds interest. Think about how the shoe will appear on a surface-showing part of the sole or the top can create a more engaging composition. Use reference images to understand how angles change the shoe’s proportions and visual impact.
Layering Colors and Textures
When it comes to coloring your drawings, layering is key. Start with a base color and gradually add darker shades for shadows and lighter ones for highlights. This technique not only enhances realism but also gives a sense of dimension. For texture-like the canvas of a Chuck Taylor-consider using techniques like stippling or cross-hatching for shadows. Incorporating mixed media, such as colored pencils over markers, can yield unique results that stand out on the page.
Incorporating Environment
To truly bring your drawings to life, think beyond the shoe itself. Adding elements of the surrounding environment can provide context and emphasize the character of your Chuck Taylors. Whether it’s a gritty urban street or a vibrant skate park, place your shoes within scenes that represent the lifestyle they embody. Think about how these shoes fit into culture. Including skaters or punk rockers in your scenes can tell a story and make the artwork resonate deeper.
Dynamic Lines and Movement
Finally, embrace movement in your artwork. Use dynamic lines to suggest action or energy. Curved lines around the shoes can imply motion-like running or jumping-adding excitement to your drawings. This technique requires practice but can significantly enhance the liveliness of your sketches. Capture that essence of freedom that comes with wearing Chuck Taylors, and your artwork will not only speak to skill but also vitality.
By integrating these advanced techniques, you can transform your drawings of Chuck Taylors into captivating pieces of art that reflect their heritage and energy. Remember, every artist develops their style-embrace trial and error in your journey. Always keep in mind the story you want to tell through your artwork, and let it guide your creative process.
Showcasing Your Artwork: Best Practices
Showing off your artwork can be as rewarding as creating it. Whether you’re an amateur artist or a seasoned pro, capturing the attention of an audience can elevate your passion to new heights. To effectively showcase your Chuck Taylor drawings, approach the presentation with creativity and strategy.
Start by selecting the right platform. Online galleries, social media platforms like Instagram or Pinterest, and even local art shows offer various opportunities to present your work. Make sure to choose a space that aligns with your artistic identity. For instance, if your drawings have a street fashion aesthetic, Instagram’s visual focus is perfect for reaching a like-minded audience. Tailor your content to each platform-short, engaging posts for social media, and more detailed descriptions for galleries or blogs.
Next, create high-quality images of your artwork. Good lighting is key. Natural light works wonders, but if that’s not available, use soft artificial lights to avoid harsh shadows. Ensure that your images are crisp and well-framed, showing the details of your artwork without distractions. Consider using a scanner for flat pieces or a high-quality camera for 3D pieces to best capture the essence of your work.
To draw viewers in, consider adding contextual storytelling to your presentations. Share the inspirations behind your Chuck Taylor drawings, whether they’re linked to personal experiences, cultural references, or artistic movements. This not only engages viewers but also deepens their appreciation for your work. Consider crafting captions or brief narratives that resonate with the lifestyle associated with Chuck Taylors, such as skate culture or artistic expression.
Finally, foster connection through interaction. Encourage viewers to comment, ask questions, or share their own experiences related to your artwork. Engaging with your audience can help build a loyal following. Don’t forget to showcase your work in different formats, like time-lapse videos of your drawing process or behind-the-scenes shots. This transparency not only humanizes your art but builds trust with your audience.
By presenting your Chuck Taylor artwork thoughtfully and strategically, you’ll not only gain visibility but also create a community of art enthusiasts who resonate with your vision. Happy showcasing!
Sharing Your Work: Social Media Tips
Your artwork deserves to be seen, especially those vibrant Chuck Taylor sketches you’ve poured your heart into. To share your creations effectively on social media, start by identifying the right platforms. Instagram is a powerhouse for visual artists due to its emphasis on eye-catching imagery, but don’t overlook Pinterest for its discovery capabilities or even TikTok for fun, engaging videos. Tailor each piece of content to fit the vibe of the platform. For example, quick, punchy posts work well on Instagram stories, while in-depth tutorials might resonate better on YouTube or blogs.
Once you’ve chosen your platform, focus on creating high-quality images of your drawings. Good lighting is crucial-natural light is your best bet, but if you’re working indoors, use soft boxes or ring lights to eliminate harsh shadows. A clean, uncluttered background will ensure your Chuck Taylors stand out. Consider experimenting with different angles; sometimes a close-up of the details can tell a richer story than a full shot.
Engagement is key in the social media game. Use captions to tell your story-share the inspiration behind each drawing or anecdotes related to Chuck Taylors. People connect to narratives, and a relatable story can turn casual viewers into loyal followers. Don’t hesitate to pose questions in your posts or encourage comments. When someone takes the time to interact, respond to them! Creating a conversation around your art can foster a community that supports you.
Finally, mix up your content. Share progress shots, behind-the-scenes clips, or even time-lapse videos of your drawing process. This transparency invites your audience into your world and shows the effort behind your work. Engage with trends when appropriate; use popular hashtags to increase discoverability, but make sure they’re relevant to your art. It’s all about creating authentic connections that extend beyond just likes and shares. With these strategies in place, you’ll build an audience that not only appreciates your art but looks forward to seeing more of your unique Chuck Taylor creations.
Frequently asked questions
Q: What are the best techniques for sketching Chuck Taylors?
A: The best techniques for sketching Chuck Taylors include starting with basic shapes to establish proportions, using light pencil strokes for initial outlines, and gradually refining details. Don’t forget to incorporate perspective lines, especially for the laces and sole, to enhance realism. Check out the *Step-by-Step Guide to Sketching Chuck Taylors* in the article for detailed instructions.
Q: How can I add realistic shading to my Chuck Taylor drawings?
A: To add realistic shading to your Chuck Taylor drawings, observe the light source and use a range of pencil pressures. Apply darker shades where shadows naturally fall, like under the sole and around the laces. Blending with a tissue or blending stump can create smoother gradients. For more shading techniques, refer to the *Shading Techniques for Realistic Sneakers* section in the article.
Q: What common mistakes should I avoid when drawing Chuck Taylors?
A: Common mistakes when drawing Chuck Taylors include misproportioned shapes and neglecting details like eyelets and laces. Artists often rush the shading or overlook shadows. Take your time and refer to the *Common Mistakes and How to Avoid Them* section for tips on ensuring accurate depictions.
Q: What tools are essential for drawing Chuck Taylors effectively?
A: Essential tools for drawing Chuck Taylors include high-quality sketching paper, a range of pencils (from H to B grades), erasers, and blending tools like tortillons or blending stumps. Consider using fine liners for enhancing details. For a complete list, check the *Essential Tools Every Artist Needs* section of the article.
Q: Are there specific coloring techniques for Chuck Taylors?
A: Yes, specific coloring techniques for Chuck Taylors include layering colors to build depth and using colored pencils to enhance textures. Watercolor or markers can also add vibrant effects. Always consider the material of the shoes when choosing colors to create a more authentic look. Refer to the *Coloring Your Chuck Taylors for Impact* section for more insights.
Q: How do I showcase my Chuck Taylor artwork effectively?
A: To showcase your Chuck Taylor artwork effectively, use good lighting when photographing your pieces. Presentation mats or frames can enhance appeal. Consider sharing your work on social media platforms with relevant hashtags to reach a wider audience. For best practices, see the *Showcasing Your Artwork: Best Practices* section for tips.
Q: Where can I find inspiration for different Chuck Taylor styles?
A: Inspiration for different Chuck Taylor styles can be found by exploring fashion blogs, Pinterest boards, or Instagram. Visiting sneaker conventions or galleries can also spark ideas. For various styles, check out the *Inspiration: Different Styles of Chuck Taylors* section in the article.
Q: What advanced techniques can improve my drawings of Chuck Taylors?
A: Advanced techniques to improve Chuck Taylor drawings include experimenting with dynamic angles and perspectives, utilizing negative space effectively, and practicing with mixed media for unique textures. Personalizing your style will further enhance your artistry. Consult the *Advanced Techniques for Dynamic Drawings* section in the article for guidance.
In Summary
Now that you’ve learned how to draw Chuck Taylors, it’s time to put those skills to the test! Remember, practice makes perfect, so grab your sketchbook and start experimenting with different angles and designs. If you’re eager to refine your technique further, check out our guides on “How to Shade Realistically” and “Creating Textures in Drawing.” These resources will elevate your art and give you new ideas to explore!
Don’t forget to share your creations with us in the comments below-I’d love to see how you’re interpreting this classic sneaker! And if you found this tutorial helpful, consider signing up for our newsletter for more tips, tricks, and exclusive content delivered straight to your inbox. Let’s keep the creativity flowing!


