Have you ever struggled to get the perfect nib on your calligraphy pen? You’re not alone! Attaching a nib might seem like a simple task, but doing it correctly is crucial for achieving those beautiful, flowing letters you envision. The right attachment can dramatically improve your writing experience, allowing for smoother strokes and better ink flow. In this guide, we’ll walk you through the essential steps to ensure you attach your nib properly, so you can focus on expressing your creativity through elegant script. Whether you’re a seasoned calligrapher or just starting out, understanding this fundamental skill is key to perfecting your craft. Let’s dive in and make your calligraphy journey more enjoyable!
Choosing the Right Nib for Your Calligraphy Pen
Selecting the right nib for your calligraphy pen can transform your writing experience and the final output. The variety of nibs available can feel overwhelming, yet the right choice is crucial for achieving your desired style, whether it’s elegant cursive or bold Gothic lettering. Different nibs provide different line qualities; for example, a flexible nib allows for line variation that adds flair to your script, while a stiff nib offers consistent strokes that are straightforward to control.
When considering which nib to use, think about the effect you want to create. If you’re just starting, a medium, flexible nib is often a good choice as it balances ease of use with expressive potential. Experimenting with different shapes and sizes will help you find what feels comfortable. Some common types include pointed nibs for copperplate scripts and broad-edged nibs for Gothic or italic styles. Additionally, the material of the nib can affect your results; stainless steel is durable and versatile, while gold nibs are softer and often preferred for their smoothness.
It’s also essential to think about your ink and paper compatibility. Some nibs work better with certain inks or are better suited for specific types of paper. Testing a few combinations can make a big difference in your calligraphy quality. For instance, using an ink that’s too thick with a fine nib can result in clogging, while a wet ink with a broad nib may bleed through thin paper. Always keep your project’s requirements in mind when selecting a nib. This initial investment in the right tools will pay off in the quality and joy of your writing.
Essential Tools for Nib Attachment Success
When it comes to successfully attaching a nib to your calligraphy pen, the right tools make all the difference. Having the appropriate equipment on hand not only simplifies the process but also ensures that your nib attaches securely, enabling you to create beautiful lettering without interruptions. One essential tool is a reliable nib holder designed explicitly for the kind of nib you’re using. Different nib styles require different holders, so check compatibility before starting.
You’ll also want to have a small, flat-surfaced area to work on-preferably a clean desk or table. This provides stability while you apply pressure to attach the nib, reducing the risk of bending it. A pair of tweezers can come in handy, especially if the nib is small or delicate. They provide better grip and control, allowing you to position the nib accurately without risking damage from finger pressure.
Don’t overlook having a light source that helps you see what you’re doing clearly, especially if you’re working with finer nibs. A bright desk lamp can illuminate your workspace, preventing the frustration of misalignment. Finally, having a cleaning cloth nearby is crucial for wiping off any residue or ink that may accumulate during the process. A clean nib ensures optimal performance right from the start.
In essence, equipping yourself with these essential tools prepares you for success. When you have the right setup, attaching your nib becomes a seamless part of your creative process, allowing you to focus more on your art than on technical details.
Step-by-Step Guide: Attaching Your Nib Correctly
Attaching your nib correctly is crucial for a smooth writing experience in calligraphy. It’s not just about fitting the nib onto the holder; it’s about ensuring that it’s secure and aligned for optimal performance. With the right approach, you’ll find it becomes second nature. Follow these steps to make it a breeze.
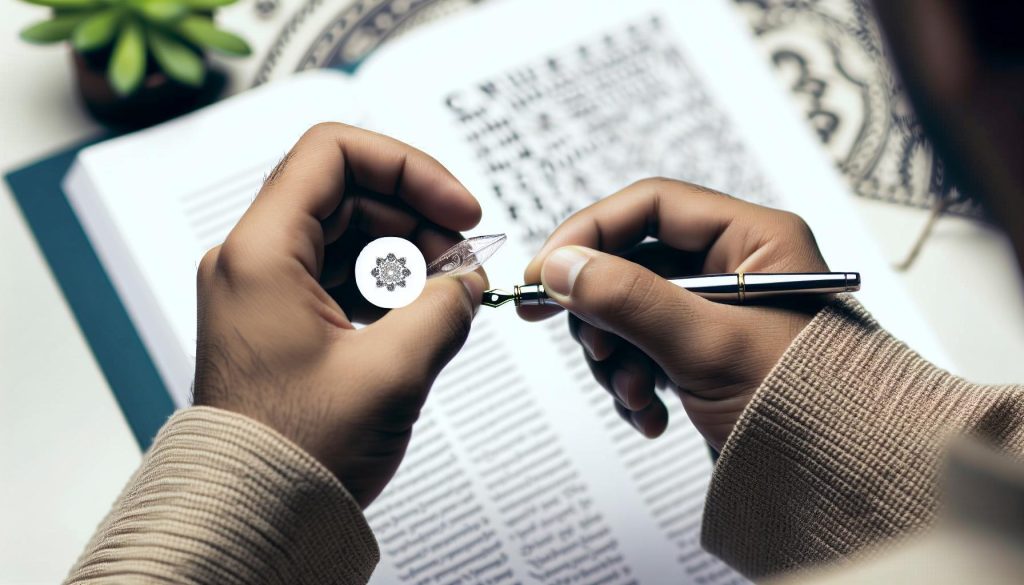
Start by selecting your nib and holder. Always use a nib holder that matches the size and style of your nib. Once you have the correct fit, hold the nib by the edges to prevent any potential bending. Align the nib with the holder’s socket, ensuring that it is seated properly. You should see the nib’s tines (the two prongs) fit snugly into the holder’s groove. This initial alignment is vital – a misaligned nib can lead to poor ink flow and uneven lines.
Next, apply gentle pressure to secure the nib into the holder. If you feel any resistance, don’t force it; instead, recheck the alignment and try again. It’s essential to be patient here. Once it feels secure, give the nib a gentle wiggle test to ensure it’s locked in place. To finalize the attachment, you might want to add a tiny drop of adhesive at the point where the nib connects to the holder. This tip is especially useful for those frequently changing nibs or looking to maintain their nib’s position over extended use.
Lastly, before you dive into writing, take a moment to inspect your setup. Make sure that the nib isn’t touching the holder in a way that might obstruct ink flow. If everything looks good, grab your ink, and you’re ready to create beautiful lettering! Remember, practice makes perfect, and soon you’ll be able to attach and detach your nib effortlessly.
Common Mistakes When Attaching Calligraphy Nibs
When it comes to attaching calligraphy nibs, even seasoned artists can make avoidable mistakes that compromise their writing experience. Understanding these common pitfalls can save you time and frustration, ensuring that your nib is securely attached and ready for beautiful lettering.
One of the top mistakes is improperly aligning the nib with the holder. It’s crucial to ensure that the nib’s tines fit snugly into the holder’s groove. A misalignment can lead to jagged lines and inconsistent ink flow. Always take a moment to check that everything is seated properly before applying pressure. Don’t rush this step.
Another frequent error is applying too much force when securing the nib. If you feel resistance while inserting the nib, don’t force it-this can bend the nib or damage the holder. Instead, gently wiggle the nib and recheck its position. Preserve the integrity of your nib by being patient; it’ll pay off when you write.
Additionally, neglecting to clean your nib or holder before attachment is a common oversight. Residue from previous uses can interfere with ink flow and lead to poor results. Always ensure both the nib and holder are clean and dry before attaching.
Finally, many overlook the importance of testing the nib’s fit before starting a project. Once attached, take a moment to do a quick test stroke on scrap paper. This helps confirm that everything feels right and that the ink flows smoothly. If it doesn’t feel right, don’t hesitate to detach and adjust. By avoiding these common mistakes, you’ll enhance your calligraphy experience significantly and enjoy a seamless writing process.
How to Care for Your Calligraphy Nib
Caring for your calligraphy nib is crucial if you want it to perform well and last over time. Think of your nib as the heart of your pen; without proper care, you risk poor ink flow, uneven lines, and a disappointing calligraphy experience. One of the best things you can do for your nib is to keep it clean. This sounds simple, but it’s often overlooked. After each use, take a moment to remove any ink residue. A soft cloth or paper towel can do wonders-just wipe the nib gently, ensuring it’s free of any dried ink.
Proper Cleaning Techniques
When cleaning, avoid using harsh chemicals. Instead, go for warm, soapy water for a natural touch. Dip the nib for a few minutes, then rinse it thoroughly and let it dry completely. If you use different inks, especially those with pigments, a good soak helps to maintain your nib’s integrity.
Storage Matters
Equally important is how you store your nibs. Keep them in a secure, dry place away from moisture, which can rust metal parts. Consider using a dedicated case or a compartmentalized box to prevent nibs from knocking against one another. This can save you from accidental bends or breaks when reaching for your favorite nib.
Lastly, regularly check the fit of your nib in the holder. Over time, slight bends may occur, affecting your nib’s alignment and flow. Test it on scrap paper now and then. A well-maintained nib not only enhances your lettering but can also inspire more creativity in your calligraphy journey. Embrace the nuances of caring for your nib, and you’ll see how it transforms your practice.
Tips for Storing and Maintaining Your Calligraphy Pen
When it comes to preserving the life and performance of your calligraphy pen, storage and maintenance practices are paramount. Properly caring for your pen can significantly enhance your writing experience and ensure that your tools remain in top condition for years to come. Here are some essential tips to follow.
Firstly, store your pen in a safe place. A dedicated case or a desk organizer can prevent accidental drops or impacts that may misalign nibs. If you have multiple nibs, consider a compartmentalized box to avoid scratching. Always keep your pen upright, especially if it uses bottled ink; this helps prevent ink leakage and flow issues.
Secondly, regularly inspect your nibs. Over time, nibs can become bent or misaligned, leading to poor ink flow or uneven lines. Check them after each use, and consider rotating nibs to give each one a break, especially if you notice any wear. If you encounter resistance when writing, it might be time to clean or replace the nib.
Next, maintain cleanliness by ensuring no ink residue remains after use. Storing a dirty nib can lead to clogging and permanent damage. A gentle wipe with a damp cloth after each use will keep your nibs clean. For a deeper clean, soak them in warm, soapy water occasionally, avoiding harsh chemicals that could erode the nib’s quality.
Lastly, always check ink compatibility with your nibs. Different inks can affect performance; some may be too thick, causing clogging, while others might be too runny, leading to bleeding on paper. Experimenting with different inks alongside the right nib can help you find the perfect combination for your calligraphy style.
By following these simple yet effective tips, you’ll maintain not just the functionality of your calligraphy tools but also elevate your overall creative experience. Proper care allows you to focus on creating beautiful lettering without the hassle of equipment malfunction.
Exploring Different Nib Types and Their Uses
When diving into calligraphy, the nib you choose can transform your experience and the quality of your work. Each nib type brings its own personality to your writing, influencing everything from line thickness to flow. Understanding these differences can help you elevate your calligraphy skills, making it essential to explore the various nib options available.
Types of Nibs
- Broad Nibs: These are ideal for traditional calligraphy styles like Gothic or Italic. Their wide, flat shape allows for rich, bold strokes that can create striking contrasts, especially when used with heavier inks.
- Fine Nibs: Perfect for detailed scripts, fine nibs produce delicate lines and intricate designs. They’re great for Copperplate calligraphy or jotting down quick notes with an elegant touch.
- Flexible Nibs: If you want to add flair to your writing, flexible nibs are your best bet. They can produce varying line widths based on pressure applied, giving your work a dynamic quality that’s hard to replicate with stiffer nibs.
- Oblique Nibs: Primarily used in Copperplate styles, these nibs are attached at an angle to the pen holder. This unique positioning helps achieve the characteristic slant of the script, making them indispensable for certain calligraphic scripts.
Each nib type not only influences the aesthetics of your letters but also caters to different writing styles and preferences. For instance, using a flexible nib for a pressure-sensitive stroke can add drama, while a broad nib might be better if you want consistent thick lines throughout your work.
Choosing the Right Nib
So how do you decide which nib is right for your project? Start by considering your preferred calligraphic style. If you’re just beginning, experimenting with a range of nibs can provide insight into what feels comfortable in your hand and what suits your artistic vision best. Additionally, don’t hesitate to mix and match-using different nibs for different projects can keep your work fresh and exciting.
Finally, remember that the right nib will enhance your creativity rather than hinder it. Invest time in understanding their capabilities, and you’ll find that each one brings something unique to your lettering journey. Happy writing!
Upgrading Your Calligraphy Pen: When and Why
Upgrading your calligraphy pen can be a game-changer, especially when you discover just how much the right pen affects your writing experience. Every artist reaches a point where the tools they use can either enhance or hold back their creativity. If you’ve been using a basic calligraphy pen, it might be time to explore options that offer better precision, comfort, and functionality.
Start by evaluating your current nibs. If you’re experiencing inconsistent ink flow or struggle to achieve the desired stroke thickness, it’s a clear sign that your tools aren’t meeting your needs. High-quality nibs are designed to accommodate various writing styles, and investing in a new nib can significantly improve your work. As an enthusiast, I can attest that switching to a flexible nib for dynamic strokes or an oblique nib for italic scripts can transform the ease of writing.
When considering an upgrade, think about the type of projects you typically undertake. If you’re diving deeper into more intricate styles, a pen holder that allows easier nib changes can save you time and frustration during your creative process. There’s nothing worse than being mid-project and feeling held back by your equipment. Many calligraphy pens now come with ergonomic designs that reduce hand fatigue, which is crucial for longer sessions.
Lastly, don’t overlook the importance of compatibility with different inks. Some nibs perform better with specific ink types, affecting your overall experience and the final result. Experimenting with various combinations can lead to delightful discoveries in your calligraphy.
Investing in the right tools is a step towards refining your skills and unleashing your full potential. You’ll find that the right upgrades allow you to write more freely and artistically. Happy writing!
Understanding Ink Compatibility with Nibs
When you’re diving into the world of calligraphy, understanding ink compatibility with your nibs can make or break your experience. Imagine writing smoothly, watching the ink flow perfectly onto the page. It’s not just about the nib you choose; it’s also about the ink that flows through it. Some inks are thicker, while others are more fluid, and they all interact differently with various nibs. Choosing the right combination is key.
Different nibs are built for different inks. For instance, if you’re using a fine point nib, a thicker ink can cause clogging, leading to frustration mid-stroke. In contrast, broad nibs can handle thicker inks much better, resulting in bold, expressive lines. To find the right balance, consider these quick tips:
- Test Before You Commit: Always test your ink with your nib before starting an important piece. This will help you gauge how well they work together.
- Match Viscosity: A good rule of thumb is to use inks with similar viscosity to what your nib is designed for. Inks designed for fountain pens might not work well with broad nibs, for example.
- Consider Dry Time: Some inks dry quickly, while others take longer. A slower drying ink can lead to smudging, especially if you’re using a very flexible nib that requires more pressure.
Don’t hesitate to experiment. It’s one of the best parts of calligraphy. I remember the first time I tried a metallic ink; it transformed my work with a sheen I hadn’t seen before! Just keep in mind the characteristics of each nib type and the ink you have at hand. Over time, you’ll develop a sense for which combinations deliver the results that thrill you. Your nib and ink relationship can truly elevate your calligraphy to the next level, opening new avenues for creativity.
Visual Guide: Nib Attachment Techniques
Attaching a nib to your calligraphy pen should be a straightforward task, but it’s an area where many fall short. It’s essential to get this right, as the nib is your primary tool for expression. A secure and properly aligned nib can make all the difference between smooth, flowing strokes and a frustrating, uneven experience. Here’s a visual guide to help you master this crucial technique.
Getting Started: Tools You’ll Need
Before you begin, gather a few basic tools. While some nibs directly fit onto certain holders, others may require a precise technique for attachment. Here’s what you’ll need:
- Nib Holder: Choose one that matches your nib type, such as pointed or broad.
- Nibs: Select your nib, ensuring it’s clean and free from any residue.
- Clamp or Adhesive: Use if necessary for extra security, depending on the nib holder style.
Attachment Techniques
- Align the Nib: Start by aligning the nib with the holder. The split should match the curvature of the holder’s tip. Ensure that the two sides of the nib sit securely within the holder, which should grasp the metal without excessive pressure.
- Secure the Nib: If your holder requires a screw mechanism, be cautious. Tighten it gently; over-tightening can warp the nib and disrupt its performance. If using adhesive, just a tiny drop is often sufficient.
- Check for Stability: Before you commit to writing, test the nib by gently moving it in and out of the holder. It should feel secure and not wobble. A well-attached nib should maintain its position no matter how much pressure you apply when writing.
- Final Adjustments: Once everything feels secure, do a quick alignment check. Place your nib at an angle typical for the style of writing you’ll be doing. If you notice any misalignment, loosen it slightly, adjust, and re-secure.
Common Attachment Mistakes
Avoid the common errors that can lead to frustration down the line:
- Neglecting Cleanliness: Always start with clean nibs. Residues can affect ink flow.
- Forgetting to Test: Don’t skip the pre-writing test. It helps in catching any improper attachment early.
- Using Excessive Force: Whether tightening screws or pushing the nib into the holder, too much force can damage your tools.
With these techniques and tips, attaching your calligraphy nib can become second nature, enhancing your overall writing experience and allowing your creativity to flourish without technical hiccups. Happy writing!
Troubleshooting Nib Issues During Use
It’s frustrating when your pen feels off mid-stroke, and often, the culprit is a nib issue. Whether you’re dealing with inconsistent ink flow, scratchiness, or a nib that feels more wobbly than secure, understanding and troubleshooting these problems can save your writing session-and your sanity.
First, if you notice your ink flow is uneven or completely stopped, it’s often a sign of an improperly attached nib. Ensure the nib is seated correctly. Sometimes, it might just need to be tightened again, especially if your holder uses a screw mechanism. Be gentle when retightening; excessive force can warp the nib or even damage the holder. A nib that’s not aligned properly can also lead to poor ink flow. Take a moment to check that the split of the nib lines up with the holder’s tip, as misalignment can obstruct ink from reaching the paper.
Another common issue with nibs is scratchiness. If your nib feels like it’s catching on the paper, it might be either too dry or a sign of a burr on the edge. To address this, try dipping the nib in ink and writing with it a few strokes; this can often help get the ink flowing smoothly again. If it persists, a light polish with some fine sandpaper or a nail file on the underside of the nib can smooth out any imperfections.
Lastly, if your nib feels unstable or wobbly, check how it’s seated in the holder. Insufficient tension can cause the nib to move too much during writing, interrupting your flow. Reassess the attachment method-if you’re using an adhesive, ensure it’s secure but not overly restrictive. With these tips in hand, you can tackle common nib issues and enjoy a seamless calligraphy experience, letting your creativity shine without interruptions.
Faq
Q: How do I know which nib fits my calligraphy pen?
A: To determine which nib fits your calligraphy pen, check the pen model and its compatibility specifications. Typically, nib sizes are standardized, so refer to your pen’s manual or manufacturer’s website. It’s essential to choose a nib type that complements your writing style for the best results.
Q: What are the common sizes of calligraphy nibs?
A: Common sizes for calligraphy nibs range from extra fine to broad, including sizes like 0.5mm, 1.0mm, and 2.0mm. The size you choose affects the thickness of your lines; larger nibs produce broader strokes, ideal for decorative work, while smaller nibs are perfect for intricate details.
Q: Can I use different nibs on the same calligraphy pen?
A: Yes, you can use different nibs on the same calligraphy pen, as long as they are compatible. Check if the nib’s holder is designed for interchangeable nibs. Experimenting with various nib types can change your writing experience and help you discover your preferred style.
Q: What tools do I need to attach a nib to a calligraphy pen?
A: Essential tools for attaching a nib include a nib holder, a smooth surface for work, and tweezers for precision. Ensure you have ink handy to test the attachment afterward. Following your *Step-by-Step Guide* will help streamline the process for better results.
Q: Why is it important to clean my nib before use?
A: Cleaning your nib before use removes manufacturing residue and ensures smooth ink flow. It prevents skipping and improves line quality. Rinse the nib under water and dry it thoroughly before attaching it to your pen for optimal performance.
Q: How often should I replace my calligraphy nibs?
A: Replace your calligraphy nibs when they become worn, damaged, or lose their sharpness. Regular use can dull nibs, affecting performance. Monitor your nibs regularly; being proactive in replacement will enhance your writing experience.
Q: Where can I buy high-quality calligraphy nibs?
A: High-quality calligraphy nibs can be purchased from art supply stores, specialty stationery shops, and online retailers like Amazon or dedicated calligraphy websites. Look for reputable brands that match your writing style for the best performance.
Q: What should I do if my nib keeps coming loose?
A: If your nib keeps coming loose, ensure it’s properly secured in the holder before use. Check for damage on the nib or holder, which might affect fit. You may also apply a small amount of clear adhesive, but avoid using too much, as this can impair ink flow.
In Conclusion
Now that you know how to attach a nib to your calligraphy pen correctly, you’re well on your way to creating beautiful lettering. Remember, practice makes perfect, so don’t hesitate to experiment with different nib widths and inks. If you’re eager to dive deeper into the world of calligraphy, check out our articles on the best calligraphy pens for beginners and essential supplies to elevate your craft.
Ready to take your skills further? Visit our shop for top-notch calligraphy tools that will inspire your creativity. Don’t forget to leave a comment below sharing your experiences or any questions you might have – we love hearing from fellow enthusiasts! Engage with us on social media to connect with a community of artists who share your passion. Your journey in calligraphy starts now – let’s make it memorable together!